Using leading lines to draw your viewer’s eye to your subject is a great way to take your photo from just a snap shot to something that makes them stop and admire your work.
Table to Contents
What are leading lines?
Leading lines is a composition guide used in photography to draw the viewers attention into your subject. The line does not need to be straight as curved lines can have the same effect. Typically the line starts towards the bottom or corner of the frame and leads the viewer’s eye through the image to your subject.
This is a more advanced form of composition but once you start looking for leading lines you will see that you are surrounded by them if you take the time to slow down and look.
Why are they Important?
Composition is an important part of any photo. Whether you are using rule of thirds, framing, or any of the other popular ways to compose an image, you are trying to set the subject in the photo in an interesting way. They allow your view to be taken through the photo and end up on your subject.
Read More: 3 Ways Negative Space Will Enhance Your Photography
Mistake to Avoid
One of the common mistakes made when using this composition method is having a line that doesn’t lead a viewer to a subject. You want to make sure that there is something for your viewer to see at the end of the line. It may feel tempting to use a walkway as a leading line. However, if there is not someone or something at the end of the path that you want you viewer to see these lines are not actually leading lines. They are just lines in an image.
Different Types of leading lines
Lines don’t have to be straight; they can be curvy or wavy. In fact, you can choose the type of lines to give the image a certain feel.
Be aware of the direction the line leads the eye in. If your subject is in the foreground of your image and the line leads away from them, the eye of the viewer will continue to follow it out of the frame. Viewers usually take in an image from the left, so leading lines often begin on that side. A line that starts on the right of the frame can leave your subject feeling unsettled.
Diagonal lines
This type of line give the feeling of movement and energy

Horizontal lines
This type of line give the feeling of calm or security
Vertical lines
This type of line give the feeling of strength and growth, and move the eye upward

Curved lines
This type of line give the feeling of balance

Where to Find Leading Lines
When composing a shot, step back and examine the area around your subject. Challenge yourself to think about the elements in your frame and ask yourself how you could use them to compose an interesting shot.
This may mean you need to move around and adjust your angle to use this type of composition guide.
Examples of leading lines:
-walls
-walk ways
-stairs
-furniture (when subject is placed on opposite side)
-fences
-benches
-railings
The following are description and examples from Megann Robinson.
Playgrounds
I love how all the lines are leading to him and how he is framed in the opening of the slide. As an added bonus, the light was amazing that evening and the light rays are also acting as leading lines.

While you’re at the playground, teach your children how to find and use leading lines too: Photography For Kids
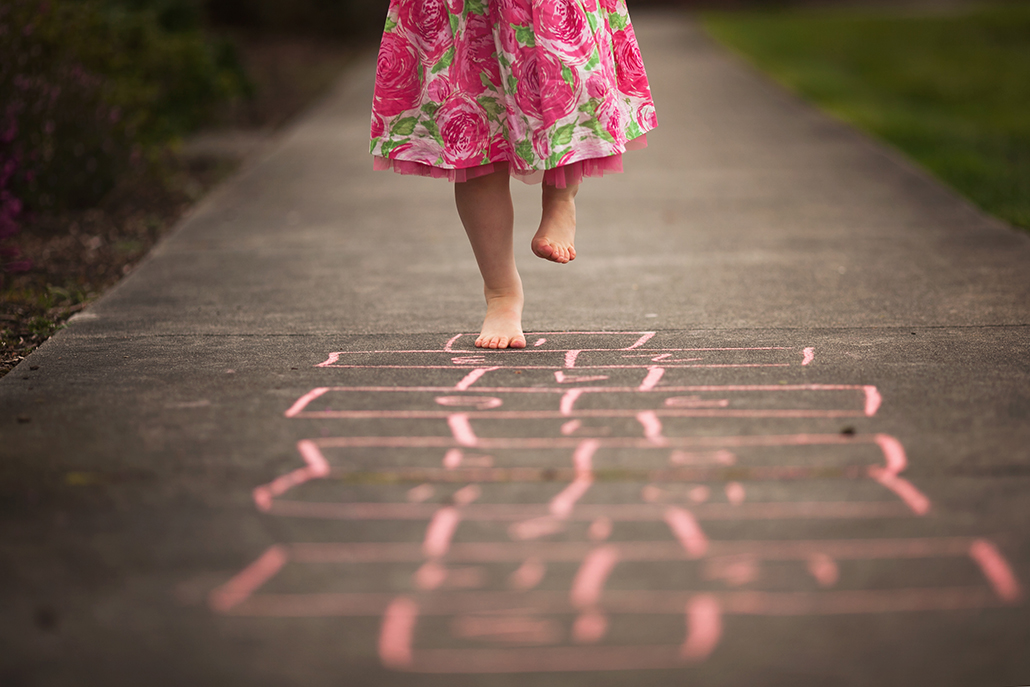
Sidewalks
The hopscotch drawing really directs your eyes to the cute little feet as the main subject of this photo.
I laid down on the ground to get this shot to emphasize her feet and the activity she was involved in.
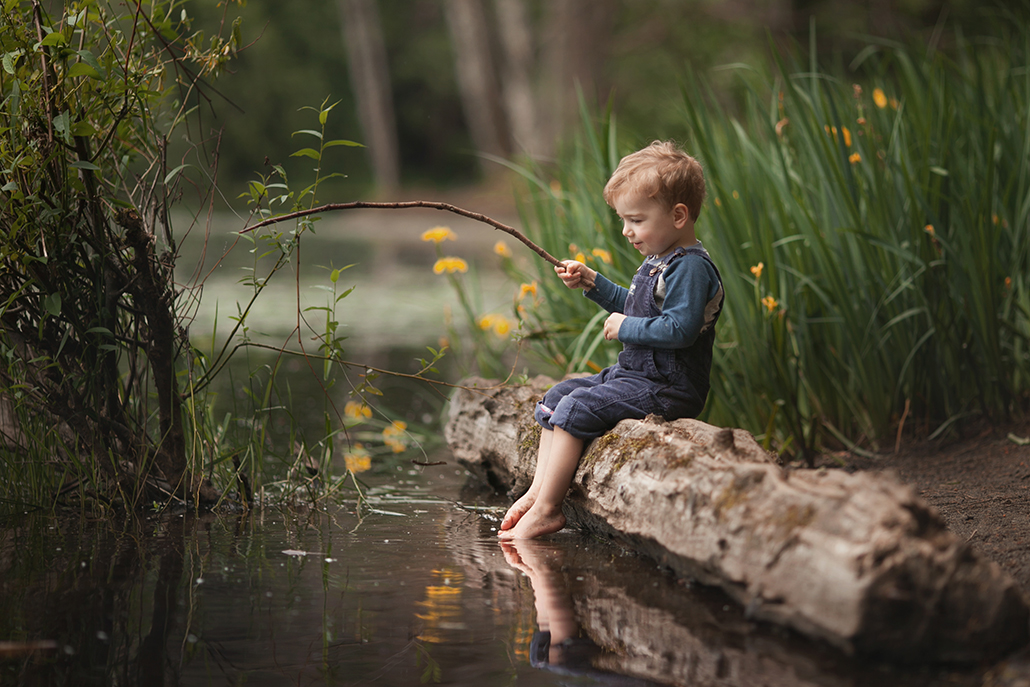
Trees and Logs
The log that my son is sitting on is acting as the leading line right to him. For this photo I picked him up and placed him where I wanted him to be and he was happy to sit there for a couple of minutes pretend fishing while I took some photos.
Read more: Essential Landscape Photography Tips for Breathtaking Photos
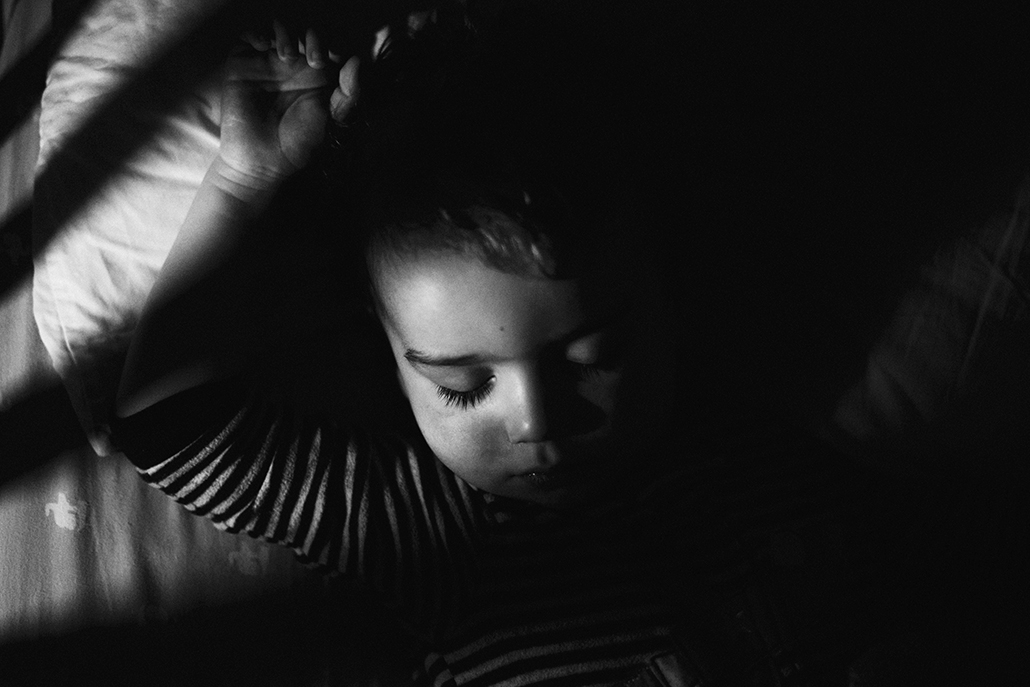
Light and Shadows
In this photo I used light and shadows to create these lines. My husband held a light outside of the crib bars and adjusted it until the light was just perfectly hitting his face.
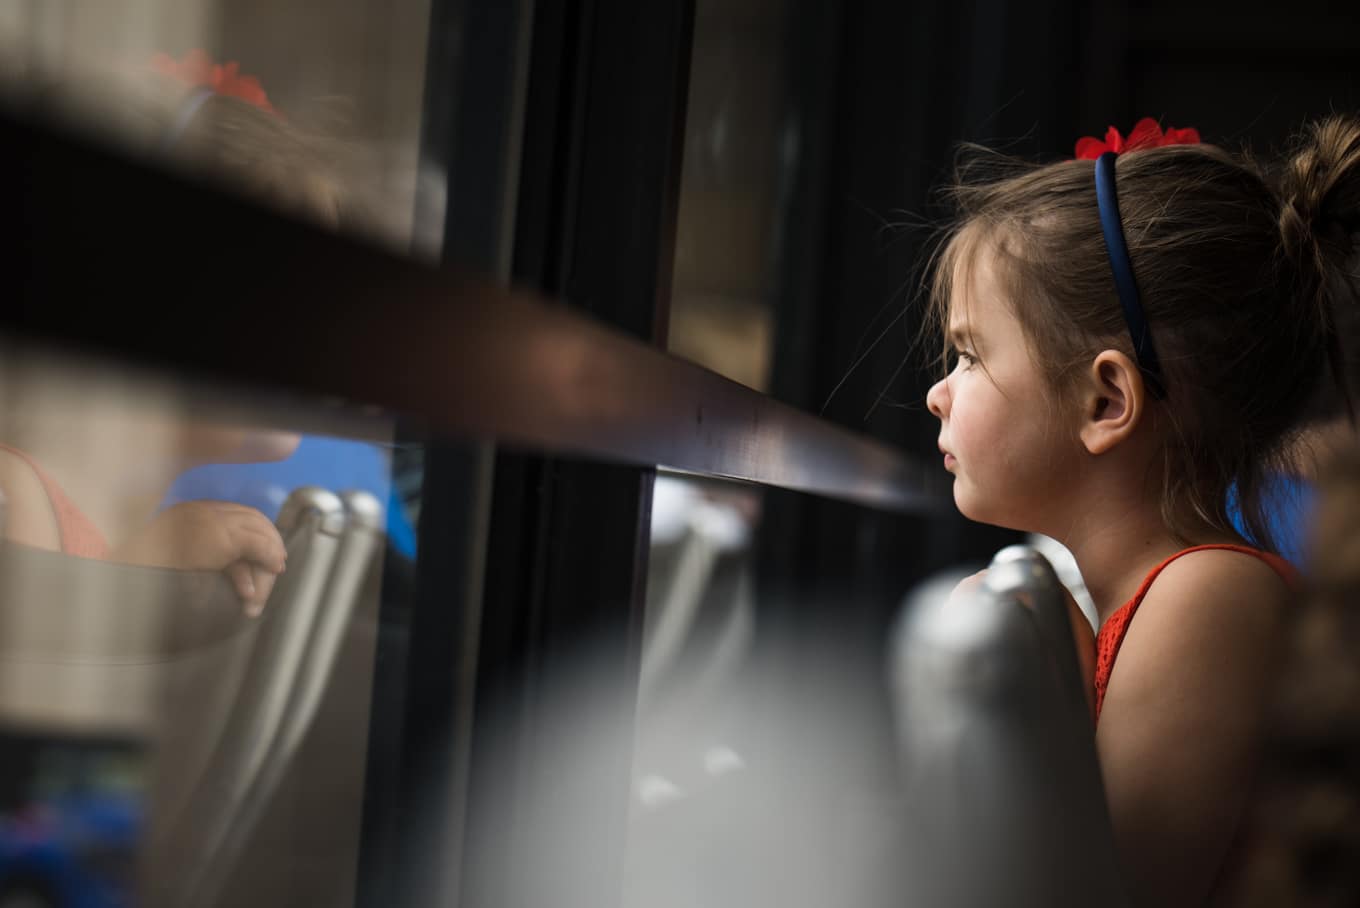
Blinds
Blinds provide fabulous leading lines. I have taken many of these photos because I love beautiful window light and I can usually ask my kids to tell me what they see while I take their photo.

Fences
Fences provide great lines as well. In this shot I got really close to the fence and crouched down low so I was on their level and I got some of the fence in the foreground.

Leading Lines Photography Examples


Read more about composition:
11 Photography Composition Rules to Know to Improve your Photography
8 Ways to Weave Intentional Design Into Documentary Photography


Thank you. This is so helpful! :) Love these pics too.
I love doing this, too!:) thanks for sharing!
I’m a little obsessed with leading lines, so thanks for telling me what to call them :-)
My pleasure :O)
I LOVE LOVE LOVE lines…would love to take a class on photographing them. I feel like it’s a recent discovery and have tons to learn. Great shots! Thanks for sharing. :)
I find the one of the single subject on the stairs the most interesting as the lines don’t come into the frame in the same way as all of the others. I am not sure why I am drawn to that one the most, but there is something about the difference in the lines that is appealing to my eye. Thank you for sharing and drawing attention to how to draw attention :o).
Oops, the face was supposed to be this :).
Great idea!! I think I do this subtly, but I’m going to be more intentional about it!
Courtney, you rock at leading lines! Such an inspiration!! I really need to work on this. Thanks for the inspiration as always! :)
Love it! I try to do this fairly regularly, but realize I need to work on it consistently for several weeks so that my eye will be better trained to look for it.
Ahhhhh, so much to learn and practice. LOVE IT!!!
I love leading lines too especially from a low POV. You’ve provided some great examples and the arrows help the viewer know just what they’re looking for.
Those are seriously fantastic examples!!
One of my favorite types of composition :)
Nicely demonstrated.
Great examples! Love the first one, reminds me of constantly checking the mail at Ramstein. :)
Great examples Courtney! I love to find the leading lines as well! They really do make a photo stand out! :-D
This is so cool! I never thought about using lines like that before. I love love love that picture of Kate on the couch–beautiful!
Great inspiration :). Can’t wait to use it…..
These are all amazing examples of leading lines!! I use them a lot too…one of my favorite ways to compose.
Gail
This is great! A good reminder on those leading lines, I love lines but seeing some of the multiples makes me rethink a few shots I have… thanks as always!!
What are the setting usually for this kind of photo?
Which photo were you wondering about??
Great examples! I love the picture of the girls getting the mail.
Thanks! That is one of my favorite pictures of them as well :)
Having a tough time experimenting with leading line… I have a 1.8 lens on a D90. Not sure how to do it, I feel like I am too close…then when I move back, my subject is too far away…HeLp!
I’m sorry you are having that issue. The one of my daughter on the see-saw was taken with a D90 and 50mm 1.8. Just keep playing around :)
I feel like “just keep playing around” is not instructive. I have been looking for a ‘how to’ tutorial on leading lines. This post is a good introduction to what they can look like, and you have shown off some great photos. I really need some more instruction on this, but this is a good introduction/overview and now I know what to call them so I can research it further.
Glad you know the words to google now :)
Very helpful post. Thank you! Love your blog
Thank you!
I need to work on this! Love your examples!! Especially the bridge and see saw.
http://www.daniellegeriphotography.com
I’m somewhat new to photography and still learning all the rules. Your posts have been so very helpful including this one. I do have a question tho. I was told by someone I recently met and claimed to be a professor of art and photography at a college to always put my subject to the right as the eye leads left to right. In your examples I found myself following your lines in all cases and only a few were left to right. My eye automatically followed so my question is…is it always the rule and if not, when is it ok to break the rule. Thanks again for all your help to those of us who are still up and coming. I have learned so much from IOU!
Hey Brenda,
That is correct. The eye typically travels through the image from top to bottom and left to right. If you noticed all the horizontal images follow the guide of putting the subject on the right hand side. A couple of the vertical ones where the lines start from the bottom and move up is because I wanted to give the sense of height in my photo. I highly suggest taking Sarah Wilkerson’s Elements of Design workshop at Clickin’ Moms. She spends an entire week on the psychology of where to put your subjects in the photo to try to get your viewer to feel something :) – http://www.clickinmoms.com/cmu/archives/listing/shooting-301-elements-of-design
Since I wasn’t able to reply to your email I wanted to thank you and this was the on,y way I knew how.
Thank you so much. I so enjoy your posts and have learned so much from you. I’ve also learned a lot from watching the photos that others post and the critiques given on each. You are such a blessing to those of us who are new to photography. It’s nice to have someone who knows their stuff offer it to others instead of turning up uour nose. Thank you seems so small in words for all you do. I will absolutely checkout Sarah’s workshop. Seems like I’ve been a sponge lately and trying to soak up as much as I can.
The professor I spoke of is a new acquaintance here in my small town that was a professor at a college in Chicago. Her method has not been what you recommend of sandwiching critiques with good and bad. In fact, at one point I started to put my camera away and never pick it up again her words were so harsh. That’s one reason I appreciate you so much. You know how we new folks feel and you make sure we don’t get stepped one.
Thank you again for all you are and all you do. You may never know how many lives you’ve touched. I’m sure one day when we all get to heaven, you will be surprised with just how much you’ve done!
May God continue to bless you greatly,
Brenda
Brenda,
Thank you so much for your sweet words. They meant more to me than you will know. I appreciate you taking the time out of your day to write me. I’m sorry to hear that the professor made you feel like you shouldn’t pick up your camera. It breaks my heart when I hear that teachers have discouraged someone instead of encouraged them. Keep doing what you are doing, keep clicking and ignore the negative along the way :) Thanks for making me cry happy tears, Courtney
I agree absolutily with Brenda. Thank you Courtney.
It seems like such a simple concept, but it was so confusing to me before…your words & examples are amazing. Thank you! I can’t wait to look at my surroundings and give this a shot!
Thanks :)
Wow, these are great examples of leading lines and everyday photos! One thing I need to work on is not insisting that I have the perfect set up for each photo I take. Because of that, I’ve been taking less photos. I’m going to use your photos as inspiration to take more everyday, and INTERESTING, photos. Thanks Courtney!
Thanks so much :) Definitely pick up your camera.
I can’t wait to try specific lines now. Thank you
Hey! These are really beautiful leading lines
I did not know anything like a leading lines in Photography.
I think leading lines from a good place are on you. Thank you for your generosity.
I thought I knew all about leading lines, the long straight ones, across and diagonal but the shorter ones in combination with the long ones never occurred to me as a leading line. Thank you for pointing it out to me.
Hi: thank you for this article. I was wondering if you know about other online references to learn more in-depth composition? I have been searching for online workshops/video tutorials but haven´t found anything interesting. Thank you very much in advance!
There are workshops on composition at Clickin Moms
I love these photos and I have tried numerous times to get the same concept in my own “just learning how to use this camera” way. I have been successful, meaning that I am happy with the actual outcome, only twice. For some reason, I can’t seem to figure out where the line should start and where it should end for the composition to look right…Can you talk a little about that?
How did you decide where in the frame the lines being/end?
Thank you for your blog – this is going to be the start of something momentous for me!
It’s completely up to you where you want the line to start. I like my lines to start on the lower left of the frame and work their way through the frame to the subject on the right side. But work with what you have and how the lines work to draw your eye to the subject.
Thanks! previously I never realise about the effect of lines!
My dad is a famous photographer. Make sure you look up Adam Kent images.
Thank You for the Tips i am looking forward to getting out and trying them All.
Thank you for the tips and examples!! Very helpful!! :-)
You are just amazing to share so much so generously. I have learned a ton from you and thank you, thank you! From the bottom of my heart. Thanks for every idea and every photo and every personal example. Imagine how many young and old photographers you have helped!
I appreciate you!
Beckie Hall
Hi Courtney
Thank you so much for sharing this information as someone who has just recently purchased a new pro camera for having nice photos of the kids it’s really been very informative and so easy to read.
It’s so refreshing to read a tutorial that is not pretentious and is really out there to help guide people who are very new to this. Even my husband who is a designer gained some insights.