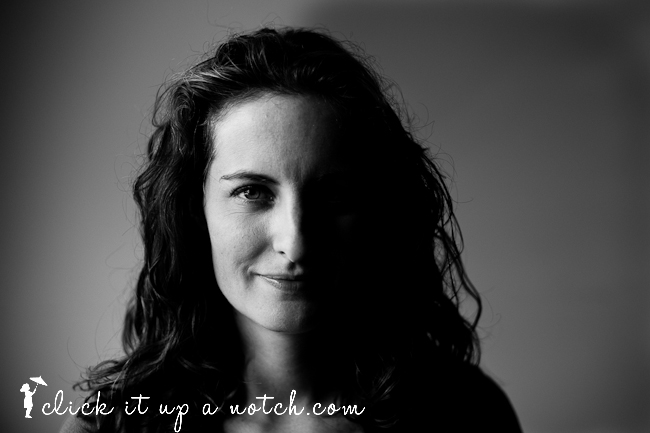
Split lighting is one of my new favorite types of way to manipulate light. I first learned about split lighting in Megan Cieloha’s workshop – Lighting 201: Mastering Natural Light Indoors. Her class taught me how to take advantage of the light I have in my house as well as taking really cool split light images. If you are wanting to learn more about natural light you MUST take this workshop!
Lighting truly can make or break an image. It can give your image a soft dreamy or dramatic feel. Learning as much as you can about lighting will quickly improve your photography.
How to create an image with split lighting:
1. Get your subject close to a light source.
I have found that split lighting is easier to achieve indoors since you can control to a point where the light is coming from. Sit your subject as close or far from a window as the type of lighting you are looking for.
2. Place subject and yourself at a 90 degree angle.
You want the light to only be hitting your subject at a 90 degree angle. This helps to create that look of only one side of your subject having light and the other in complete darkness.
3. Look for a line down the enter of their face.
Since your subject should be at a 90 degree angle you should see a line of light running down the middle of their face. If you don’t see that line your subject may have moved and is no longer at a 90 degree angle. This can be a challenge with small children.
4. Convert to black and white.
Okay, this is a personal choice as I think it makes your image a little more dramatic and really draws the viewer in to see the light and dark sides of the image. You can also use your burn tool in Lightroom or Photoshop to help darken the side that is not facing the light.
5. Play around.
Seriously, get your camera, grab a willing subject and just play with the light. Don’t forget to move them closer and further away from the light to find which type of light works better on that subject and time of day.
Have you tried split lighting? What is your favorite type of lighting?


I have done a little split lighting, but not much. You have inspired me to play around with it a little more.
It’s very dramatic; I’m loving it!
I have done a few photos of my sons like this but didn’t realize it was a technique or had a specific name. Fun!
I took a photo like this of m daughter this weekend in a hotel.
It’s still in camera. I can’t wait to pla with it.
Thanks for the steps.
That is awesome!! Would love to se it!!
I did a bit today, without really knowing what I was doing. Your advice of converting to black and white is perfect!!
Split lighting is so dramatic and works wonderfully on children. Especially when they are playing and seemingly unware.
I love low lying sunshine and sun flares behind children playing (in the garden) for exmple. Just a sense of wildness and freedom. Thank you for the link ups to the tutorials.
Jennie. x
I had never heard of split lighting but i am going to try it. Thank you for the info!
♥charlotte
I hope you do try it! It’s can be so much fun!!
Good tutorial. I find myself longing to see the eye in shadow.
Do you think it would be a good idea to take Intro to Light 101 before this 201 class? I just took Lynne’s Best Darn beginner class, and wanting to take another one soon, so thought I would ask you. I’m highly frustrated with my dimly lit house and getting some good pics of my family, so this looks like a good start. Just wanted to see which one you thought would be better to do first? Thanks! ;)
I took an outdoor lighting 101 class prior to moving up to the 201 class. They don’t offer the class I took anymore but they have another one that looks great. Yes, I think it’s a good idea to get familiar with lighting on a 101 level prior to moving to 201. However, when you are ready you DEFINITELY need to take full participation in Mastering Natural Light Indoors by Megan Cieloha. She is a sweet friend of mine that actually taught me manual mode in my living room years ago. Her workshop is AMAZING :)
I like Rembrant. :)
Yes, I like Rembrants light as well!
Thanks Courtney!
This is something I’ve been wanting to work on more. Thanks!!