So how do you remove the textured look of an added texture? That sounds funny, doesn’t it? What I mean is the grain and texture that is on textures (what give them that amazing look). Sometimes you do not want that grain on a part of your image, especially if it is in a portrait and on a person’s skin…gross.
One option is to use a layer mask like we discussed in the post about understanding the basics of layers. But masking away the texture takes it away along with the added tones.
So I am going to share my favorite way now that allows to keep everything but the grain and grit.
First you start by adding a texture to your image. Once you have selected the blend mode and adjusted the opacity how you want it, you are set to remove the parts you don’t want.
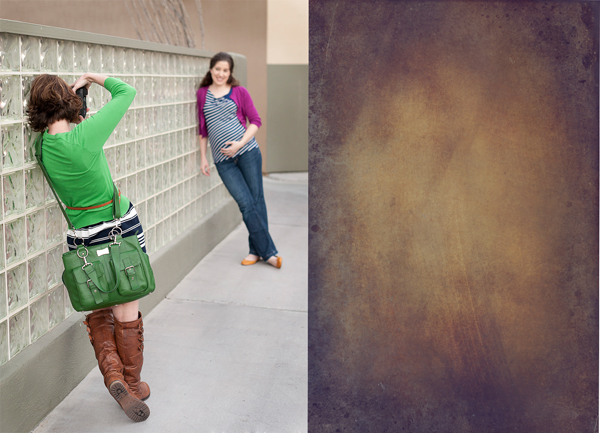
Here is the original photo and the texture I added to it. The texture is another one from Jessica Drossin named Toffee in warm. I just love her textures.
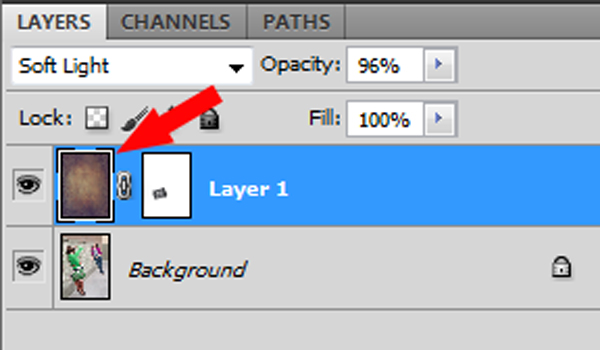
I added the texture in Soft Light blend mode and adjusted the opacity down to 96%. Then I did a layer mask on the bag because the texture was tweaking the color a tad funny. But now the texture can show up of Courtney’s skin/clothes and her subject’s skin/clothes, too. Not a flattering look so let’s avoid that. I do not want to lose the nice golden glow it has given, though. I think it would be very noticeable and distracting to simply mask it. So here is what you do.
First, look over at your layers panel and make sure you are on the layer of the texture you added. That layer will be highlighted. If you did a layer mask, be sure to click on the actual texture box and NOT the layer mask box.
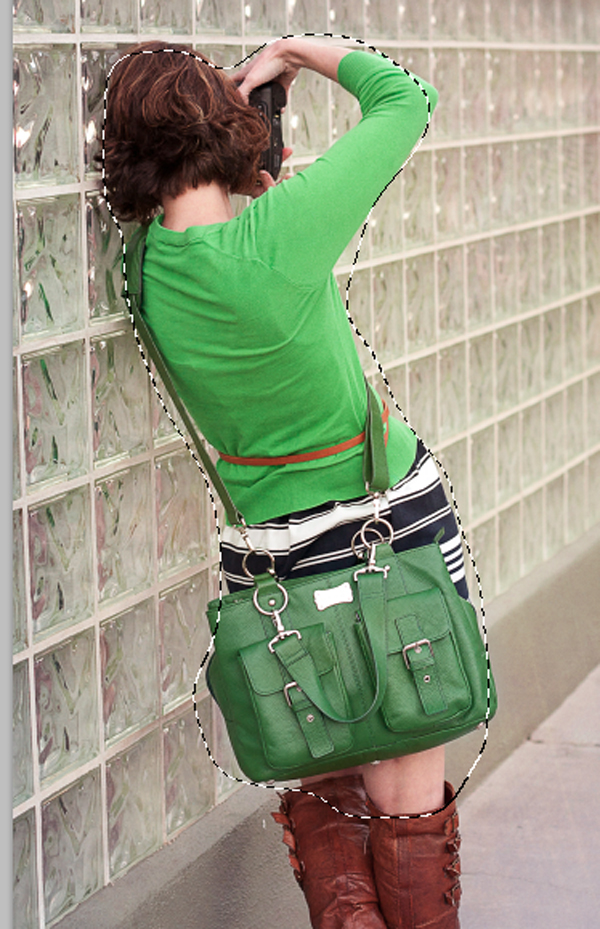
Now go to your tool bar on the left side of your screen and select the Lasso Tool.
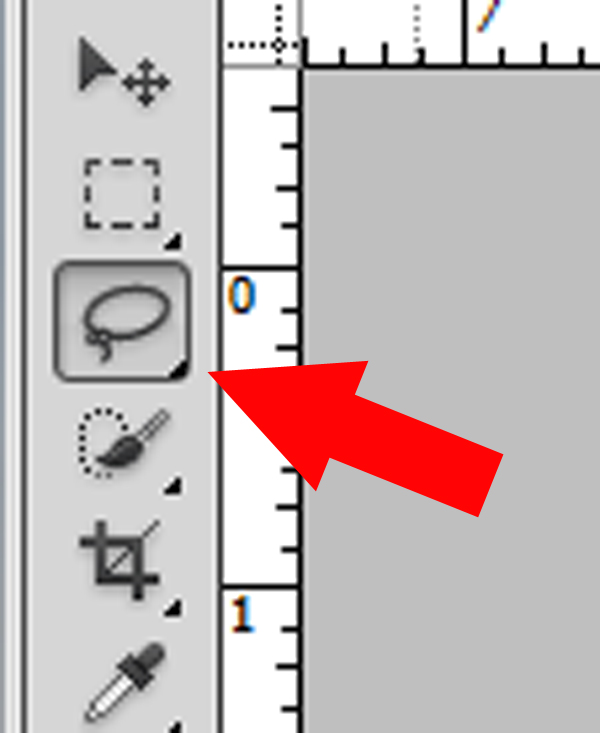
Use the Lasso Tool and circle around an area you want the grain to be gone. You will get the marching ants once you are done selecting the area. If you mess up, simply click anywhere else on the photo and it will deselect. ;)
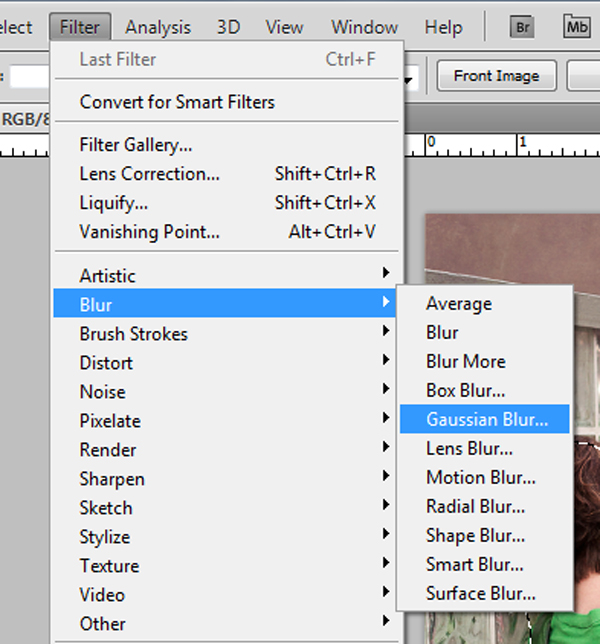
Once you have selected the area you want simply go to the Filter tab, down to Blur, and then to Gaussian Blur.
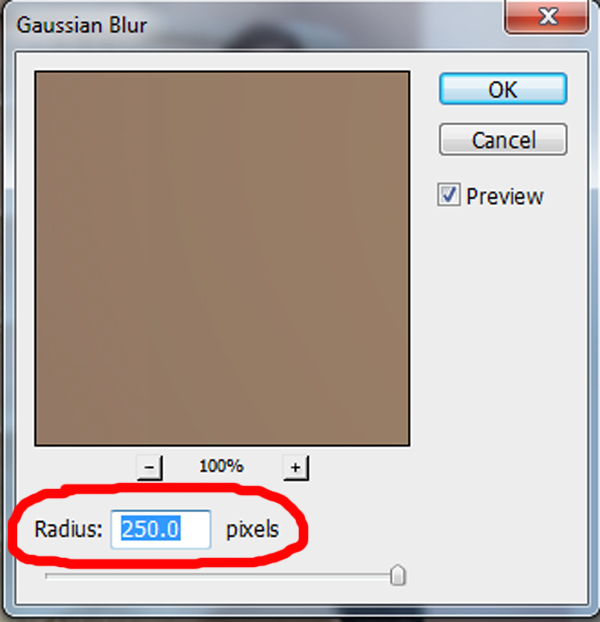
A box will pop up that looks like this. Set the Radius to 250.0 and hit OK.
Now just click on any part of the photo to deselect the the area you just blurred. If you need to do another area (like Courtney’s subject in this photo), go ahead and repeat the process for that new area.
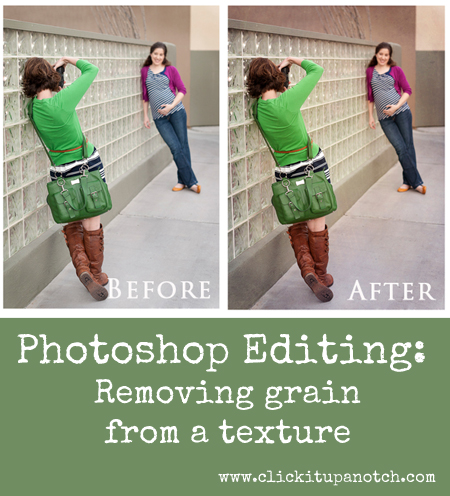
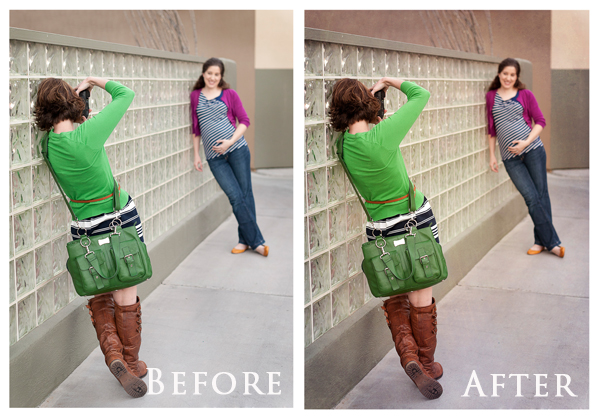
Now you are done and your image has a little bit, or a lot, of oomph to it from the added texture without the yuckiness of blotchy skin or clothes. Here is a before and after side by side.
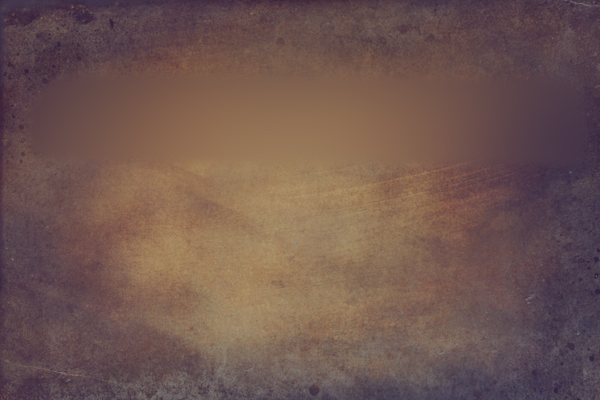
If you are wondering you can do this with any added texture, portrait or not. This is great to remove texture from flower petals without losing the cohesiveness of the tones or the gradient of the vignette. Here is the same process directly on a texture so you can see exactly what it looks like. Can you tell where I used the Guassian Blur filter? But the beautiful rich warm tones are still there and will still be there when added to a photo.
Now go have fun and experiment more with textures! Be sure to share some of your photos with us on Google+ and Facebook.


This is awesome! Always playing with textures and layer masks to get the weird splotchiness off skin with out creating a break in the tones of the texture. Never would have thought of this, thanks!