I will admit I am just a bit obsessed with gorgeous skies. I mean really, who doesn’t enjoy looking at a colorful, creamy sky complementing their subject in the foreground?
The problem is that when we, as photographers purchase sky overlays we risk our images looking like other photographers work because many other photographers have that exact same sky overlay.
I will admit I have seen many images with skies that have a familiarity about them because I have seen that very same sky before but in other images. This is a bit of a problem because as a photographer I want my work to be unique, I don’t want people to gloss over my images because there is an element that might remind them of someone else’s work and therefore makes mine a bit less significant.
A quick note: An overlay is simply an image captured by camera or otherwise constructed in an editing program. In this tutorial we are using our sky images as overlays to create skies where they do not exist or could be enhanced.
I came up with a solution, to make my own sky overlays. The best part is, it’s so easy, and everyone can do it.
Create your own sky overlays
Taking the sky overlay image:
1. Choosing your lens.
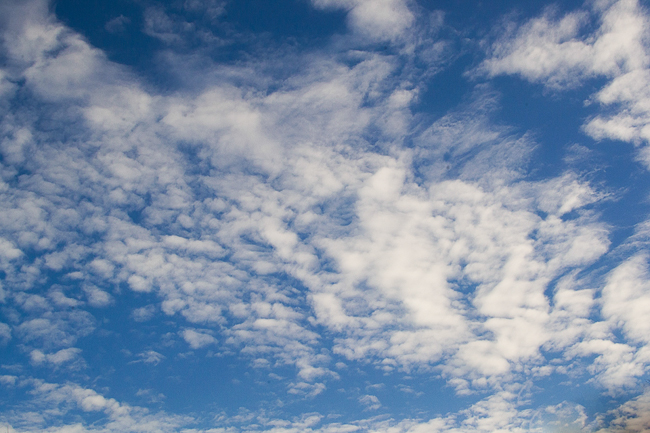
When capturing sky overlays the objective is to get as much cloudy, fluffy goodness as you can fit into your lens, for this reason I prefer to use a lens with a wider focal length. I personally used a 35mm prime lens when capturing images of the sky for this project. Don’t be afraid to experiment. You can try a zoom lens to try and capture your sky at different focal lengths and see what you come up with, the sky is the limit!
2. Choosing the correct exposure.
Exposing correctly is always important and always a hot topic among photographers. When photographing skies it is easy to get “hot spots” or overly white areas of an image because of all of the white and bright areas caused by the clouds and sun. To resolve this I use the spot metering method and I will measure the light off of the brightest area of my image. This way I am guaranteed to have soft white clouds (not overly bright) and it is easy to lighten the shadows and dark areas in post processing later.
3. Location, location, location.
You would think a sky is a sky and who cares if you take an image of it in your backyard right!? Wrong! Unless your home has a huge, empty field behind it this is probably not a good idea. Why you ask? Well because to fit as much sky into your image you will need to capture your sky right along the horizon. Find a park or other area close by you can go to with little to no obstacles blocking the horizon and your sky overlays will look amazing!
4. Time of day.
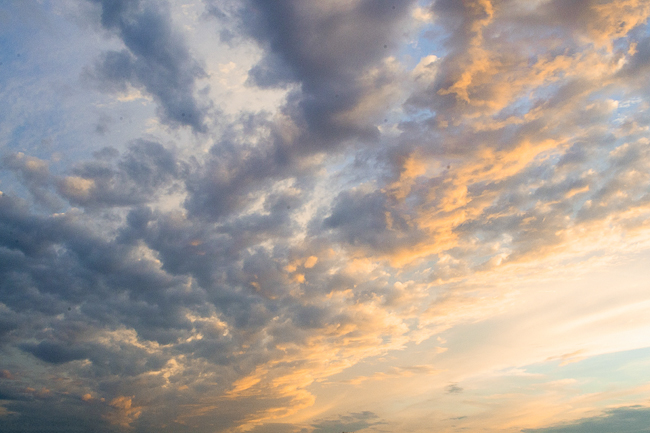
OK so you can capture gorgeous images of the sky any time of day. But you will find after starting this project that you are at the whim of mother-nature and time (as photographers, when are we not)? Keep in mind the type of sky you are wanting to capture and make sure to go out on location during the right time of day. For example, if you are wanting a colorful, saturated orange sky, you are going to have to capture images of the sky during sunset or sunrise AND make sure there are actually clouds present otherwise you will just have images of the color orange.
Applying Your Sky Overlays in Photoshop
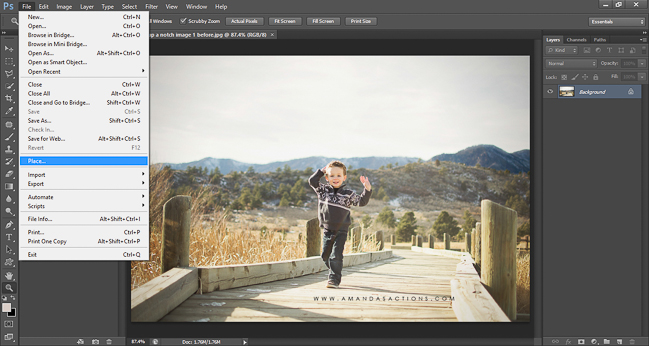
1. Placing your Overlay on the Image.
This step is very simple, first you should of course already have opened the image you wish to apply your sky overlay to. After you have uploaded and saved your sky images to your computer or hard drive, just go to file>place and navigate to your desired sky image and select ‘place’. You will now see your sky overlay appear directly on top of the original image.
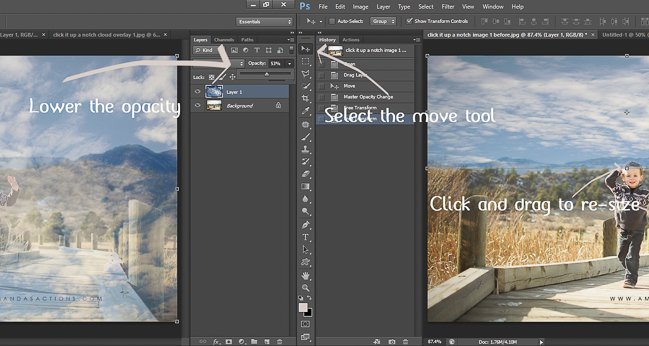
2. Lower the opacity.
Now it is time to re-size the sky overlay to match your individual image. To do this you must lower the opacity of your overlay to see what your sky looks like in relation to the image, I usually readjust the opacity to 40% or so. Now that the opacity is lowered, I can better see what my sky will look like when applied to my image. At this stage I may choose to resize my overlay to fit the sky better using the move tool in Photoshop.
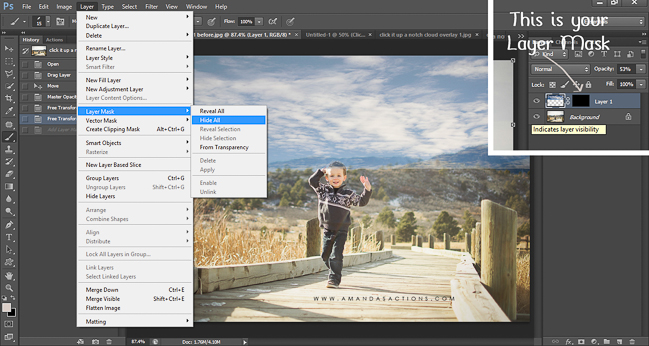
3. Add a Layer Mask.
Let’s face it, we all make mistakes and nobody is perfect (especially me when I haven’t had my coffee yet haha!) and for this reason I like to use a layer mask with all of my edits. Make sure to bring your layer opacity back up to 100% now. At this point I could easily choose my eraser tool and erase the parts of the sky overlay that do not line up with where the sky is on the original image, BUT if I make a mistake when erasing the edges of the sky overlay it’s going to be very hard and time consuming to fix, this to me is no good, time is money! So instead I am going to add a layer mask because it is very forgiving if I make a mistake or need to make a readjustment to my overlay anywhere in my edit. To add a layer mask go to Layer>Layer Mask>Hide all. You will notice that your sky overlay has disappeared, don’t worry, this is supposed to happen, I promise!
4. Paint on Your Sky, Easy as Pie.
Keep in mind when using layer masks, black conceals and white reveals. You will want to make sure you have selected your layer mask in your adjustments panel for this step (the black box next to your sky overlay). The box is black because your sky overlay is being concealed. To reveal or “paint on” your sky overlay where desired simply select a soft edged brush and select white for your brush color. Again it is very important you have your layer mask selected when painting otherwise you will literally paint white onto your image, yuck! Ready!?!? Start painting where you wish to apply your sky and voila! You may need to switch to a hard edged brush when painting near your subject or another area of your image where your sky and foreground intersect for a more clean line, just play around here, the most important thing is to have fun and enjoy your new overlays!

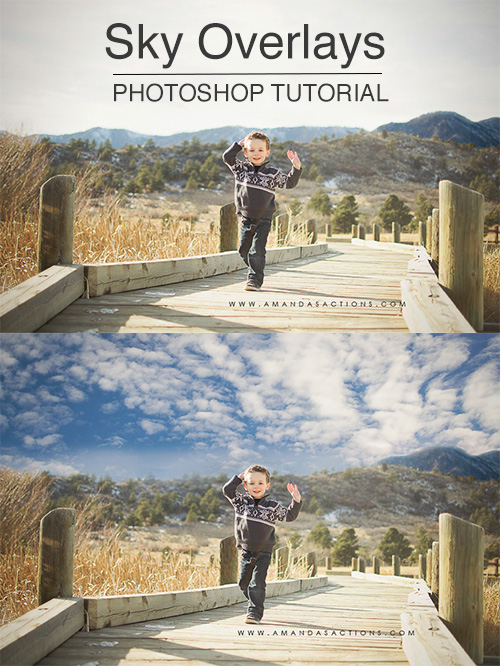
Before:

After:

![]()
 Guest post – Amanda Glisson
I am a momma of four rambunctious kiddos, wife to one ah-mazing and supportive hubby, workaholic (eep I need to work on this!) lover of the written word and self proclaimed Photoshop junkie.
Website | Facebook | Pinterest | YouTube


Thanks Amanda! Great tip! I’m going out right now (no joke, literally right now) to shoot some winter sky images to give this a try. I’m stoked to play with this!
Thanks again!
Mark
You’re very welcome Mark, I’m so glad you enjoyed the tutorial! I very much enjoyed this project and found myself going on frequent evening drives to catch the beautiful sky, it’s so good for the soul too!
Thank your for your inspiring tutorial on sky overlays.
I been having a love affair with clouds for years, and photographically capturing them has been a quest of mine.
I look forward to putting your tutorial to good use and making those beautiful skies and clouds a part of my work. :)
Thank you again!
I’m so glad you enjoyed the tutorial Nancy!! This is such a fun project and now you will be able to play with all of your sky/cloud images you have already captured, so cool.
I love this article. Thank you for sharing. I am very interested in learning all I can about photoshop, I am a beginner, needing all the help I can get! I just liked your facebook page and am looking forward to all you share! Thanks Courtney for having Amanda!
I want to thank Courtney for having Amanda! Also want to say as a very new beginner to photography and Photoshop, I am loving this article, and looking forward to following Amanda’s Facebook page to learn more!!
Thank you Tanya you’re a sweetheart!
This tutorial makes the skill seem pretty easy or at least a little less intimidating. I hope to try it out soon!!
It is super easy once you give it a try!
I am just learning photoshop= this is fantasic!! I can’t wait to try it out. But how do you store the overlays? As photos? What type of folder?
Hi Dawn! You store the overlays as you would any other image :)
Thank you very much for the tutorials
Thank you!! I just learned a new trick in Photoshop because of this tutorial! Big help!!
Thanks for this tutorial!
I really want to use this tutorial but I cannot figure out how to save free overlays to my computer to even start using them? I cannot find a tutorial on this either? Please feel free to email me if you have time to help I’d greatly appreciate it! Thanks in advance! -Briana
I have some AH-MAZING colorful Arizona sunsets ima definitely play with now! WooHoo! SUPER excited to try this! Thank you!
Can you use a smart brush to “paint” on your sky? I can use the brush to select the areas I want to be sky, but I can’t seem to figure out how to “enter” the change. i.e. It selects, but a change isn’t made and the area stays outlined…seems like I should be able to “apply” the change or something. I’m obviously VERY new to photoshop. Thanks in advance!
Thanks for the info I Just started and lean a lot
Thank you, just did it step by step with your help!
Wow, what a stunning and easy to follow tutorial. Amanda, you’re a genius! Thank you and love.
Thank you! I am also a mom to 4! I followed this tutorial but my brush isn’t painting anything on to the mask. I have tried several brushes and have restarted it multiple times…any pointers?
this is fantastic technic!I love this article.thanks
Well described post. Thanks for sharing this useful information photoshop tips. As always awesome content, I love reading your articles, much appreciated!
Thank you for the tutorial. This will help an amateur photographer like me a lot!