First off, I would like to put a big disclaimer out there! I am not a Photoshop genius, nor do I pretend to be. I’ve learned everything related to template designs either by trial and error, you tube videos, or tutorials from around the web. No formal training here, so I’m sure there are simpler ways to get the job done, but I’ll be explaining my way. Hopefully, this little tutorial will show those who are more clueless than me that it isn’t really hard to make your own templates. And if you have any short cuts, feel free to add them in the comments! Enjoy!
I need a new template for FB, so I am going to make a quick and dirty one for a download to share.
1. Know your dimensions.
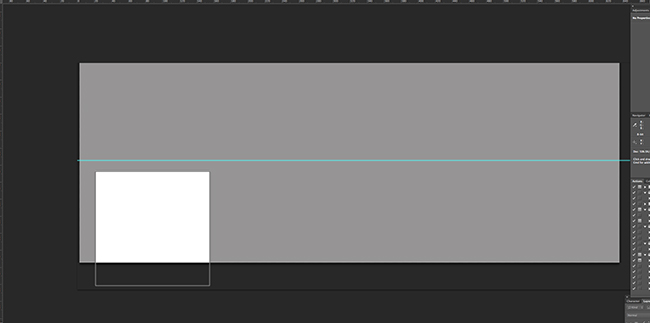
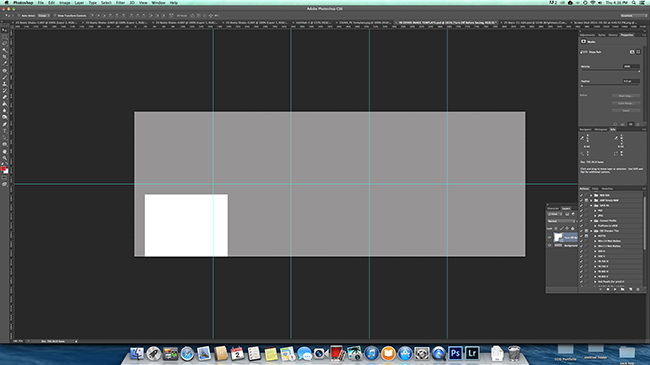
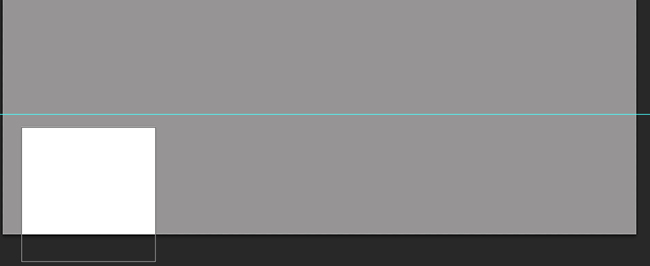
This is a Facebook Cover, so I looked up the cover photo size here on Facebook. The dimensions of the FB cover are 851 pixels x 315 pixels. Also, by looking at the picture, I calculated where the placement of the profile pic would be and put a white box there. This way I can plan accordingly when I start placing pictures. **Remember to turn off the white box after adding images and before saving the finished cover image.
2. Change your ruler units to pixels if you want to be more exact in your measurements.
The default measurement in CS6 is inches, but for web sized images, I prefer to work in pixels. Honestly, for the sake of making a timeline cover, I would probably guestimate more than calculate, but I’m going to attempt to show the “right” way, for those OCDs out there.
**In CS6, to change ruler units, go to Photoshop > Preferences > Units and Rulers and change from the default inches to pixels.
3. For my template, I’m going to use a gray background because I want to use white dividing lines between images for a clean look.
Any shade of gray will do. If your background isn’t already gray, then use the paint bucket tool to fill it in.
4. And now is time to calculate and place guides.
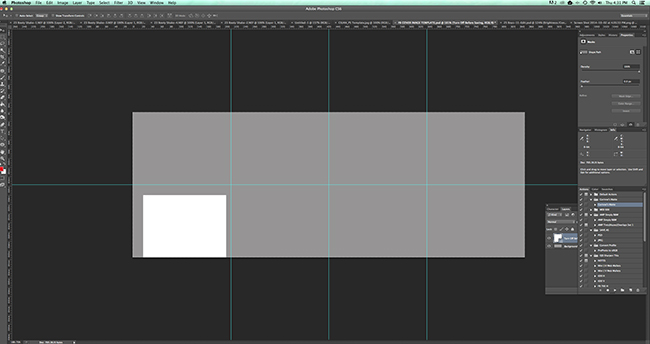
First off, I’m going to place a guide (grab from the ruler and pull down) at the halfway mark dividing the timeline in half vertically (which is at about 158 px).
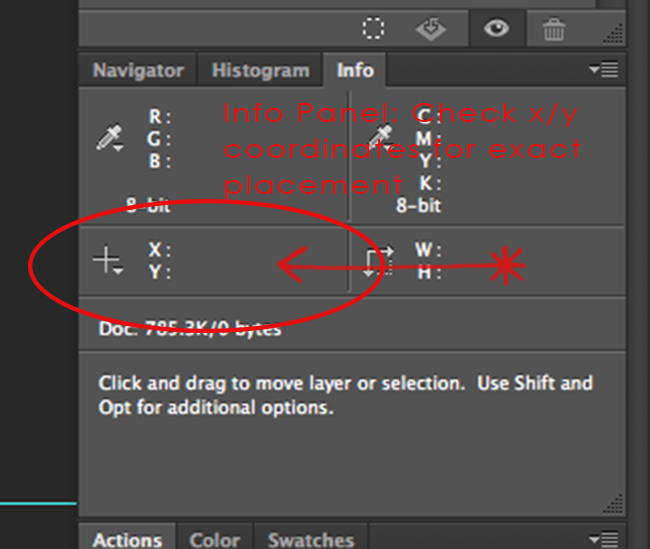
And a little memory jogger: x coordinate is on the horizontal axis, the y coordinate is on the vertical axis.
I like to use guides before placing the shapes so that I get an idea as to what the template will look like.
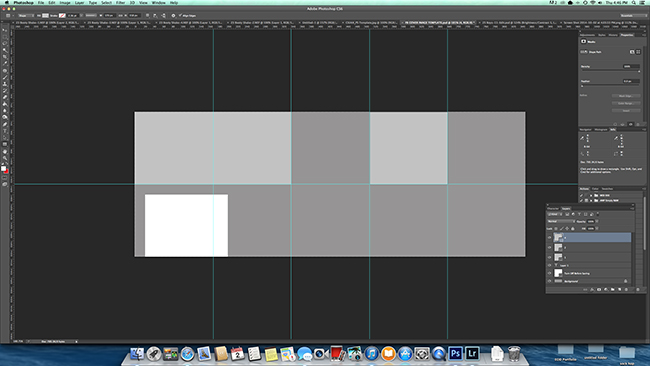
Guides placed templates divided by 4….guides placed at 213, 426, and 638.
Divided into fifths (great for instagram). Guides placed at 170, 340, 511, and 681. I like the simple squares, so I’m going to continue with the next step.
 It took about 60 seconds to change up the templates. Very simple and quick.
5. Next up, it’s time to place the shapes inside the guides. The shapes will act as the clipping masks when it is time to place images into the cover photo template.
I use the shape tool first to make boxes inside of each guide. I chose a lighter color gray so that I can see the box and later see the white dividing lines as well. Here is a screenshot of what it looks like with a few shapes added.
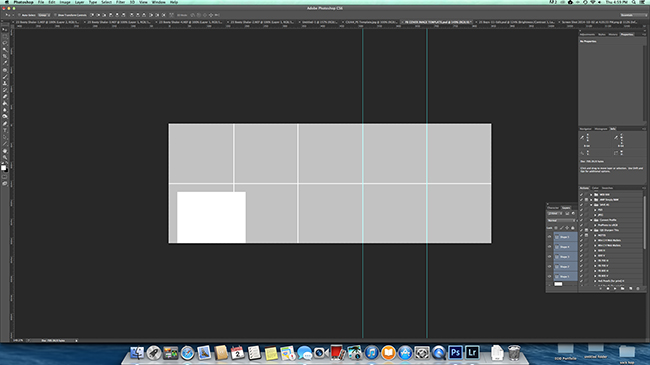
I finished adding boxes (and numbering them as I go in the layers panel).
6. Now it is time to place the dividing lines to separate each image. I like clean simple lines, so I’m choosing a pixel width of
5. So, using the pixel width of 5, I used the line tool to draw lines along the guides in white. I’ll take a couple of guides off so that the white lines are more visible. This took about a minute as well. Making a template it really pretty simple and fast… and will save lots of time in the long run if you choose to change out images frequently.
Now the fun part! :) Choosing and adding images.
To use the new template, drag an image onto the template, transform it (command T -Mac or control T- PC) to approximately the correct size and place it over the square where you wish to place the image.
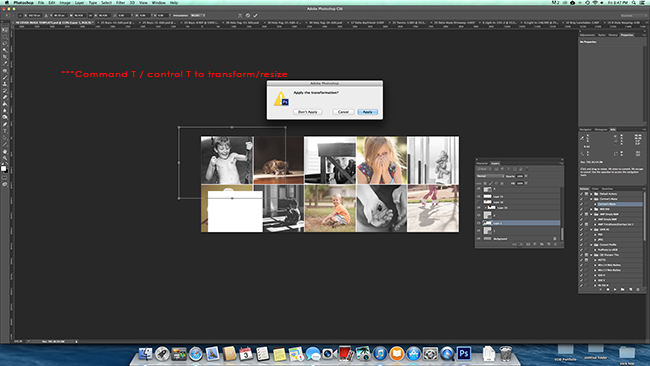
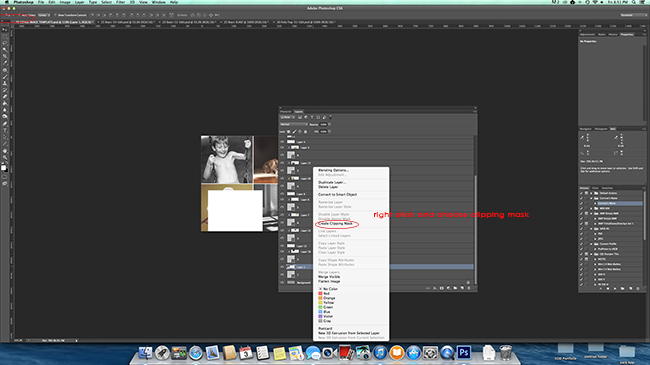
Next use the clipping mask to clip the image to just the shape of the square. To use the clipping mask, click on the image in the layers panel, then right click, and choose “Create Clipping Mask”. This will clip the image to the area of the shape we created earlier only. Repeat for each of the squares. The image behind the profile pic will barely be visible as well as the images to the right of the profile pic (which tends to have your name printed on FB). So, when choosing those images, keep that in mind.
And done !
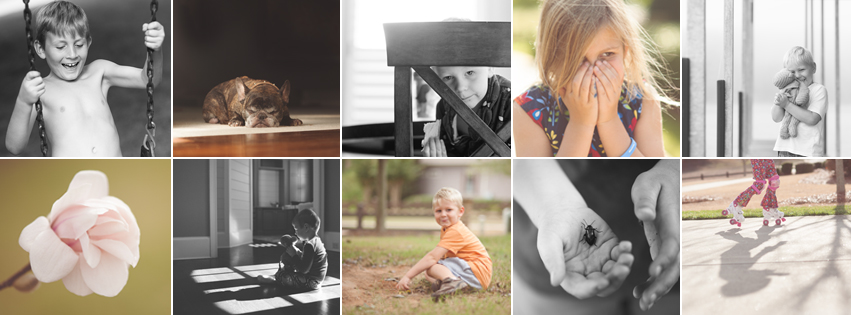
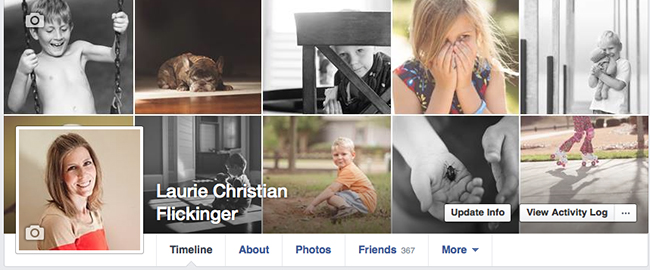
 Here is my finished product as on FB.
Download your free Facebook Cover Photo Template
If you prefer not to create your own but would rather use this template, you can download it here.


Well, although the display size is 851 x 315 for the facebook cover photo or facebook timeline photo (and 160 x 160 for the profile photo), you should use double the size when designing them in Photoshop (means 1702 x 630 and 320 x 320).
Otherwise you’ll get a size warning from facebook when trying to upload them in display size …
Hello
the clipping mask doesn’t seem to be working when I click on it….I put a pic in above the assigned square, right click clipping mask and then it puts it behind the white lines. But you can still see the rest of the pic in the squares that don’t have any pictures in it yet. Can you help please??? Thanks
Make sure you are behind on the correct one? You can email me and we can figure it out together. [email protected]
Hi! I found your template and am using it, but the images get very pixelated when I drop them in, and I can’t figure out why. They are high-quality images that look fine outside of the template. Any ideas? Thanks!