Today I’m going to show you how to use mod pod photo transfer to put your photos on glass. This is something I’ve definitely wanted to try for some time now, but the process looked extremely daunting. I’m here to tell you that it’s actually not as a bad as it looks! I’ve done all the trial and error for you (and believe me- there was lots of “error” in that trial and error) and have a few tips to help your finished product look its best!
What you need to know about Mod Podge Photo Transfer:
The Mod Podge Photo Transfer basically turns your picture into a decal that can then be stuck to glass or any smooth surface. You brush the medium onto your photo, the photo transfers to the medium as it dries (into a very thin plastic-like sheet), and you peel the paper away. Knowing this will help you envision your final project as you are working on it. 
There are a few key tips to make your project successful:
1. You definitely need to use pictures that were printed using a laser jet printer. Most home printers are ink jet, and that will not work, and photos printed on photo paper will not work either. Call around to your local photo copy centers and ask what kind of printers they use. I found that my local UPS printing stores use ink jet, but Staples uses laser jet, which is what you want. I placed my images into a word processing document and brought them into the store on a jump drive. They were able to plug the jump drive in and print out my documents.
2. When you print your images, get 2 copies, just in case you make a mistake on the first!
3. If your images have words, reverse the image in your word processing program before you have them printed so that they appear correctly on the final project. (You’ll notice below in my sample images that I did not do this, and couldn’t use any image that had a word on it.
4. For your first project, choose a glass jar or plate that has straight (not curved) sides/bottom. After you get used to working with this medium, then you can move up to curved plates or jars. 
What you’ll need:
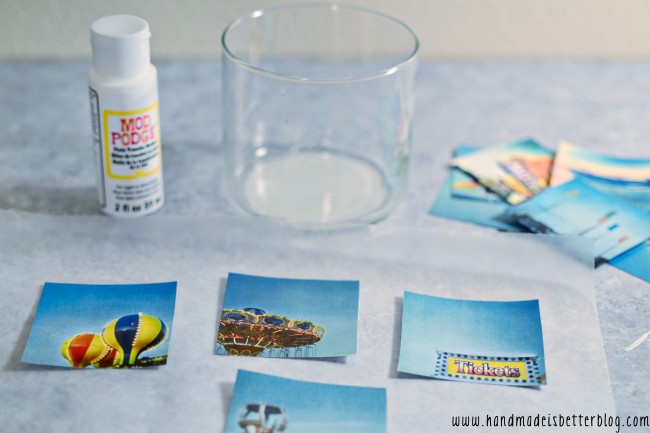
1. A clear glass jar or plate. Check out your local thrift store, dollar store, craft store or even recycling bin for a good selection. I used cleaned out candle jars for my project. 2. A sheet of photographs printed out on a laser jet printer, onto regular printer paper 3. Mod Podge Photo Transfer medium 4. Foam brush 5. 2 Sheets of wax paper (to work on/protect your surface and to dry your images on) 6. Water and sponge
Directions for Mod Podge Photo Transfer:
-
No.01
Trim your photos from the sheet of paper and lay them out (face up) onto the wax paper.

-
No.02
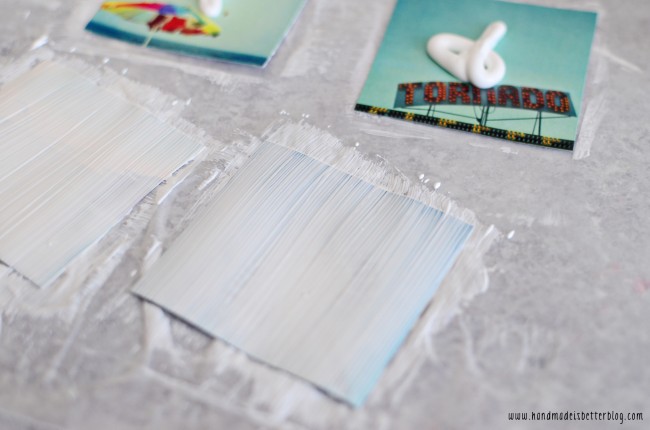
Squeeze a generous dollop of the Mod Podge Photo Medium onto the image, and brush it evenly over the entire image. You want a very thick coating – thick enough that you cannot see the image through it. Your photo will be transferred to this coating as it dries, so if it is too thin, it will make transferring the image very difficult later. Transfer the images to a clean sheet of wax paper to dry.

-
No.03
Set aside to dry for 24 hours. Ensure that the room is in the 60-80 degree F range. In humid climates, the dry time may take longer than 24 hours.
-
No.04
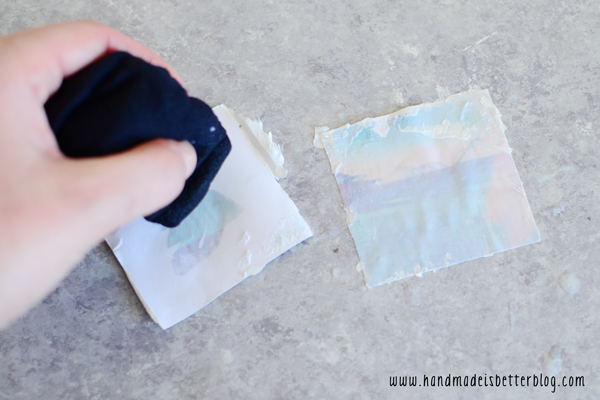
Using a sponge, generously wet the back of the image to begin to soften the paper.

-
No.05
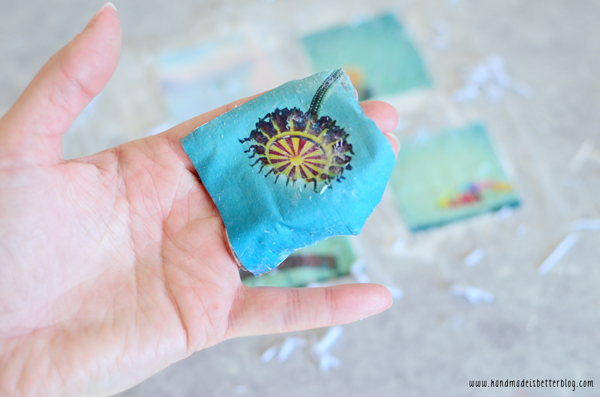
Begin to carefully rub away the paper on the back of the image. You can either use your finger or the sponge. I found that that my finger worked better so that I could work on it gently. You can tear the image if you rub too hard.
-
No.06
You may need to repeat step 4 and 5 two or three times until all the paper is removed. Allow the paper to dry between steps, then re-wet and rub again. Eventually, you’ll be left with a very thin decal of your image.

-
No.07
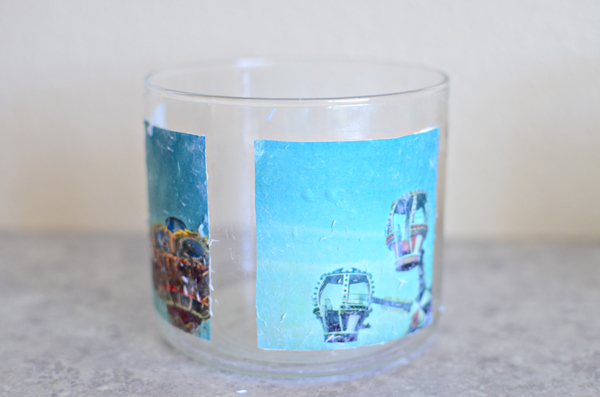
Carefully place your image decal onto the jar. If you need to trim the image due to excess Mod Podge medium, do so carefully before you apply it, or use an Exacto knife after it has dried.
-
No.08
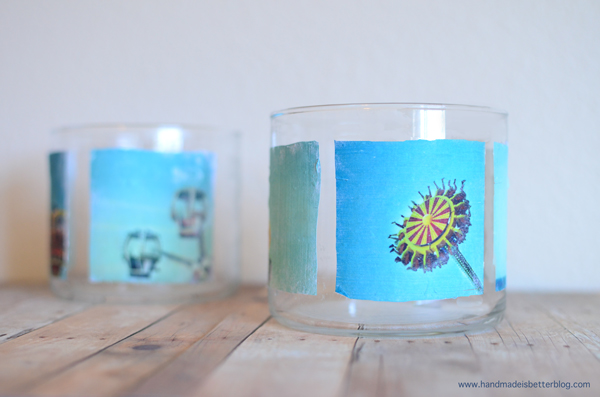
Repeat steps 4-7 for each image until your jar is covered as you’d like. The Mod Podge packaging states that the images are permanent on the glass, but I sealed mine with a thin coat of regular Mod Podge to seal it.


I’ll have to try this! I’ve transfered photos to fabric before (using paint), but I’ve never seen this technique.
Rubi x
The Den
Very creative and cute idea! This would be a great gift for dad’s desk on Father’s Day! Love it…thanks for sharing!
I love your blog, you have some wonderful information and it has helped me so much with my craft.
I have tried the method you have posted here with good success but may I offer another way to do this if you want to have a clear background? If you google “Water Slide Decal Paper” you can read up on it and also search Youtube under the same title. There are directions to help you do this with decal paper. I wanted my projects to have a clear background so I found this method some years ago. I found decal paper and it is very easy to work with. You print out your special picture on this clear decal paper, then once the ink has dried, you then spray a light coat of Krylon clear acrylic spray and wait till dry then spray one more coat. Once the second coat has dried, you cut out the picture and moisten the picture with water, the picture is now a decal and you can slide the picture onto your project. Wipe with a soft cloth to make sure the picture is secure then allow to dry over night. I use to do this with ceramic tiles; when I took pictures of a child’s 1st birthday gathering, I would create a special ceramic tile for the parents to display on a small easel. I used a 5×5 with tile but there are larger sizes too and you can also use ceramic plates.
I hope I did not intrude on this post by suggesting an alternative method.
God bless and keep you all safe.
Thanks so much for sharing this!! I love decorating my home with photos of my kids..The tiles would make wonderful gifts!!!
Bless you!!
I dont think one crafter sharing another alernative to a projedt is intruding and its a really awesome way to achive a diffrent outcome thanks for info……
Tammy, thank you so much for suggesting this!! I have been looking everywhere for something similar to make my boys some Christmas ornaments of their footprints with a clear background!! Glad I stumbled upon this blog and also skimmed through the comments
Can I spray or paint something clear over the top to prevent the photo being washed off or to make it dishwasher safe
I just did an entire show of boudoir photos on glass panels. The best way to do this is exactly as your described, the thicker the mod podge the better. Also, you can cover your photo in mod podge and place it directly on the glass, letting it dry for 24 hours. Then using a sponge to remove the paper. Then the image is directly transferred to the glass.
Our Texas Style rub is our original blend, inspired by an old household recipe and excellent for all types of meats. This award-winning rub is a savory blend of premium spices, with hints of sweetness, lots of flavor and no MSG or gluten. It goes well with just about anything you want to add flavor to!
Can you wash if put on like tea glasses? Super cute. Gonna try for the great grandparents.
Hmm… I wonder if this would work as a way to decorate a plain glass cookie jar (or similar) to use as a wedding card box?
I had better luck applying the Mod Podge directly to the glass surface and letting it dry completely, then removing the paper with water and my fingers (but my glass was flat, not curved like the above picture).
If you don’t mind can you explain a little more how you did it, I’m trying to do this project for my son’s wedding as favors and buy it with pictures is very very expensive. Thanks
Are you transferring the picture to the wax paper, then rubbing off the extra regular paper, and then taking the wax paper (that now has the photo on it) and sticking that to the glass? Sorry, I’m just confused about the rubbing away of paper. How does that work if you’re not transferring the picture to the wax? Please help:(
Hi! Thank you for the wonderful tips. When you place the image on the glass- do you put Modge podge on the jar too ? Just making sure, after paper is rubbed off and you have the image ready- how does it stick to the glass? Thank you !
Could you use regular modge podge. And can u use ink jet instead of laser?
As she mentioned in the article, ink jet printing does not work for transfers.
Great Idea I would love to use this idea now!!!!
My goal is to transfer printed text onto a small piece of 4″ x 6″ glass.
If my original image is (mirrored) text against a white background, how transparent will the portion be?
(I’ve tried printing onto transparency paper, but this I don’t like the way it wrinkles over time. If I could, I would print directly onto the actual glass surface, but can’t figure out how I might accomplish that.)
Thanks!
I am trying to transfer a photo onto glass.. what kind of paper do I use. I just tried regular
photo paper…it didn’t work.
I have one drying right now on regular paper, I don’t know if it worked or not yet, I am
letting it dry over night.
Would yo please email me and let me know what kind of paper to use in case this does
not work…. thank you
[email protected]
Hi this is driving me nuts. Iv tried every way I think. Read all tutorials and u tube. I have lots of white ceramic tiles and wanted to put images. Pictures onto them I first tried my home printer and realised it just smudged. Next printed off pictures on laser printer but was normal copier paper so just came off when water added. Next went to shop and got photos from phone printed. Tried today but I can’t see how I can run paper from back when it’s glossy photo paper. So water doesn’t soak in back. Plus the pictures slide on anything curved. Can someone be kind enough to e mail me on [email protected] and put me out of my misery xx Lesa
Can you put it into a dishwasher when it is all dried trying to transfer a logo into a coffee cup for a friend?
I have been racking my brain for a few years trying to remember how we used to decoupage images back in the day; it’s been over 45 years, and the product we used doesn’t exist anymore. It was the technique, however, that I wanted to get straight, and for me this tutorial was just the refresher I needed. The reason we get confused, is that our brains don’t want to accept that the actual image will be IN the MOD PODGE PHOTO TRANSFER MEDIUM once the coating dries. After the MOD PODGE has dried, you turn it over and take the paper off (oh so carefully) BECAUSE THE PICTURE IS IN THE MOD PODGE NOW. I know it seems like I’m being over-emphatic, but this was the exact step in the process that, after so many years, my brain didn’t want to wrap itself around. The paper is supposed to come off – THE PICTURE SHOULDN’T BE IN IT ANYMORE!
For so many other questions I am seeing above, the answers are actually included in the tutorial. Laser Jet printer, no photo paper…and for Cami, if you want a dishwasher safe item, use one of the on-line photo specialists. Once you have applied your decal, multiple clear coats of either MOD PODGE or lightly diluted Elmer’s Glue-All make items water-proof enough for surface cleaning, but dishwashers are way too fierce for these sealants, and I don’t know how a spray sealant would look on glass. Light sanding with very fine sandpaper between each coat of sealant after it dries will give you a smoother final surface..
I have a side mirror off of an old farm truck that I have wanted to put a picture on for years, do you think using a mirror instead of plain glass would make any difference in the result?
No it won’t make a difference: a mirror is just glass with a reflective coating on the back.
Exactly what I needed! I am making stretched images that will appear 3d on angled glass. This technique should work great. Thanks!
So I am trying this right now but must my question is can you also do this with mod podge Gloss
i love this as a gift idea for a set of bar glasses. How are they cared for? Do you wash by hand or are they dishwasher safe?
Thank you,
Judy
I have the plate and the clear transfer sticker and 6 marker what else do I need
Will any Mod Podge work
Ok folks, I got one for you to help me with. I’m an artist , primarily black charcoal drawings. What I would like to accomplish is this,,, transfer my drawing onto a window store front, approx. 10 feet by 8 feet. I have the means to enlarge my drawing to that size. My question Is, your all talking about transferring onto mugs etc. Can your process enable me to achieve my goal ?
Donald Berkowitz
Using this method for your large scale project would work. However, removing the paper is a time consuming step; to do it carefully takes a long time. My first project took me about 2 hours total, with drying in between, for a 5″x7″. Also, removing it may be problematic. I assume a razor blade would chip it off the glass, but you would want to talk to the store owner about the possibility of damaging the glass.
Your idea sounds awesome though!
Ran across your “czgator” on a website I visited. Is that cz as in Canal Zone? I’m a ’56 grad of BHS, my husband ’52.. Just wondering. We live in California. If you are from the CZ and want to, get in touch.
I purchased a beautiful glass window frame with pictures affixed to it. It has been hanging on my wall for thirty years. Can I include a photo for you. I did modge podge wood piece years ago. it took twenty layers and then had to be milked. it survived with no peeling all these years. carla
I purchased a beautiful glass window frame with pictures affixed to it. It has been hanging on my wall for thirty years. Can I include a photo for you. I did modge podge wood piece years ago. it took twenty layers and then had to be milked. it survived with no peeling all these years. they were images from picture books and advertisements from the twenties. carla
If I read your request for help correctly, I may be able to help. If all you need is your drawings to a photo print, that is easy. Providing as you say, you have the facilities to make it to your large requirements.
Use a good scanner that will be large enough for your drawing, Save to a known safe file. Then have printed with a laser printer. I think you can do whatever you like once it is in digital format.
Hope this is what you are referring to. Good luck.
I don’t understand how the image stays on the glass. The mod podge has already dried and the other side where the paper was just removed is just wet with water so why does the decal stick to the glass? Does the water reactivate the mod podge? If that’s the case then how will the image stay on if the glass gets wet again? You said you don’t need that final coat of mod podge over the glass image. Am I missing something?
Does any white in the image disappear and leave transparent glass when you have rubbed off the paper?
If you stuck the image onto something like Saran Wrap in its original orientation, could it be peeled off to be put onto the final object, or would it be permanently stuck no matter what you used?
My question is when my photo is face up and I take my sponge brush and put the modge podge onto my photo do I place my wax paper on top of my photo???.. Is that how it transfers to the wax paper?.. because I keep reading it & it sounds as if the wax paper is underneath of the photo and the photo is face up & that just doesn’t make sence to me. Please help as I am about to tackle this right now Lol
can i use a regular modge podge or does it have to be photo transfer specific?
does the mod podge dry clear eventually?
I’ve tried 3 different times to photo transfer onto glass and each one has a film over it so you can’t see the image very well. I also tried to make a decal to transfer to glass with the same result. Maybe it’s the paper they use to make calendars?
I want to put a picture under a round piece of glass. Is it possible to do this with Modge Podge? I don’t want the picture on the outside of the glass.
I used regular mod podge on a wooden box and it was way too dark. You couldnt see the photo so I think i need to use tje transfer medium but my picture is only on the center of the top of the box it does not cover the entire thing. So if I do this will the entire top of the box around the picture be white?
I am putting bling and stickers on clay flower pots can this be used to spray over the pictures and the bling to secure the items I glued on the pot without the colors changing? I just want to secure the items the pots without yellowing.