One of the easiest ways to make your photography more appealing is to follow the rule of thirds for composition. Now that you know how to change your focal point that won’t be a problem.
Table to Contents
What is the Rule of Thirds in Photography?
The rule of thirds is a composition guide to help you draw your viewer into your photo.
It creates a 9 piece square grid and can be done horizontally or vertically. This allows the focus to go to the subject and leaves the rest of the photograph less busy or “open.”
A 9 Square Grid
Now let’s break it down. For this composition rule you will break your images into a 9 square grid. Think of it like a tic tac toe board.
Some cameras offer this type of overlay when you look through your viewfinder. That is very handy.

If your camera does not, no worries. You can just imagine a tic-tac-toe board placed over your photo. You can also use the focal points as a guide as well.
Where to put your subject for Rule of Thirds
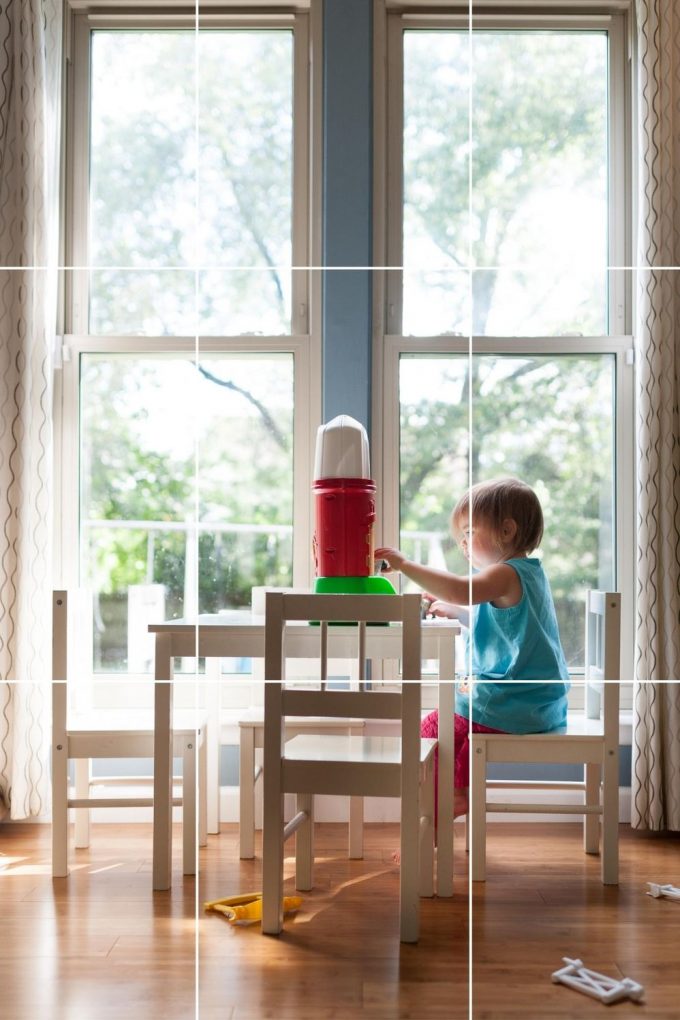
Ideally you want to place your subject on one of the thirds of the image. Just like you see in the photo above, the subject is in the left third leaving the other two thirds mostly open.
When using the rule of thirds photography as a guide your subject will not be in the dead center of your picture.
Points of Interest in Rule of Thirds
There are four points of interest when using the rule of thirds and those are at the intersecting points.
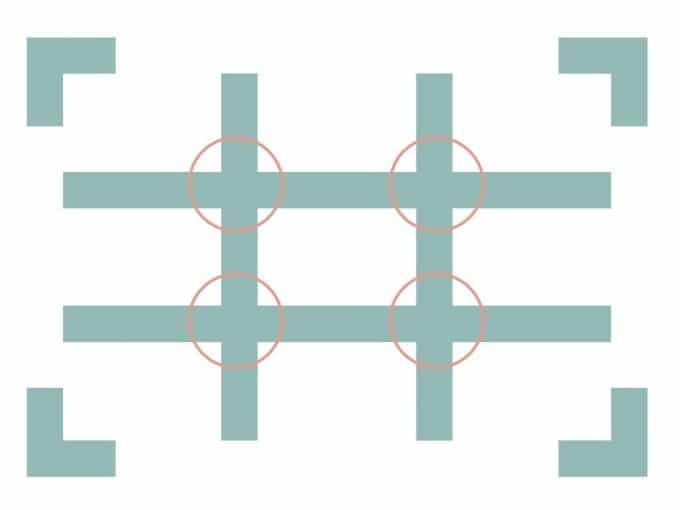
In an ideal situation you would place your subject on one of these points of interest. However, when photographing kids or something else that is moving it isn’t always possible. That is perfectly fine.
Try to get the eyes of your subject to be where the vertical and horizontal line join. It’s easier said than done sometimes.
Just for you: 4 Unique Framing Photography Composition Ideas for Creative Photos
Just a guide not a rule
Remember this is just a guide. It isn’t a hard and fast rule. Plus, you can always adjust your image in post processing if you want to make sure your subject is on one of the points of interest. We’ll talk more about that later.
Another thing to keep in mind is that it’s possible to have a mine point of interest and then place something else on an option intersecting point. This creates an invisible diagonal and since our minds are always looking for shapes this helps it to make sense to us.
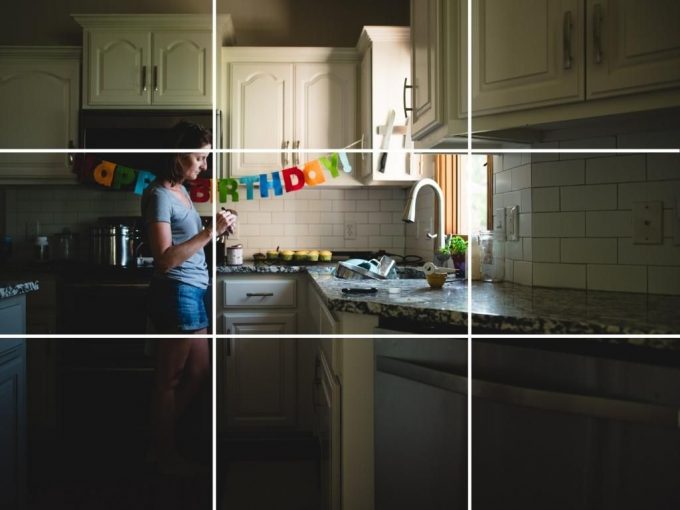
You will see rule of thirds everywhere
One thing I have found very interesting after learning the rule of thirds is that television and movies use this rule as well. I mean, of course that makes sense, since it is all a form of photography.
Have you ever noticed that when you are watching a show and they are showing a conversation between two people but only one person is on the screen at a time, they are in the right or left third?? Very interesting.
Post Processing for Rule of Thirds
Several post-processing (PP) programs such as Photoshop and Lightroom have a grid that can be displayed over your photo to check your composition. This is also very useful when cropping.
This comes in handy if you were trying to get a toddler to line up with your points and they just kept moving. No problem! Try to leave a little extra room in the frame.
Then use the overlay that shows up in Lightroom when you click on the crop tool. Then you can just crop the photo to make it right!
How to use the Rule of Thirds in Landscape Shots
Landscape shots don’t have a clear subject so it makes it a bit more of a challenge to know what to put on the points of interests.
When shooting landscape images I challenge you to put the horizon on the upper or lower third.
You can also apply these same rules to group photos. Making sure you have equal amounts of sky, ground, and people!
In fact, each time you shoot a landscape shot consider taking one shot of each. Here are a few examples below of landscape shots using the rule of thirds.

These two shots show you the importance of trying the horizon on both the upper and lower third as one is stronger than the other but I wouldn’t have captured it if I hadn’t challenged myself to try both.

Rule of Thirds Picture Examples
Horizontal/Landscape photos
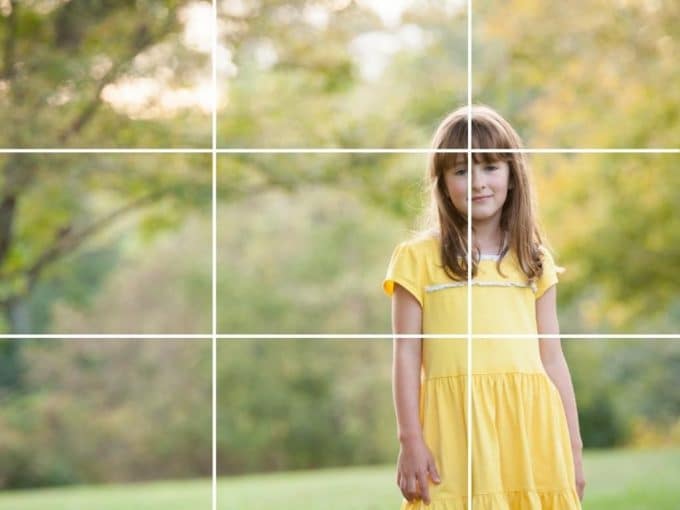
For horizontal or landscape photos you want your subject’s eyes or focus point to be in the right or left third of the grid.
Doing this leaves the other two thirds open without a subject in them. Which immediately makes a viewer drawn to your subject.
Vertical or Portrait photos
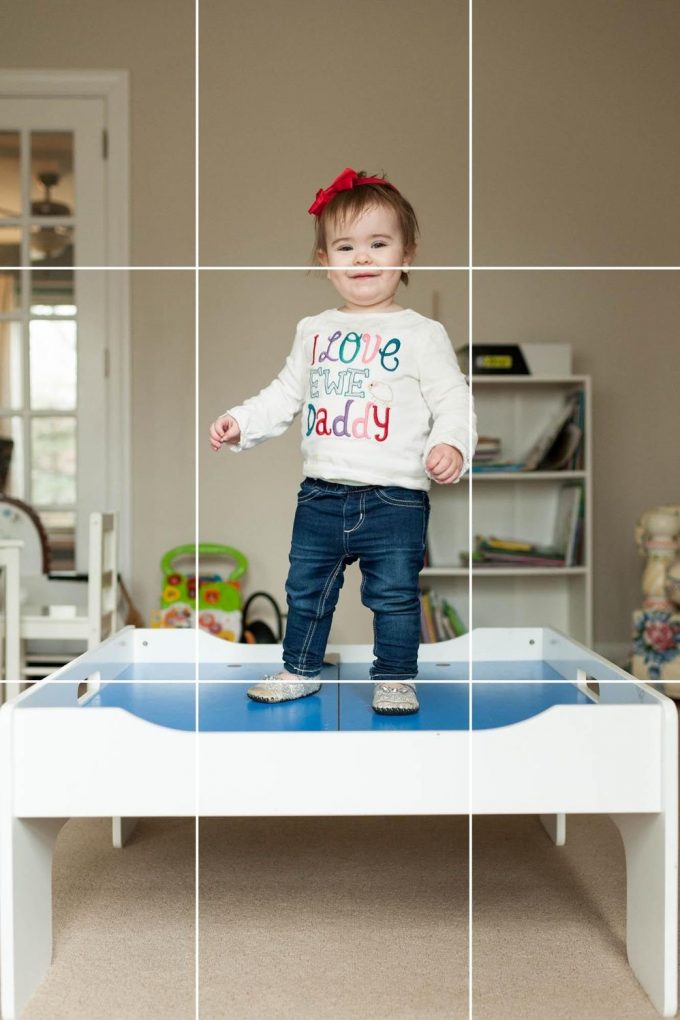
For vertical or portrait photos you want your subject’s eyes or focus in the top or bottom third.
Looking into the frame
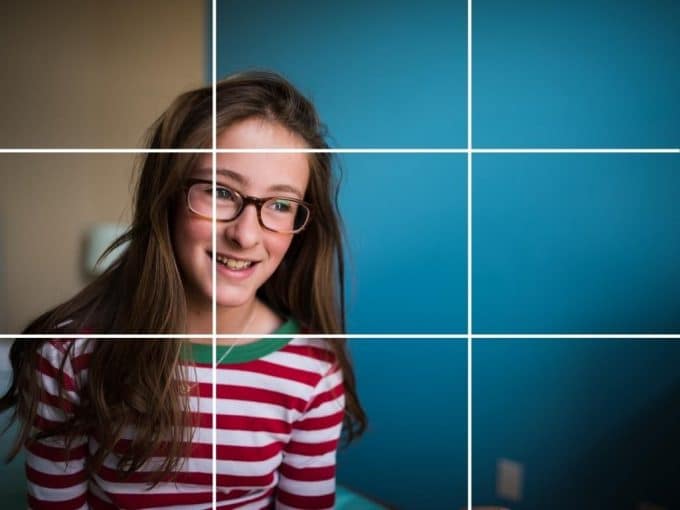
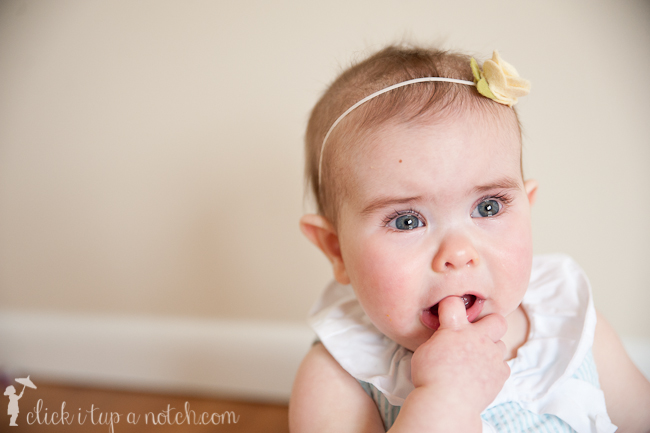
Another thing to keep in mind is that your subject is “looking into the frame”.
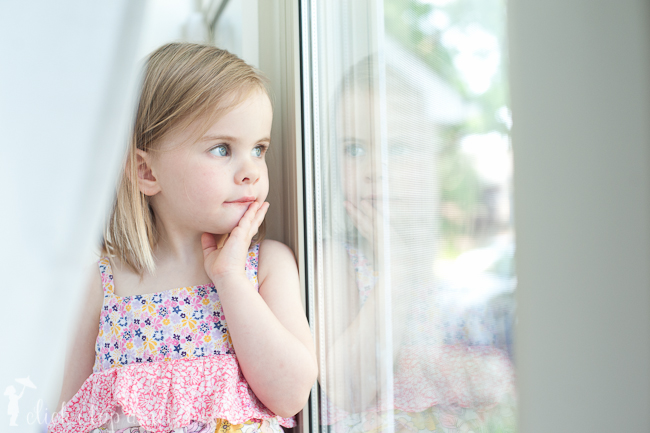
You want there to be empty space for your subject to look at. Same thing applies if your subject is moving. You want to give them room to “go”.
This is an example of someone looking into the frame, and then followed by the subject not looking into the frame.
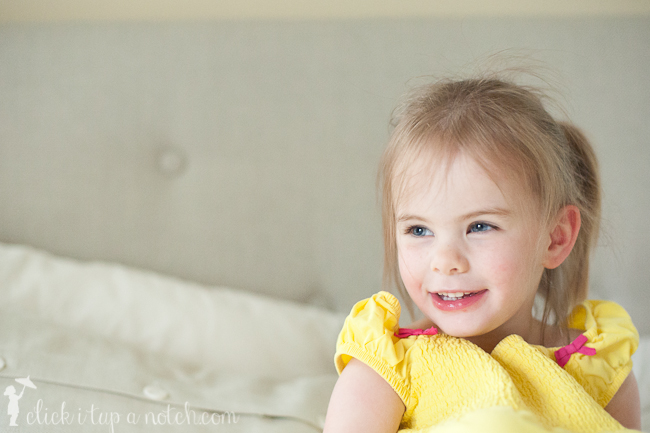
And this is an example of the subject looking out of the frame, this is what NOT to do.
See more: 8 Composition Photography Mistakes to avoid
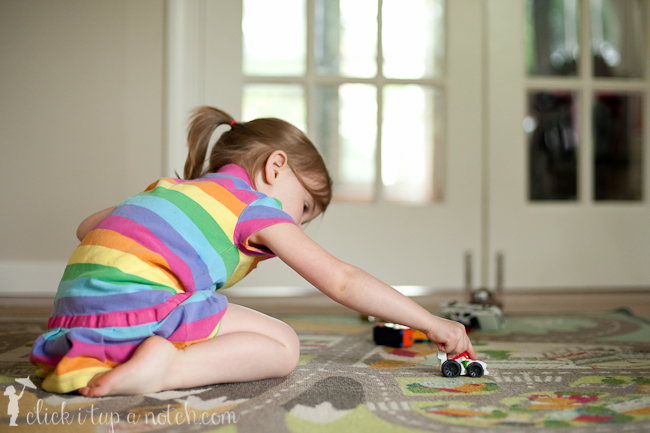
Leave room to go
Below is an example of “leaving room to go.” The child has plenty of room in the frame to let the viewer see the action.
Rule of Thirds is just a guide!
Please remember that if you take a photo and the subject isn’t looking into the frame or isn’t in a third of a picture, that doesn’t mean you have to trash it.
Some of my favorite pictures of my kids aren’t technically correct and they are breaking the rules. Who cares! I love them anyway.
Speaking of kids, you can teach this composition rule to them too! Read more about how to involve your children here: Photography for Kids
Grab your camera and start practicing!
Read more on Composition
11 Photography Composition Rules to Know to Improve your Photography
3 Ways Negative Space Will Enhance Your Photography
Story Telling Through Light, Emotion, and Composition
Over 100 Photography Tips to Elevate your Photography


This is great info. I knew about thirds, but this gives more in depth information. Thank you.
So glad you found it useful!!
The picture with your younger daughter sitting on the chair outside, did you use a certain editing technique to make the background blurred like it is or was that solely the result of the aperature? I’ve seen pictures like that and have always wondered how the photographer achieved that?
That was achieved by opening up my aperture (it was a low number) I am currently in Tokyo, so I can’t tell you what it was set at but I will check when I get home :O) I don’t use any editing techinques to blur my background it is always done with the aperture. Do you know the lowest number you can set your aperture to? I’m not sure what kind of camera and/or lens you have but if you have a DSLR, which ever lens you have on with determine the lowest number aperture you can set it at. Hope that helps!!
I’ve got a 50mm f1.8 lens. I’m able to get a blurry background but some of yours look almost like little circles of blur. Maybe its because of the lighting. Mine always seem to just be a blurry matte look.
Great! A 50mm 1.8 will be able to get you want you want. Yes, you are right sometimes I am able to get the blurry circles (bokeh). That depends on your lighting that is coming through the background. A good way to get that would be to find an area where the sun is shining through the trees, position your subject in front of the trees and you should be able to get some nice bokeh. Good luck!
Thank you! I will give that a try this week!!
Hope you share a photo so we can see your work :O)
For the pictures above did you use the centre focus point and recompose or did you use the off centre focus point?
I will look at your ‘changing focal point’ article as there may be something in there. Ta
Hi, i was wondering if you could recommend a free editing place. I would use the good ones like photoshop and so on but i really dont want to pay for them.
Hey Kathy!! I have not personally used any of the free editing sites however, I have heard that several of my readers like Picasa.com. I understand not wanting to dive into an editing program and investing the money on one just yet. Keep an eye out because sometimes they go on sale big time :O)
Thank you for you advice,
yes i think i might just wait for a sale! :)
[…] Putting subject in dead center of the image. Remember the rule of thirds? It’s their for a reason :O) It helps to add a little more interest to your image. I have so […]
What a great idea Courtney, I just came across your blog via the fractal of the internet and only just realized it’s in Oki! What great info!
What a small world!! Yes, we’ve been here for two years and are loving it here :O)
This is brilliant! I’ve going to read this over & over until its drummed in! Task of the week for me now ; ) Practise! Thank you
I was just told about this site and I am so excited! This site is wonderful and I can’t wait to read everything you have to offer. Great job!!
Welcome!! I hope you can find some useful information here! Let me know if you have any questions!
see it just goes to show how much i know about photography yet xD i’ve never even heard of this concept till now.
No worries :O) That is what I’m for :O) Let me know if you have any questions!!
[…] is a great explanation of it by Courtney at Click it Up a Notch. She also mentions here that when you shoot using the rule of thirds folks may comment – […]
[…] what you know about photography composition. For example, in this photo I utilized both the “rule of thirds” and the “golden spiral”. I love empty space on the side of a plate of food. It draws your […]
[…] can teach this age range even more about photography. Start with some basics in composition. – Rule of thirds – Limb chops – Leading lines – Fill the frame – Negative […]
Question: if you focus (meter) on the eyes in the photo to get those the clearest, it then natural puts them in the middle of the frame to one side or the other (depending if you metered on the left side or the right side). So do you meter on the eyes then move the camera to put them in the top 1/3? I must be missing something here. Hope this makes sense. Thanks in advance for your response.
Hey! Do you have a Canon or Nikon? If you have a Nikon, you have an active focal point which means you can move your focal point around to a different third of the image and take the photo. If you have a Canon, you will need to meter, focus and recompose. Check out this post and the comments – http://www.clickitupanotch.com/2012/01/tips-to-achieve-sharp-focus-guest-post-by-jaymi-mcclusky/
[…] you had to keep adjusting the meter! Such a light bulb moment! -Rules of composition-to include the rule of thirds, negative space, having your subject look into the frame and giving them somewhere to go (if they […]
This was a great article. Explains it so well.
Thanks!
[…] can teach this age range even more about photography. Start with some basics in composition. – Rule of thirds – Limb chops – Leading lines – Fill the frame – Negative […]
[…] way to take your photo from looking like a snap shot to something you want to frame on the wall. – Rule of thirds – Limb chopping and basic composition – Shooting from different angles – Fill the frame – Leading […]
[…] what you know about photography composition. For example, in this photo I utilized both the “rule of thirds” and the “golden spiral”. I love empty space on the side of a plate of food. It draws your […]
[…] white balance and how it affects your images – Basics of composition – incorrect limb chops, rule of thirds, looking into the […]
[…] was tempted to leave the image as is, even though he’s composed with Rule of Thirds in mind, I didn’t really like that he was almost looking out of the frame, and I wanted to […]
[…] 12: Rule of Thirds. If you are unfamiliar, you can read about it here. This website is a great resource for people starting out in photography. She also has a great FB […]
[…] 23, 2010 // No Comments Used the Rule Of Thirds from I knew about it, but didn’t really understand it. She really explained it […]
I’ve been practicing the rule of thirds with the grid on my camera (Canon T2i) It has really helped me to ‘see’ better. You can also move the focal point with this camera. :) Thanks for the helpful post!
That is awesome!
I love the photos from your kids… i wish mine would let take them some photos, they just run away… :D
I get that. I learned long ago not to expect much from them when I pull out the camera and we have all been much happier.
Hi! I’m VERY new to photography but had a quick question. Is there any special technique you used to capture the girl’s reflection in the first picture under “Looking into the frame” where she’s looking out the window?
[…] A great article that goes more in depth with the Rule of Thirds. […]
[…] Rule of thirds http://clickitupanotch.com/2010/09/rule-of-thirds/ […]
I am learning how to take pictures , and now i know the rules of thirds
i would suggest that the composition of the picture with the three kids on the blanket is awkward due to the strong line of the blanket being too far down the image. Perhaps the centers of the children or the blanket itself would be better positioned on the 1/3 line. If the blanket were not so high contrast o don’t think it would look so awkward. Just my opinion. Otherwise great shots.
[…] through the blog post that discussed the Rule of Thirds, the author inspired me to draw some quick lines on a photo to look at how the photo works within […]
Hi I’m a teacher. I’m about to start a Photography Club with my second graders!! This information was very useful thank you!!!
We will be using IPAds because we don’t have cameras so hopefully we can apply the “third” rule with them!!!
Hi Courtney, thanks for this info. I’ve heard of this but you explained it so well, i finally understand it and it seems easy too! My question is: does this rule of thirds apply when taking pictures of objects as well?
And thanks for the “looking in”, not out of frame tip!..i see how it makes so much sense. :)
Hi. I bought your book and I am thrilled. I am practicing the rule of thirds. I came across some back to school pictures, though and realized that Indont know how to practice the rule of thirds when I have two or more people in the shot. How do I practice rule of thirds when I am photographing four people or even just two? Thanks!
Just follow the same guide as if it were just one person :)
[…] – Rule of thirds – Limb chops – Leading lines – Fill the frame – Negative Space – Catchlights – Backlighting – Low light – Window light […]
[…] we’ll want to learn more about photo composition — the rule of thirds, leading lines, how not to chop off limbs. That sort of […]
This is so great! Just getting into photography a bit more with my new DSLR, hoping to get some beautiful pics up for my blog relaunch. I’m thrilled to have stumbled across this and am now devouring your site! lol
Thanks a ton for all of the great tips!
I’m so excited to do the rule of thirds
AAAAAAAAAAaAAaAA everything hurts aaaaaaaaaaa god please help
Ligma… Wow… I love the drama!
This post was very useful
The post was useful to photographers like me to excel my photos
This is super helpful! Thank you! I can’t wait to show these tips to my father (he has a new camera and this will help him a lot ;D )
I know the rule of thirds is pretty rad. I like how the pictures has it’s own focus point for each one. The way that the pictures turn out is so unique to me. I think that whoever created this form of pictures taking deserves a medal. This is a true work of art.
[…] the focus, and changing the exposure. Learn about composure techniques like leading lines and the rule of thirds. Then use the camera app on your device or another online app like Snapseed or Pixlr to enhance […]