I must admit. I LOVE my iPhone camera and iPhone photography. In fact? I may or may not have upgraded my phone simply for the camera and Instagram awesomeness.
I use my phone so often now rather than lug my big d700 around. Even my girls love it. They really don’t mind stopping for a picture when I use my iPhone instead. Also, I don’t see my iPhone as a device for snapshots and think of my “real” camera as if it’s reserved for everything else.
My phone is simply another tool to capture my vision.
In my mind, it’s pretty equal to my other camera; therefore, I use it in exactly the same way. It just plays music and games, too.
If you are new to iPhone photography or Instagram? Here are some of my favorite tips on how to get great images with “just” your phone.
iPhone Photography Tips
1. I look at my phone’s screen the same as if I were looking through the viewfinder on my Nikon.
I search for the same compositions. The same leading lines and light. My style is very “head choppy” with blown out backgrounds and slight haze or contrasty black and whites. I don’t reserve that style for just the d700. It carries over to all devices that I use.
I also shoot from above quite a bit. That is very easy to do with a phone camera. Just hold it above your subject’s head and snap!
2. I expose my iPhone photography shots, too.
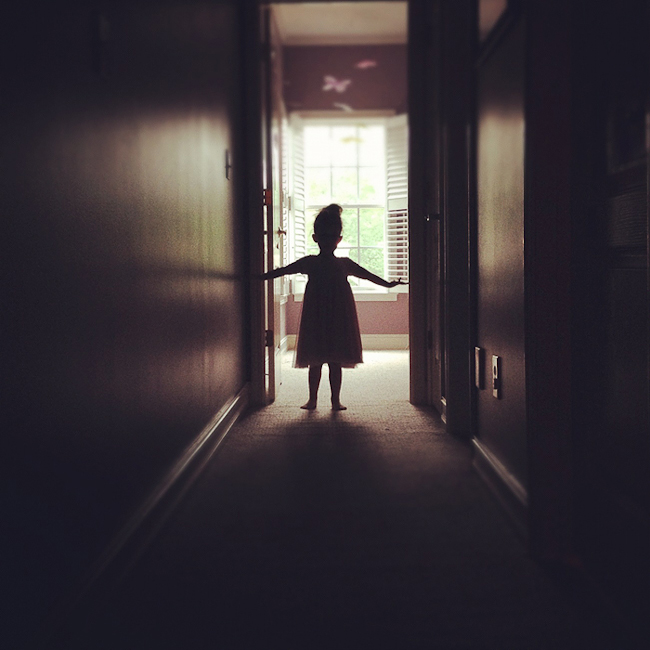
Did you know you could do that? I do this a lot. For example, in the shot below, I wanted my girl to be in silhouette so as I was setting up the shot I tapped the window behind her. Exposing for the window. If I wanted to expose for her, I’d just tap on her instead.
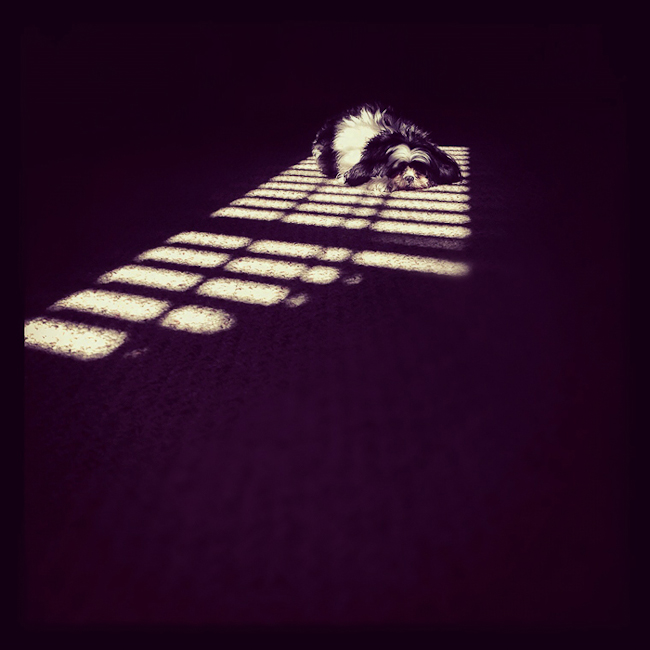
The same for the image here. My camera wanted to expose for my dog, but I wanted her in the shadows of the light that was falling in. So, I simply tapped where Lulu was on my screen and…tada…she’s in the shadow.
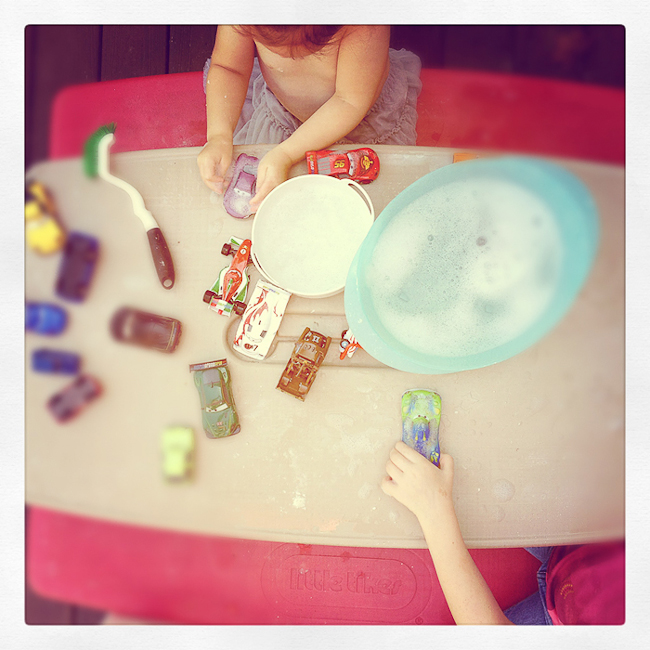
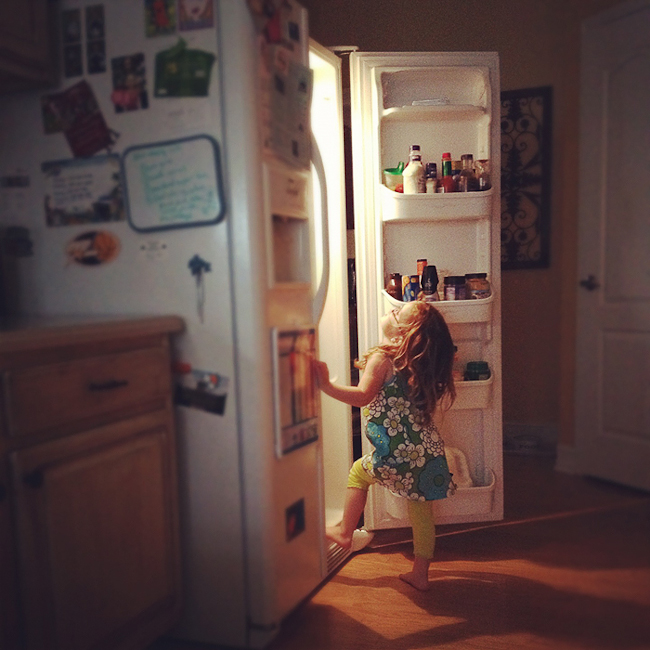
And this one. It was pretty late in the afternoon and my house was not very well lit. The only light was from the refrigerator and a nearby side window. By the way, I was just going for a fridge shot here, but my 4 year old ran up and started searching for a snack.
3. I use the camera on my phone 95% of the time rather than shooting right in Instagram (IG).
Why? Because the IG app seems delayed and I often end up with blurry shots. Also, I like to have the freedom to have more than one chance at getting the shot. When you shoot right in IG, you have to fiddle around, delete that one, and start all over. Most times, it takes too long and I am really impatient.
4. Once I take the shot, I pull it into Instagram.
Zoom and position the image the way I like it. I use the tilt shift option most of the time and I like the “rise” filter.
5. Sometimes, I use more than one filter on an image.
If I want an image with more color I will choose the “lo-fi” filter first. Upload that image to IG (so that it saves to my phone), delete it from IG and upload that “lo-fi” image from my phone. Then, I will choose the “rise” filter and use tilt shift.
6. I use IG to document our daily lives and I want to keep those images to use in my Project Life book.
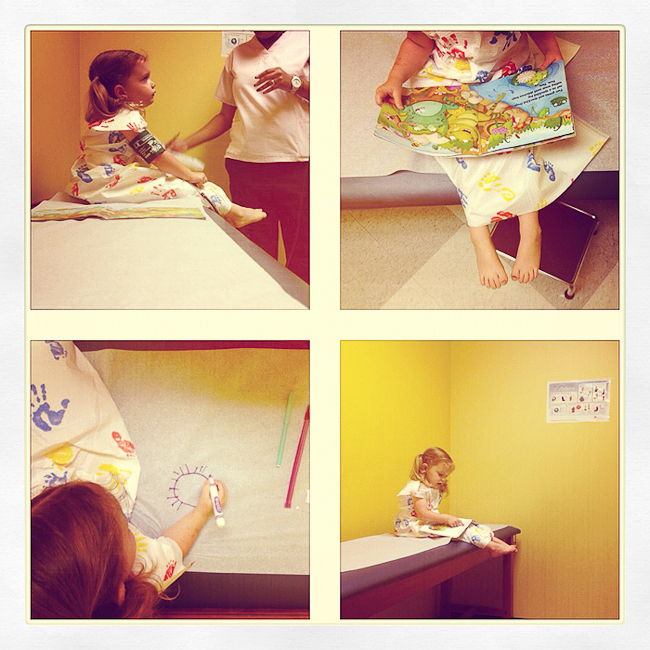
I’d say I take about 4 or 6 IG shots a day. I use the Frametastic app to create a collage of those images. About once a month I upload each day’s collages and have them printed through the Postal Pix app. I choose the 4×4 option for size and I have absolutely loved the prints when I get them back! Both apps were free, the prints are rather inexpensive and they look super cute! It’s a great and simple way to document your days.
You can also create the collage with unedited images, save it to your phone, upload to IG and then apply the filters.
7. My family enjoys keeping up with my girls and just because they aren’t on IG doesn’t mean they can’t follow along.
I can send them to my online IG stream so that they can have a peek. Just go to instagrid.me/*your IG username* and you can view all of your IG images, too.
And that is how I use my iPhone camera and Instagram. I must say, I’m addicted to IG. You can follow along with my family if you like. My IG username is freckledmommy. I’d love to see you there and follow you, too!
Finally, here are some other popular apps that go right along with IG and your phone’s camera.
Smugmug Camera Awesome (has a few compositional guide overlays)
6×6
Square Ready (let’s you keep the original aspect ratio of your image despite the square crop of IG)
VSCO CAM
Now, go out and use that camera on your phone just like you’d use your “big girl camera”!

Melissa is a former teacher and happy hobbyist living just south of Atlanta. She is married to her high school sweetheart and has three little girls. Capturing the lives of her family is something that she is passionate about. Some of her most favorite things are music, blogging, sushi, and Instagram. And of course, like everyone else, long walks on the beach. She is a prime girl shooting a Nikon d700.
Blog | Instagram Stream | Pinterest







Hi! Great post!! I’m the same way :) I don’t want to lug around my d700 either and I’m always taking pictures with my phone and love that instagram is now available for android! But I was wondering how you get the blurr on the edge of the photos? Is that just an iphone thing? I had wondered how people were doing the frames too but you’ve answered that :) I’m going to have to see if there is an android version. Unfortunately for me (I just double checked) I can’t touch button focus on different things I think my standard camera app on my phone isn’t as cool as the iphones!!
Hey Erin! To blur the image I just use the “drop” button that’s at the top…it’s the tilt shift option. Not sure if Android has that…??
This was a wonderful article!! I’m really enjoying using my IPhone to document our daily life and Melissa…you had some fabulous ideas to be even more creative. :) Thank you!!!
Wow. Really impressive. I don’t have an iPhone but I really like the idea of using it to create images that are just as wonderful as what you’d get w your dslr! Maybe now I need one…
You are me in a nutshell! I am obsessed with Instagram and all of my iPhone editing apps. I too want to upgrade to the iPhone 4s for the sheer reason of having a better camera!
With that being said- another way to go about the “double filter” on Instagram is by putting your phone on “airplane mode”- it’ll save the picture to your photo roll but not to Instagram- then you can open the saved photo in Instagram and apply another filter.
I’m SewIn2Disney on Instagram if you want to follow me- I’m going to go look for you now!
I LOVE my iphone for the camera – use it constantly and I an an IG junkie! I do exactly what you do – use the regular phone app and then pull it into IG. I tried to find you in IG but couldn’t…and the links to the blog etc. up top don’t work! just FYI!
Thanks for these tips – so awesome!
Hi,
I was wondering if anyone knows if all of this info is the same when using an ipod touch? I have instagram, but didn’t know you could pull pics into it. I’ll have to work on that.
Hi Laura, I’m pretty sure you can do this with an iPod Touch as well!
Great post! I love instagram! Just followed you, beautiful photos. (imagesbyerin is me).
Camera+ is a great alternative camera all that lets you set separate focus and exposure points. Can be handy. It’s so much easier than carrying the big camera around.
I absolutely love using my iPhone for taking photos. I have experimented with the Camera Awesome app. I bought the additions to it and love all the filters. I also think Streamzoo is really good. Basically, between Hipstamatic, Instagram, Camera Awesome and Streamzoo there’s pretty much nothing you can’t do.
Fantastic tips. I feel like such an idiot that I didn’t know that I could change the exposure point on my iphone! I thought I had to use Camera Awesome or Camera + or something to have that feature. Which I almost never use b/c with kids the shot happens so quickly I can’t mess with finding any app other than the one on the home screen. So excited about this! I also tried out the double filter thing and am loving that. Thanks so much!
Thanks so much for sharing. I’ve just recently begun to embrace my iPhone for capturing more moments and I’m really new to instagram and still trying to figure it out. I had no idea you could import an image in and apply the filters. Yay! I’m going to try that. I’m not far from you…just N of Atl. I’m following you on instagram. I’m mamasparrowphotog.
Well hey there, Christi! *wavey*! I’ll look for you on IG!
I have not lugged my camera with me as well. With the phone, it’s just easy access, I don’t have to transfer files to computer and convert/edit them. With the iphone, I can just take picture, edit ASAP and if I want to share to facebook or twitter, I can immediately do it as well – within a matter of a minute or two. I love instagram but I also use Tadaa. It’s similar to IG but this one allows you to control the exposure, brightness and contrast of your photos and plus filters. Usually, i use filters from one app and add finish with by adding another filter from IG. :)
IG: norenkay (just in case you want to add me up…:)
Love it girl! I have been looking forward to your post!!!! How do you bring your iPhone images into IG to edit? I didn’t know you could do that!
Now that I finally have an iPhone, I use the camera on it all the time. Love these tips! Thanks :).
Great post, fabulous tips and examples! I love my iPhone 4S and I bought because of the camera/instagram too. I use my iPhone far more than my Nikon D40… it’s just so much fun!
I am finally re-reading your article…love what you can do…my question: where do you find filters in IG? or do you ave to purchase them separately? I also tried to follow you on IG and can’t find you…thanks in advance.
Hi Kathy! I’m freckledmommy on IG. About the filters, they are located at the bottom when you open IG. You may have the filters turned off…?? In the bottom right corner, click that box with the triangle in it. The filters will be in a line under your image…just drag and you’ll find more to the right! :)
I love that you upgrade your phones just for the IG factor! I feel the same way – completely addicted to the ease of iPhone photos. Thanks for posting these very helpful tips. I’ll be using them to capture all our island adventures via @offshorecpa !
These are such fun tips. I just downloaded the Postal Pix app! Thanks for letting me know about that one. I link up with Liferearranged.com for Insta-Friday. You may like it too. :)
You mention in #4 that you like to use the tilt shift option in IG but I’m not sure what that is and was wondering if you could tell me. Thanks :) BtW I followed you on IG, I’m lady616
Hi Audrina! The tilt shift option is the drop icon at the top of your screen. It will show up once you have pulled an image into IG to edit. Once you tap the drop, there’s a circle tilt shift and a line tilt shift. You can size them however you like by pulling in or out with your fingers. Hope that helps!
Melissa
Great tips! By the way – Your tip/step 5 – if you have your iPhone in Airplane Mode, that keeps the image from being uploaded to Instagram and it is just saved in your Camera Roll. That saves a step – you don’t have to go to Instagram to delete the image to then add another filter. Thanks for the tips!
Thanks! That is good to know :)
I do all my food photos on my iPhone and always looking for new tips and apps – thank you for this helpful post!!
Loved this post! I use my iPhone 4 as a tool for photography too! Been waiting to save money for a DSLR for a long time! The, one day I started loving my phone! Though there are difficulties in low light photos, but that’s ok for instagram! :)
Thank you for sharing this post! I was really bummed that I was unable to bring my d3100 to Colorado with me on my current trip, but I sure have been having fun using my iPhone 4s on this trip! You have some great tips and I just started following you on Instagram :)
Some great tips here thanks! :) I love the double filter trick… never thought to do a sneaky delete and do that :) Thanks for sharing.. I’ve pinned this too! x
Hi, I’m (ckin2light) and I am an IG addict! Lol! I love the ease of capturing and editing on my iPhone, too! Thanks for sharing all your yummy tips with us here!
Hi, great tips! Do you use any of the external lenses on your phone that attach with a magnet? Thank you!
Thank you for posting this! I, too, am known to use a filter twice. I will select a filter, delete image, then apply another :) I just followed you (I’m “iheartmemories”).
Thank you for the tips. I’m a newbie who wants to learn more. Thank you.
Very cool tips. I’ve only just got an iPhone and had no idea about the touch-to-expose trick. :D
Thanks for the tips. I do have IG on my iPhone but confess I’ve been using Snapseed a lot. Have tried that one? You can apply multiple filters to the same shot without all that deleting. If you have tried it, do you still prefer Instagram? Thanks.
Hey Lynn!
Thanks for the recommendation of Snapseed. This post was written by a guest post so I’m not sure if she has tried that app before.
Very good information to have especially when trying to take photos for instagram. Thanks for sharing!
What a fun post!! I am new here and I am so glad to have found you!
My friends joke around and call me a professional iPhone photographer so I really enjoyed this. :)
I do exactly what you do when it comes to snapping photos for instagram and in addition I edit my photos in either the afterlight app or the snap seed app. They are both great for sharpening, brightening and giving your photo those tiny finishing touches that make all the difference. I am actually following along since I am new to using a “big girl” camera and I need as many tutorials as I can get! ;) Thanks for sharing!! <3 Susan (Ruby & Rosemary)
I love your tips! We’re camera sisters…I do much of the same but learned some awesome tips! Also, I wanted to add that IG has a printing website that is great. It’s very affordable and the quality of prints is great. I have a poster with 180 prints from my IG in 2013! Very cool.
Melissa! I love this post. I’ve been trying to use my iphone more often for everyday photos! I run into the problem though that my when I tap to focus, then it also exposes in that spot. So how would I get an in focus silhouette? And then, anyway around all the motion blur you get when lighting is not optimal? I’m thinking not since it always sacrifices shutter speed, but thought I’d ask to see if you knew any ways :) Thank you!
If you put your phone on airplane mode while you upload the insta pic, it will save directly into your roll of photos! That way you don’t need to upload then delete
Thank you so much for the information! I use my iphone A LOT (for most of my pics). I use Shutterfly to store them. BUT… when I try to make one of their photobooks, they tell me the picture resolution is too low. I have contacted Shutterfly, but they don’t seem to know how to get around this. Help!
I haven’t used Shutterfly but it probably has something to do with the size of the image when it is saved on your phone. Make sure you are uploading the largest image size.
I LOVE VSCO. I use it to edit tons of photos! But I’ve always wondered if it saves it under the same photo size!
If you put your phone in airplane mode before going onto IG it won’t show in your news feed but will save it to your phone.
Hi! I am having an iPhone 6s, I am planning to buy a DLSR, but it seems that you said that my phone is equally good. In fact I have taken amazing pictures with my phone and the panaroma mode is awesome.Do I go ahead and buy the DLSR?I am not a professional photographer.I am having second thought after reading your write up. Please respond. I am a General physician. Thank you.
Personally, I prefer to use my camera as it gives me more control over the image. The iPhone is great but nothing beats an DSLR :)