Occasionally, I have found that an image can use a little help bringing more focus to the subjects. There are many ways to do this in photoshop such as vignettes, B&W conversions, dodging and burning, and selective coloring. Just kidding about the selective coloring :) But, today I am going to show you how to add blur in post processing to bring focus to your subject in this photoshop tutorial.
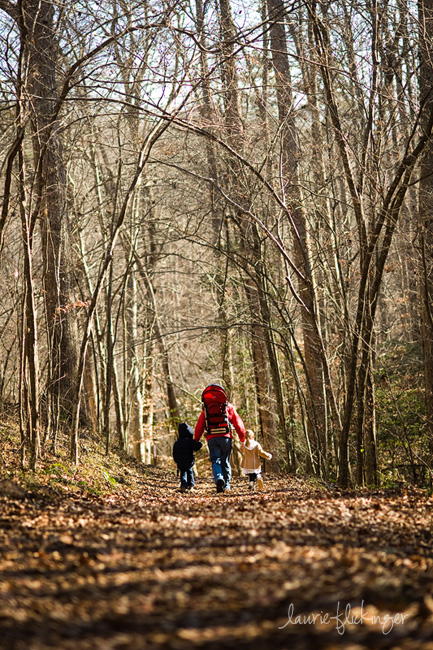
In the following image, the foreground is plenty blurred, but the trees above are much more in focus and it tends to grab my eye upward. Not to mention the trees form lines which lead the eye upward, as well. To take some attention away from the trees and bring it back to my subjects, I thought it would be a good idea to blur the trees a little.
This is the image right out of ACR, sharpened and sized for web.

Next, I cropped the image to put the subjects along the lower third of the image. I also went ahead and processed the image how I normally would. In this case, I deepened the color a bit and burned the upper and lower edges to create a light vignette.
Next up, I began the steps to start painting on blurry areas to bring more attention to the subjects. I’m using Adobe Photoshop CS4. There are two later editions out, but I’m pretty sure the steps will be the same or similar.
Control or Command J (to duplicate the background layer).
Filter>Blur>Gaussian Blur>I set it to 5 pixels. Because I will be lowering the opacity of the brush, I start off with a much more blurry look that I’m after.
Next, create a layer mask by clicking on the square with the circle inside. Invert the mask by using Control or Command I.
Here is a screen shot of what it looks like in Photoshop with the layer mask added and inverted.

Last, is the fun part! At about 40% opacity, I start by applying the blur using a white brush on the outer edges in an arch following the lines of the trees above the subjects.
By painting white on black, I am painting on the image. Painting black onto a white mask, removes from the image, as when “masking skin”. The shape of the arch or the shape of the mask will change depending on your image. Just think about how you want the subject framed and follow those lines. The trees seem to meet above the subjects, so I am using this as my guide. As I move inward toward the subjects, I decrease the opacity by half to 20%, and when even closer to 10%. You want to mimick DOF as it occurs naturally in camera. Here is another screen shot to show exactly where I have painted on the blur. The transparent area is where the blur is heaviest, the solid pink area has not been painted.

Before & After:
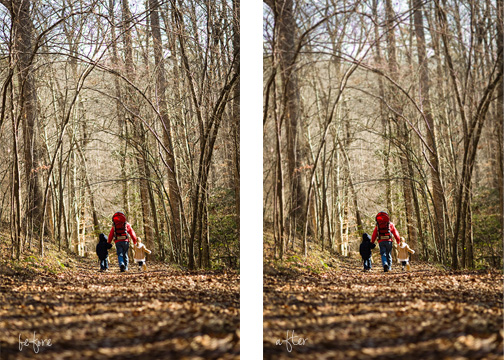
I think it is a bit subtle if you didn’t have a before image to compare it to, but it keeps my eye from going up, which was the purpose!
What trick do you do to draw the viewer into your subject??


Love this trick. It’s so simple, but it can be so effective. I love what it did in this shot.
I just took a photo of a fawn outside my house and used this technique – so simple and so smart! It did make a difference! The clematis he was eating was too in focus up close even after cropping and once I did your tip, I liked it much more! :) My husband won’t be happy that he was eating our clematis but … too cute to chase him away!
https://sphotos-a.xx.fbcdn.net/hphotos-ash4/616223_4540526754048_209385324_o.jpg
What great timing! I was just thinking about doing this to some beach photos this morning. Going to try it!! Thanks!!
information is very beneficial and beneficial
nikon d700
Exceptional publish. I used to be examining constantly this blog using this program . empowered! Very helpful details specially the final area :) We maintain similarly info much. I’m trying to get this specific certain information and facts for a long period. Thanks plus enjoy.