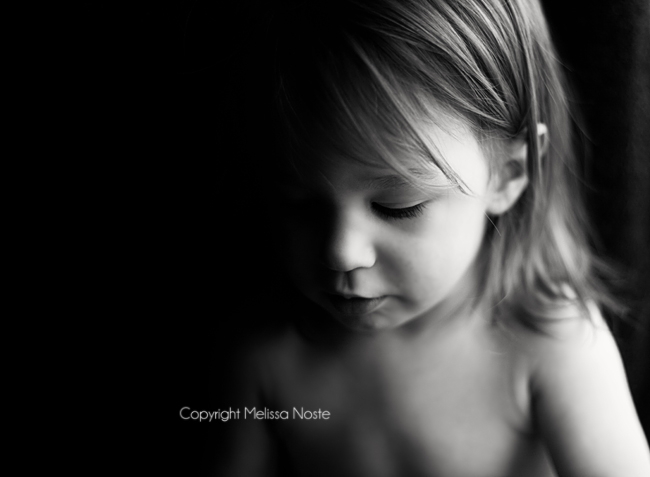
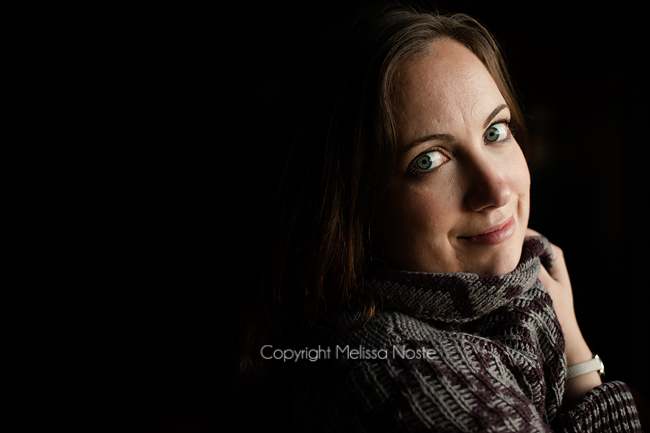
I got a lot of questions about a photo I took of my daughter with some dramatic lighting. There are several ways to achieve this shot but I’m going to show you the way I like to do it. From setup to editing. Here is the original photo. But today I’m going to show you how to achieve this with an updated photo of myself.
First off, this is for the most part a staged and creative edit shoot for me. In one case I am able to get this with my daughter just hanging out but you must be quick.
Lets first talk about the staged part. These shots are best achieved in strong directional light. You need a strong distinction between your light and the shadows in your frame. So my favorite place to take this photo is by my sliding glass door. The fact that I can manipulate my curtains to get my strong shadows and the light coming from one direction is ideal. You want to make sure that your one light source is coming through those curtains. I turn off all lights in the house and close any blinds as well to help create a strong directional light to achieve dramatic lighting.
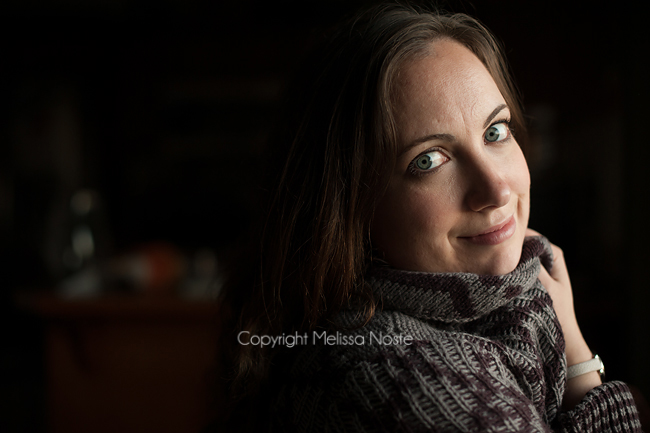
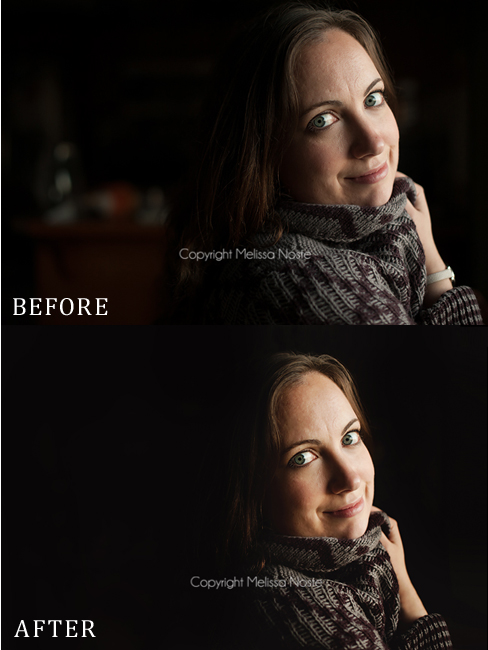
The particular set up is for this photo of me taken by lovely husband once I set everything up for him. (He was a bit easier than using the tripod.) Watch how the shadows are falling onto your subject, have them move their face back and forth till you find the most flattering light and of course the depth of your shadows you wish to achieve. For me I moved my face around and asked him to take several frames. So here is the photo SOOC.
Dramatic Lighting
As you can see the background is not completely black. That is okay because that is what post processing is for; remember this is a creative edit.
Dramatic Lighting Editing
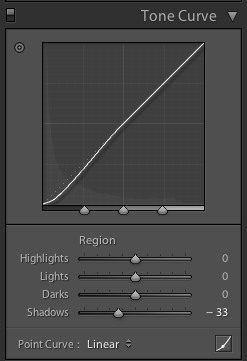
Again these shots tend to be manipulated in post processing to really get the deep shadows. Even with all the lights off and my curtains closed some light is going to seep in. Also, I love to edit in B&W when there are strong shadows. I feel the tones really bring out the emotion and can add so much depth to the photo. For me, I do a bulk of my editing in RAW form in Lightroom. The same look can be achieved in ACR. Most of the editing is down with the tone curve. There’s no rhyme or reason with this adjustment. You just want to play with each slider until you achieve your lights looking nice and bright and your blacks nice and deep.
Here are my adjustments for the photo of myself. Luckily with this shot, I only need to pull on my shadows slider.
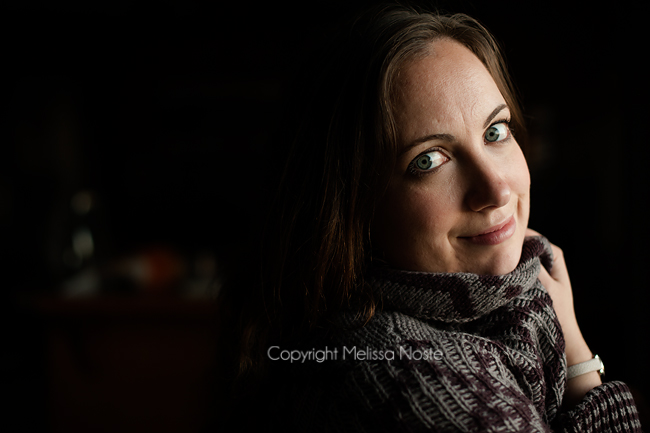
Sometimes pulling down your darks doesn’t make your background go black. This is when you’ll bring in your adjustment brush and go in at a lower exposure to really deepen the blacks. I selected my adjustment brush and lowered the exposure to -2.00 to get my background completely underexposed and black.
This will give you the basics to your edit. Now I’d move into Photoshop convert to B&W and put my finishing touches on the photo before saving it.





Thank you for the tutorial! I keep trying to get images with strong directional lighting but now realize light coming in from other places is keeping me from having that dark background and strong shadows. A “duh” moment for me but also an “aha” moment. :) I’ll try again now!
You look beautiful! Great tutorial!
You look great Melissa! I love this tutorial. I know it can be done in LR but for some reason I always pull my images into PS to do this sort of thing. Next time I will do it your way! :)
Just had to report back and say I was able to get a picture I love with more dramatic lighting because of this tutorial. Thanks again!
what time of day would you do this type of shot? i guess im wondering how strong the light needs to be. i imagine late in day or early. morning. thanks. its a beautiful shot!
When you adjust the exposure, do you mask out the subject so that they are not then underexposed too?
Thanks Melissa! This was a fantastic tutorial. Pinning right now and can’t wait to try!