This post contains affiliate links.
Q: How do I get my hyper pet to focus on me during pet photography?
A: I always try to remember something I read in the first 30 minutes before my first ever paid pet photography session. It literally saved me that day. It stated that pets need time to settle in a new environment…don’t expect to get any shots for the first 15-20 minutes.
So. in walks my first client with her two cocker spaniels. I had set out some props in the yard, had all these cute “poses” in mind… they all went out the door. THEY WERE EVERYWHERE! I think one of them even hiked a leg on my vintage box! The client got so embarrassed and I was a basket case (in my head) trying to figure out how the heck I was going to get them to sit still for anything!
Then I remembered the article and I casually walked over to the panicked client and said in my best “I’ve done this a thousand times” voice, “Oh, this is completely normal.. it’s ok, we will just give them 15-20 minutes to calm down and get used to the area.” Twenty minutes later, we were getting awesome shots, the client was calming down, and the dogs had a blast. So the moral of this story is…
BE PATIENT
Where as kids seem to “get done” with the whole process, pets do better toward the end of the session. It seems as if I am always getting my best shots in the last 10 minutes. Wear them down by running and playing for the first 10-15 minutes and then watch them relax and your time has arrived!
So here are some tips to then get them to focus on the task at hand:
1. If you are in an enclosed area, let them off their leashes and sniff around.
If not, extend their leashes as far as possible. Let them explore and sniff your equipment. Now is a good time to do a few test shots to make sure they are not spooked by the sound of your shutter. Set off a few rounds of clicks (not pointed at anything) and give the dog a few treats.
2. Have pockets of treats during your session.
I prefer the small soft kind like Pill Pockets or Lean Treats. Don’t give them out to freely, but make sure the dog KNOWS you have them.
3. Pick out a few noise makers that you can easily manipulate while shooting.
A example is a small hand squeaker. Another weapon of mine is an animal call lanyard. I have a “wood duck”, “crow”, and “squirrel”. Use these VERY SPARINGLY and only when you are ready to click. I like to wait until the dog is nice and relaxed and not paying attention to me…frame the shot…sound the call and just at the dog perks his head and ears up, take the shot. Magic!
4. There are two approaches to pet photography: With and Without a handler.
I prefer to work without a handler win most cases when possible. It minimizes the distractions and I am really able to connect with the pet. However, for this to work, you need an enclosed space… without it, you must rely on a handler (owner or an assistant). When using a handler, I change out their leash to a thin show leash that is easily cloned out of the shot. I have several colors so that I can try to match the color of the fur as close as possible as well. The rule is that the handler interacts with the dog as little as possible. If their dogs know commands, then they can ask them to sit, or get them to the desired spot, but after that I prefer for them to be silent so that I can then engage the dog with my voice, or noises or treats. I get them to slowly back out of the frame to the side and take my shot. The dogs will move. Its going to happen… again you just have to be patient
To Recap:
PATIENCE IS THE KEY! Pet photography cannot be rushed because you WILL get frustrated. Sit down, let them get used to you, the camera and the surroundings. Then run and play and wear the suckers out! You will know the right time, when they start to seek a spot to just sit and lay. Then its your turn to bust out the treats and make your moments happen!
Q: Yes.. but how do I get the dog to LOOK at me!?!?
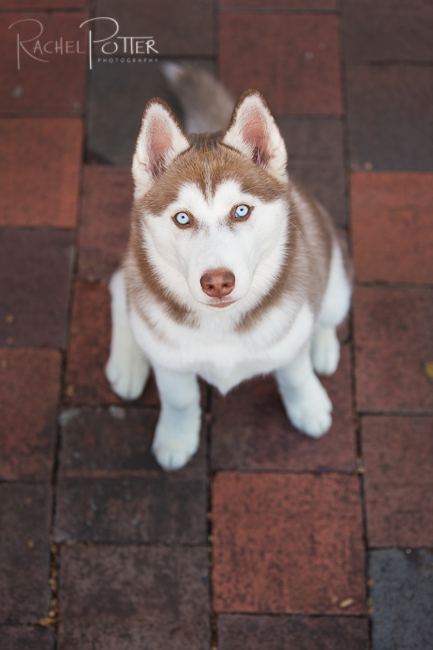
A: Eye contact is so important in my pet photography. I’m not happy until I feel like the dog or cat is looking into my soul. In order for that to happen, they must be relaxed and think I am a pretty cool human for the most part. So the first thing you have to do is make friends! I do this with my voice, my body language, and my position itself.
I vary rarely stand up to take pictures. I am usually on my rear, in a squat, on my belly or sometimes, even on my back! I am not too proud to get dirty, and want to be on THEIR level. I think this perspective is most flattering for the dog and gets them to relax. Will they come over and slurp you lens??… yes. Probably. I just do the best I can, talk sweetly and move back slowly if I can. When I was shooting with all prime lenses, this was a lot more frustrating, because every time I’d move, the dog would want to follow. I think switched to a zoom lens and this has become so much more easier for me!
In the studio I usually try to get the dog or cat up on something. It helps to reduce their movement and get them up to eye level. This will also work in a home. Using a bed or a chair facing a window is an excellent spot. If you are in a room, close the door to minimize distractions. You will constantly be placing the kitty or dog in the right spot and they will continue to keep moving… but you just have to BE PATIENT! (are you sensing a theme here?!?)
Ok, now for the eyes…
If an animal is in the general area and position you want, but looking away from you, THIS is the time to use the squeaker. Don’t over use it because it will likely only have an effect for a time or two, so be ready to take your shot when you make the noise. I usually put the call in my mouth and have it ready, frame my shot, squeak and click!
Learn to make crazy noises, and don’t be embarrassed to use them (see why I prefer to work alone?) Good suggestions: cat’s meow, coughs, and loud fake sneezes work well for me.
A word about treats. Use them sparingly. If you are photographing someone else’s pet, make sure that pet does not have any food allergies or sensitivities. I keep them in my pocket and a few in my non-shooting hand. When I do use a treat to get their attention, I hold it right above my lens. This requires you to build up a lot of arm strength if you are shooting with a large heavy lens like the 70-200. Keep your shutter speed as high as you can for the situation to help with camera shake. I often will say, “Treat” and take a few shots. When they start to lose interest, then I give them the treat.
Q: How do I get my dog to stay still?
A: There is a theme to my version of pet photography… (wait for it)… Patience!!
Some of us are blessed with dogs that sit and stay on command. I however have learned what I know working with rescues that don’t even know their name! They are nervous and scared. If I were to start chasing them around with my 70-200 without a little groundwork first, then I’d rarely get lucky enough to get a decent shot. When I first work with a rescue I try to go through a couple of steps. For the longest time, I didn’t realize I was doing this, but I think it has been vital to a successful shoot of any dog, including your own!
1. YOU need to relax so the pet can relax!
Dogs are masters of body language. If you are tense and frustrated, then will bee too! Cop a squat and let you and the dog meet each other on level terms. Set your camera down and love on the dog. Or let them sniff your camera and listen to its shutter. Make physical contact with the dog, pet it, talk sweet baby talk to it, rub its belly and give it a treat or two. This process may take 2 minutes or 10 depending on the dog. You know you are ready to begin when the dog comes and sits near you on his own accord.
2. If you haven’t yet, introduce the dog to your monster of a camera.
The 70-200 is an imposing beast… so let the dog see its not going to eat them. Click the shutter and give a treat for a couple of times so they will get used to the sound and hopefully associate the camera with a treat. Some dogs are particularly nervous about the shutter sound. If you own a 5d Miii you have an additional benefit of having Silent Shutter mode. Give it a try!
3. When BOTH of you are relaxed, take the dog to the general area you want to shoot in, and look for the best light.
Ask for a sit. If you get one, give a treat! Reward good behavior, and try to ignore the bad. You aren’t going to train your dog in the short time of a photo session, but some dogs catch on quick enough to get some good shots.
4. When the dog moves out of position, try not to get frustrated.
You can’t rush it. Just ignore him except in the spot YOU want him to be. With enough time… and positive reinforcement of doing what you want them to do. You should be able to get a few good shots. Remember to set your camera settings BEFORE you ask the dog into the area. Sometimes your opportunity for shots will be short and brief and you need to be ready!
5. If you are shooting your own dog, pretend like its someone else’s!
We all know we have more patience with other people’s children. The same goes for animals! Your attitude will be reflected in your body language and remember dogs are masters of body language! You will get what you give! If you are relaxed and having fun, more than likely your dog will mimic that behavior.
6. Give them something to play with!
Sometimes a favorite toy will grab their attention long enough to get them to sit down with it and guard/play with it. Be ready with your squeaker or treat to snag their attention for the split second and take your shot!
7. Sometimes they just don’t do what we want them too!
This is something you will learn to accept. You just have to figure out a way to make it work! In these cases, sometimes its just better to let them do their own thing, set your zoom to 200 and stay back and shoot sniper style. Throw some treat into an area with some pretty light and capture them in the environment you want doing their own thing. When dogs are acting natural, they usually position themselves in flattering positions by themselves.
Read more in the pet photography series
Pet Photography: Settings
Pet Photography: Focus and Lenses
Pet Photography: How to Photograph a Black Dog
Pet Photography: Getting THE Shot



this was an awesome post. i’m an RVT and budding amateur photographer and of course, I love animals!
Great article, Rachel. Just love your photographs.
Awesome advice!! As someone who has worked in the pet industry for over 6 years I can say every point was perfect!
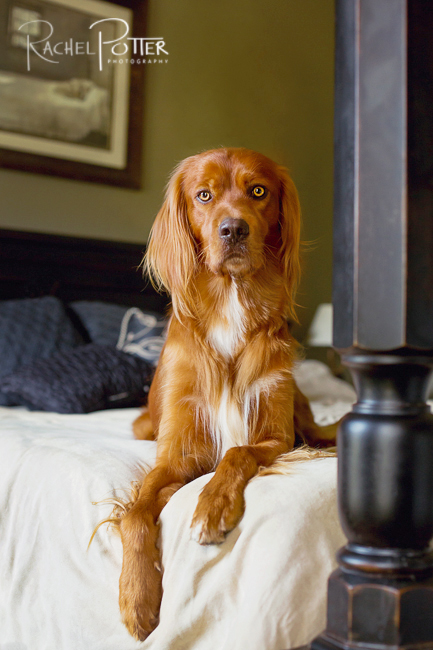
Loved all of your tips and advice! The one of the dog on the bed is one of my all time favorites from you, it’s just gorgeous!!
One of my favorite articles, Rachel!!!! I’m so excited to try your recipe for pet photography with my two pups. Nothing I would love more than to have a beautiful portrait of them next to our family. Thank you!!
Very very helpful, Rachel!! Thank you so much for these tips!
Amazing post. Such great information, Rachel! I just adore you and your work!
Loved reading this Rachel, your photographs are gorgeous <3
Hi, I am starting a pet photography business and ever time I talk to someone about opening up a studio they seem to always ask “well if your photographying pets why would you need a studio?” and I always have to respond with “I like giving my clients a variety.”.
In think of doing so I was wondering if you could show us around your studio or give some helpful tips on what to have in a pet photography studio!
I love the picture of the dog on the bed, he really is king of that castle!
These are super great tips! I am hoping to take some photos for a local animal shelter and these will come in handy and give me some confidence! Thanks so much for sharing!
Thank you for the wonderful tips! It does make it easier to shoot once the dogs are a little worn out and have some play time to get that energy out of their system! I find that if you are photographing your own dogs it really helps to tune in to their natural rhythm so you know when they have energy for action shots and when you can get more solid poses.
I’ve been shooting for an animal shelter and have found that keeping a tennis ball under my chin while snapping a shot with the dogs that LOVE playing fetch gets me some really great shots too. I throw it a few times, they go get it, some bring it back, others just play with it a bit and drop it. I either take it from them or pick it up; then stand on a chair, place it under my chin after getting the dogs attention with it again, and they instantly look up with the perked ears, and I shoot. Works like a charm for quite a few dogs.
I usually shoot with a 50 mm 1.4 or a 35 mm 2.0 lens. I haven’t tried a zoom lens yet. I may do that next time. I know I will take your advice about the aperture.
One other tip/share: I also found last week, that the dog whistle doesn’t work like it does in the movies. I tried it with nearly 20 dogs and NONE of them perked their ears or even stopped for it. My assistants “mom whistle” worked though. I will take your advice and look for an animal call. Thank you for this article. It is FANTASTIC!
Trish…I just recently purchased a silent dog whistle for use with my dog. He immediately reacted by ears up, head snapped around towards me. Mine does have one end that screws tighter/looser. I took it to be an adjustment feature. Perhaps your whistle just needs adjusted??
Love this article Rachael!!
Barbara,
My daughter found that feature today. lol Thank you so much for the helpful hint though. I had just bought it moments before heading to the shelter, so I didn’t get a lot of time to actually look at it. I just figured they came ready to work. :)
Rachel thank you so much for sharing these tips. I am working my way into pet photography. I think they are the best to photograph (along with God’s awesome nature). I am looking forward to implementing some new ideas.
Hi, Rachel;
What a great article! And what beautiful photographs! I wanted to know what camera and lens did you use for them, as I don’t have any equipment as of yet, but would like to put the equipment on my Black Friday shopping list. :-) Also, do you have any other recommendations for a newcomer as far as equipment goes? Please let me know. Kind thanks.