Today I am going to share a little Photoshop editing tip on how to create more negative space with the free transform tool. Sometimes cloning or using the spot healing tool can become a very frustrating process. I picked up this technique to learn how to quickly expand my frame and it has saved me a world of time. However, I do need to point out that this will not work on every shot. Photographs with backgrounds that have textures, patterns or objects in them are not going to benefit from this Photoshop editing trick. I do have an example at the very end that will show an example of this. Most of the best uses for this are with photos with smooth surfaces that are all one color. Some examples may be a colored wall or a blue sky or if you background is completely dark.
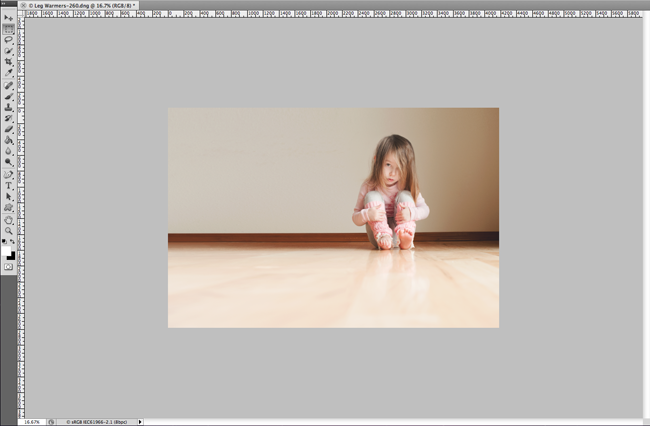
This example is in my dining room. The wall is, of course, perfect because it is a smooth surface, the trim works because it is a straight light and the flooring suprisingly works because of how light the color is that most of detail washes out. It actually helps lead the eye to the subject. So follow along with these ten simple steps and at the end I will also have a video tutorital for you to follow along.
Photoshop editing: 10 Steps to Creating Negative Space
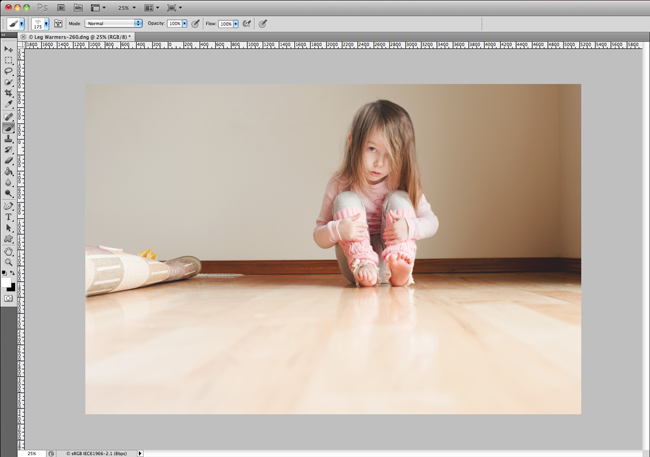
1. First thing you need to do is start out with a clean edit. This is a personal choice, some people like to do all their cloning and munipulation and such before editing the photo. But for this one I choose to do it the editing first.
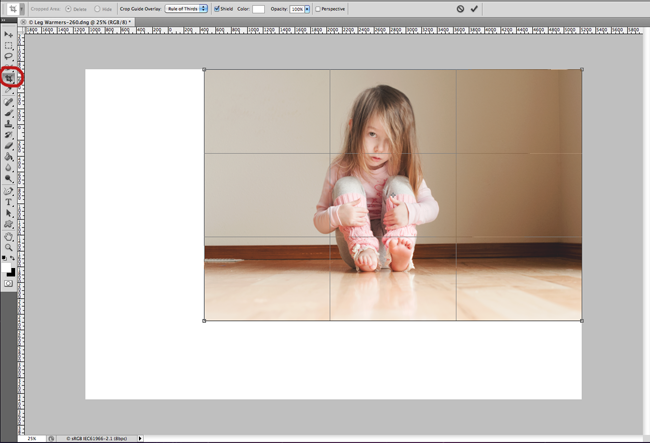
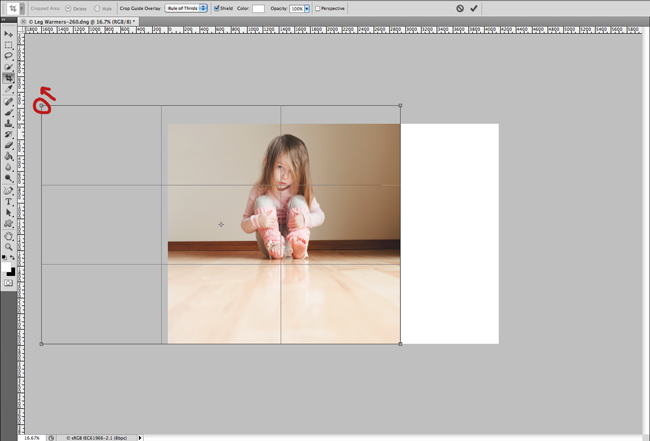
2. You are going to want to grab your crop tool (circled in red) and crop out anything in the photo that you don’t want. For me, that would be the rug to the left. When you do this you’ll notice it’ll stop the crop at the edge of the picture. That’s okay, go ahead and release your mouse but DO NOT hit the check mark up top or hit enter.
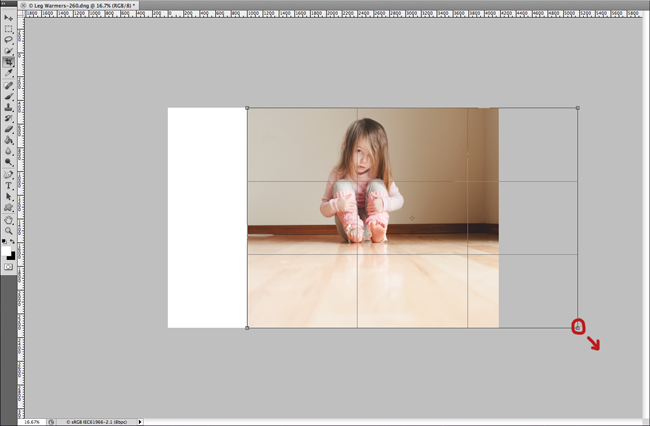
3. Next, we need to extend the crop past the orginial frame. So you’ll want to find the bottom corner square (again circled in red) and click and drag that out as far as you want. In this case, I wanted to include the whole floor so I’ll pull it till the whole floor is showing. This is now when you’ll either want to click the check or hit enter to okay the crop.
4. Now this photo has a vent to the left her that I didn’t crop out but still want it removed. So I will go ahead and use my healing brush and stamp tool to quickly remove the object.
5. We are going to do the same exact thing on the left hand side as we did in steps two and three. This time I want to crop out the right hand side that we added and then also the corner on the right hand side because I find it distracting. I’m also going to pull the crop up a bit over her head because I don’t like how tight it’s croped to her head.
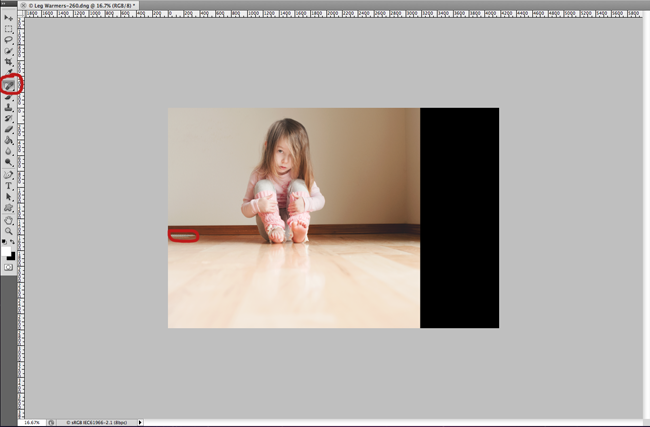
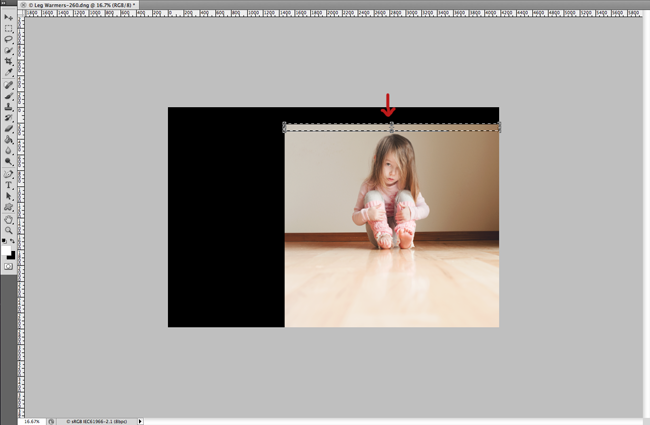
6. Now that you’ve got the final crop you want, it’s time to rectangular marquee tool. So click on that (circled in red) and you are first going to start with the top part. I like to start with the smaller area if I’m expanding two areas of the frame. Draw a box along the frame of the orginal frame. Be careful not to include your subject’s head or any object that you do not want stretched. It’ll look like an marching ants square when you release your mouse.
7. When you have your box drawn you are going to want to make it free transform. You can do this two ways, the first is the with keyboard shortcut crtl + T for PC or command + T for Mac. Or you can right click within the box and click on “free transform” in the drop down menu. This is going to make your box have handles in each corners and in the middle along the lines, also know as side handles. The handle you are going to want to focus on is the side handle of the side of the frame you are going to stretch (refer to red arrow).
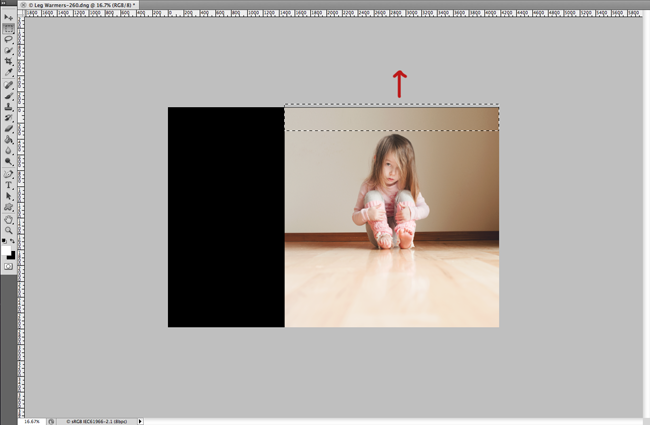
8. Grab that side handle and drag it all the way up to the full crop. The hit ctrl + D or command + D to deselect the box.
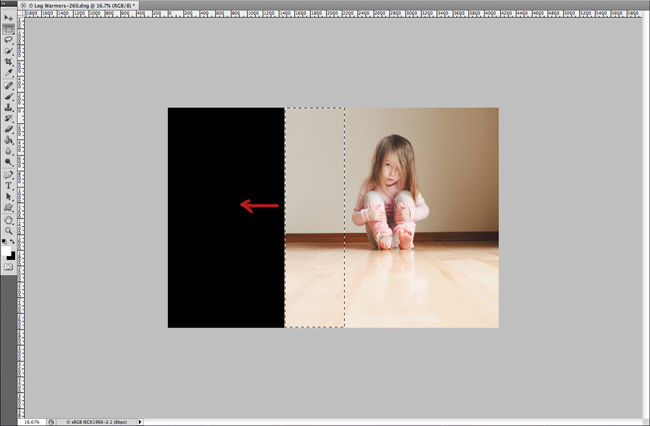
9. Repeat six through eight once again to the left side of the frame.
10. Deselect the box once again and you have your final product.
Here is a look at the before and after the shot.
Here is an example of when this technique is not suitable. The texture of the carpet does not work with the stretching of the frame as you can see on the right. With this photo is best to use the stamp or healing brush tool tool to expand.
I hoped you all enjoy this trick and if you have any questions please feel free to ask. Below is the video with me demonstrating this Photoshop editing technique.
Photoshop editing video: How to create negative space
Creating Negative Space – CIUAN from Melissa Noste on Vimeo.
3 Ways Negative Space Will Enhance Your Photography




Awesome! I had no idea this could be done– I’m forever using the cloning brush when I want to turn my 4×6’s into 8×10’s — this will be so much easier! Thanks for sharing!
Yeps. Learned PS before I got into photography about 8 years ago. Once you understand what makes a great photo (technically and compositionally in camera) the options in PS are only limited by your imagination. ♥ it! Great post as per usual.
This is AWESOME! Thank you so much!!
great examples, both the good and the bad. and little girl’s toes are killing me!!! ;-)
This is so helpful; thank you!!!
Already put this into action!
i love this! thank you so much for sharing!
I love learning new techniques!!! Thanks for the great tutorial!
Great post, I can’t wait to try this!!!
Just used this trick on a photo, LOVE IT! Thanks
Sorry I’m new at this, but does this trick work in Lightroom 5? It’s a really nifty trick.
@Amanda – Not in LR. You need the transformation tool that comes in PS, I believe. :
thank you for sharing! do you know if I can do the same with Gimp? this is really amazing *__*
I am a beginner for photography. I dont want to do anything professionally, but I do want to capture great photos that i can edit in Photoshop. Im expecting my 4th child on Xmas and i just want to capture moments of my growing children. What’s a good beginner camera would you recommend?
this is simple but great ide.
thanks for your share. I like Photoshop :)
Great job! This photo looks so much better with a bit more space.. Love the idea!
Can this be done in PS Elements?
Hi,
Im using CS6 and when Im cropping its not leaving me with the white back ground you get. Am I missing a step???
So how would you use the stamp or healing brush to expand?
I dont see any questions being answered.