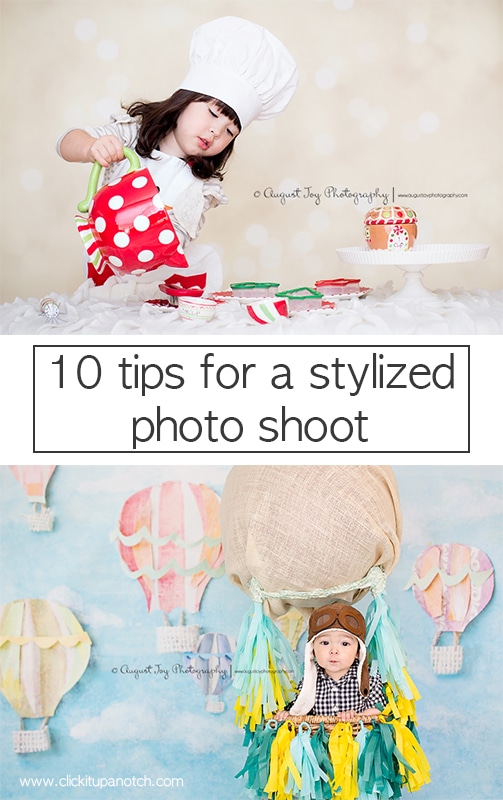
Stylized photo shoots for my little ones are my absolute favorite. I get to blend my love of creating props and styling with photography. That’s a win win in my book. However, I have a few things working against me. For one, renting a studio space in our current city is painfully expensive. Two, the space I do have (my family room) is small. Lastly, our house is poorly wired and using AlienBees (toasters, space heaters, etc.) on that side of the house can trip the circuit breaker.
Thankfully all these “negatives” have made me better at understanding natural light indoors. This means any of you can create a studio styled shoot at home WITHOUT spending a fortune on equipment. Here are 10 tips for studio style shots at home.
1. Find the light.
We have two large windows facing south. The absolute best light coming through our windows is usually mid morning. I diffuse the light coming through these windows with the paper shades that came with our house, but sheer white curtains would work well.
I shoot in front of the large sliding glass window and also let the light flood in from the window to the right. Avoid using any overhead lighting or lamps. You can see the reflection of one of our windows in my daughters sunglasses below.
2. Use what you have.
You don’t have to spend a fortune on fancy flooring or backdrops. I used a couple yards of fabric hanging from my backdrop support system. You can see that it’s not very wide and the SOOC shot is full distractions. A little bit of cloning and cropping made this photo 100 times better.
I also want to point out that you can see me in her reflection. No extra lights. Just the window. Use what you have.
3. Magic numbers.
I have what I like to call my “magic numbers”. Your magic numbers may not be the same as mine, but thankfully you can adjust your settings. If the light is perfect in our family room, I’ll start at SS 1/200, f/2.8, and ISO 800. I’ll bump my ISO to 1600 if it’s cloudy out, but I usually stay between 800 & 1250. I very rarely take my shutter speed below 1/160 when working with my kids at large apertures.
4. White balance, white balance, white balance.
Did I mention white balance? It’s important. I prefer using the Kelvin method because it makes the most sense to me. I tend to stay around 5500K indoors and adjust it as needed depending on the colors I’m shooting. Custom white balance is also a good option if your camera doesn’t have the Kelvins.
5. Keep it short and let them play
Some of my favorite studio shots are not posed. I let them play and explore. I make the most of my fifteen minutes. My children have “photographer’s child syndrome”, so I keep my expectations low and work as fast as possible. I try to get their attention by being as silly as possible so they’ll smile for me first. Once I get one or two “posed” shots, I let them play and usually end up getting genuine smiles in the process.
6. Get down to their eye level.
I always get down to eye level with my kids unless I’m trying to capture a specific perspective. This means squatting or sitting on the floor with my toddler and often laying on my stomach with my baby boy. This also prevents me from casting shadows and blocking the window light. Two birds, one stone.
7. Keep it simple.
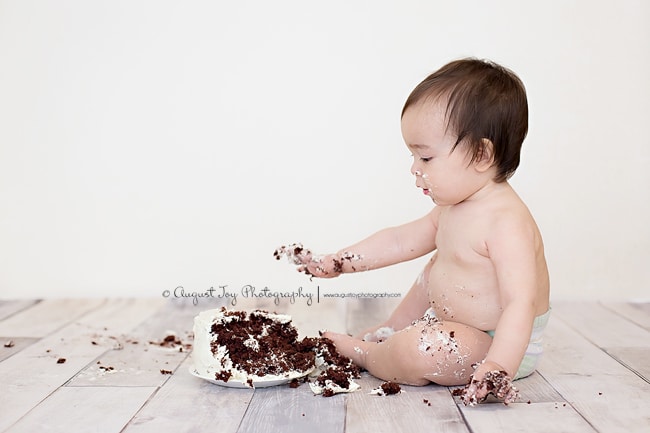
I love the look of styled shoots and tons of props, but sometimes its better to simplify things to keep the focus on your subject. This is one of the images I took for my son’s smash cake session. Notice the lack of props and neutral colors? I knew that these photos were going to get framed, so I wanted the focus to be on him and the cake. Nothing else. More proof that you don’t need a ton of props to achieve a polished studio session from home. Creativity is your greatest asset.
8. Think outside the box.
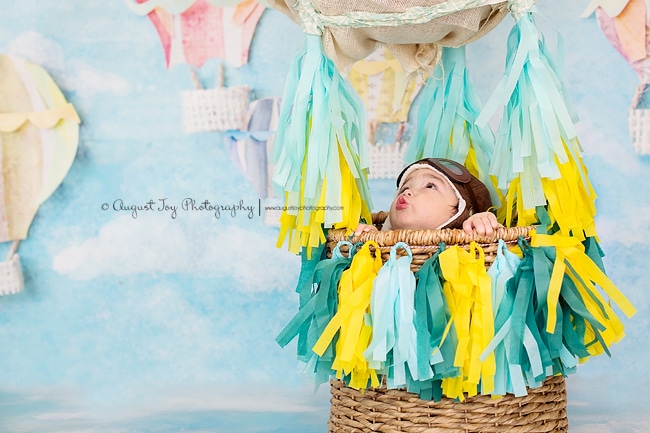
I like to mix up my simple sessions with my styled sessions. Get creative and think outside the box. The hot air ballon was made with a fabric covered exercise ball, three mini hockey sticks, tissue paper, fabric covered duct tape and our blanket basket. These were all things I had laying around the house. Props don’t need to cost a fortune to make an impact.
9. Relax.
Kids can feel your emotions and feed off of them. Have fun. Cut loose. Pretend to eat imaginary cookies and sip pretend tea. Making funny noises and silly faces. Engage them. Giving them positive reenforcement with extra enthusiasm will help them feel more comfortable about having to sit still in a small area.
They really do want to make your happy and do a good job, but sometimes being put on the spot causes them to behave differently. Reward them for a job well done even if you didn’t get any keepers. The older ones will remember and be more willing to be your muse the next time you ask them to sit for you.
10. Practice makes (almost) perfect.
If your kids are napping or away at school, set up your makeshift home studio and use stuffed animals in place of your kids. Take note of the shadows and light. Fiddle with your settings to see how it affects your final image. Get comfortable. I did this all the time when I first started doing in home studio sessions and spending an hour here and there helped tremendously. You’ll never get better unless you practice and sometimes that means using a stationary object as your model.
I hope these tips help you capture those studio style images you crave without having to spend big bucks on gear you can’t bring yourself to invest in.


Such cute images! Thanks for sharing and showing that you don’t have to have a studio.
Great tips! Love the fabric you used in with the cookie cutter pic-it looks like frosting! Beautiful images!
Hi! Those are wonderful! Do you place them with the big window behind them or behind you? I have great big windows for natural light and was wondering what would give me the best light to work with. Your tips are so helpful
Not sure if you saw Maria’s response so I’m posting it here :)
“Breanna- I place my kids about 10 ft from the window facing me with the window behind me. Make sense? You can also place them at a slight angle for natural shadows. I have two large windows. I shoot in front of one and the light also pours in from the right. This makes the photos a little less flat. Thanks for reading and hope this helps!”
This is so well written and easy for a new photo taker to understand. I love the idea of magic numbers and getting to know that special place in your house that you can go to and rely on for some great light. Spending today getting to know my house and my own magic numbers. Thank you again.
Breanna- I place my kids about 10 ft from the window facing me with the window behind me. Make sense? You can also place them at a slight angle for natural shadows. I have two large windows. I shoot in front of one and the light also pours in from the right. This makes the photos a little less flat. Thanks for reading and hope this helps!
Hear is a great opportunity to get your electrical fixed among ther things you need around your home I am an electrician and can do plumbing and handy man work toss that around ok barter the work and wages ok? Tom
Beautiful photos! And great ideas :)
This is great Maria! Just in time for me to try out some new Valentines styled sessions! Thank you!
Hi there :)
I’ve taken my dslr out of the bag to shoot in Manual, but can not seem it figure out why my photo’s are coming out dark.
Maybe this post will help – http://clickitupanotch.com/2010/09/shooting-in-manual-the-basics/ :)
Thanks for the tips Maria! Your Christmas shoot is is cute! Where is that backdrop from?
This is a great post! I have been needed to refresh my ideas for children photos so I am glad you made this. I will create some ideas through this! Thanks
Just wanna say thanks for these wonderful tips. I’m a beginner and I love seeing other golden hour lovers photos! Oh and go Navy and go S Korea!! (I’m prior navy with Army hubby living in S Korea)
I enjoyed reading this post. I have a toddler and a 3 month old, both boys. Such awesome pics of your kids. Thanks for the tips on taking good natural lit pics. Sometimes so hard with a busy 2 year old
Wonderful article! I love the background in the Christmas photos. Could you tell us where you got it? Pretty please?
Hey Dawn,
This was a guest post but my guess is it is a sheet with white christmas lights on it :)
Thanks, Courtney. I was really hoping to learn it was a backdrop, because I’ve been less than thrilled with my attempts at the Christmas light setup. I can always see shadows of the cords, and storing them…yikes! So I took a look at Lemondrop Backdrops, which seems to be one of the trendier places to get them. I found the exact one used above! You can tell by the pattern of the bokeh. Anyway, for anyone else interested it’s called Cream Bokeh. I just ordered mine. First time buyers get an extra 10% off with coupon code FRIEND too. Their shipping is a little hefty, though, but that’s by necessity for the product I suppose. (I hope it’s okay to mention that here, Courtney! I’ll totally understand if you need to delete it.)
Cool :) Thanks!
Absolutely Absolutely LOVE this! Thank You! We are moving into our new house in about a months time and it has awesome light in the lounge! I can’t wait to start setting up shoots like this with my little guy :)
Such great tips! I love the hot air balloon idea and your little ones are so precious!
Awesome post. Always glad to see what people can do with small spaces. I need that reminder myself. :)
Love the hardwood floors you used for the cake smash. Back drop or your real hardwoods?