
One of the things I love most about photography is the creative outlet it gives me. I am a creative person by nature and I’m always looking to try something fun and new. Just like with all creative passions, photography can often lend itself to those creative blocks or ruts. Experimenting and trying a new technique is always my go-to for pushing myself out of that block – which is how I stumbled upon prisms.
Read more: Peek Inside My Camera Bag
*This post contains affiliate links.
I am a sucker for everything light and I had noticed these flare effects on some photos in my Instagram feed, so I did some research and found that prisms + your camera = crazy fun photos. Prisms are inexpensive and are super easy to toss in your camera bag when you’re heading out.
The options are endless when it comes to photographing with prisms and it just takes a little experimenting to create some unique effects and fun photos. To use a prism, just place it in front of your lens while capturing an image.
-
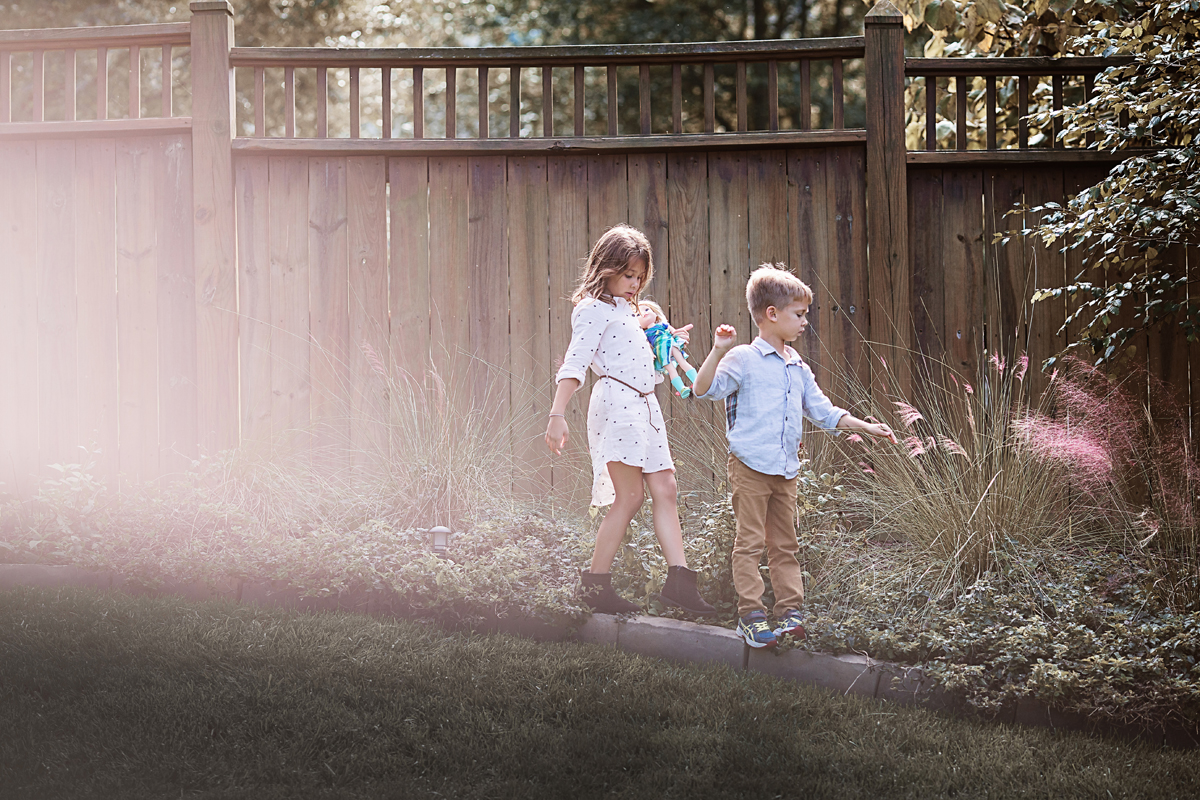
No.01Experiment
There are no rules with prism photography and the best way to figure out what works for you and what you like best is just to experiment! By moving, twisting and rotating the prism in front of your lens, you are moving and changing the way light is effecting your image, so no two images will ever be the same.
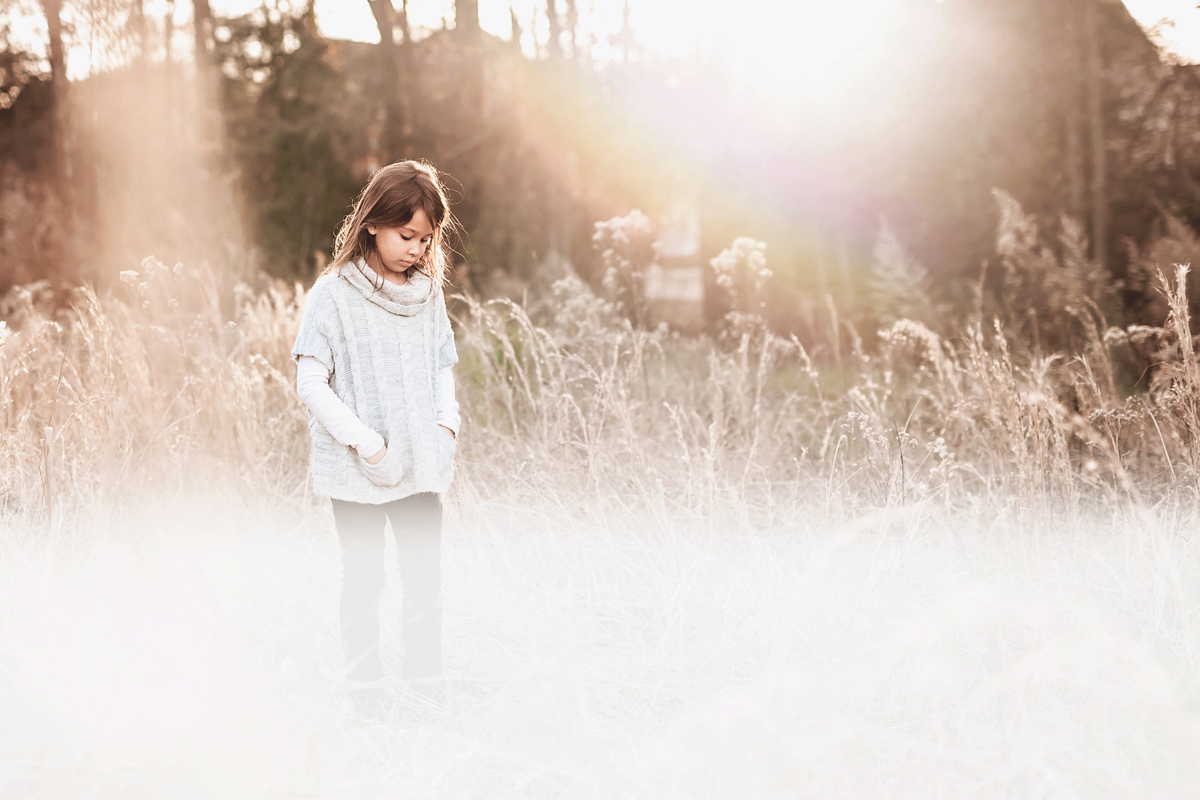
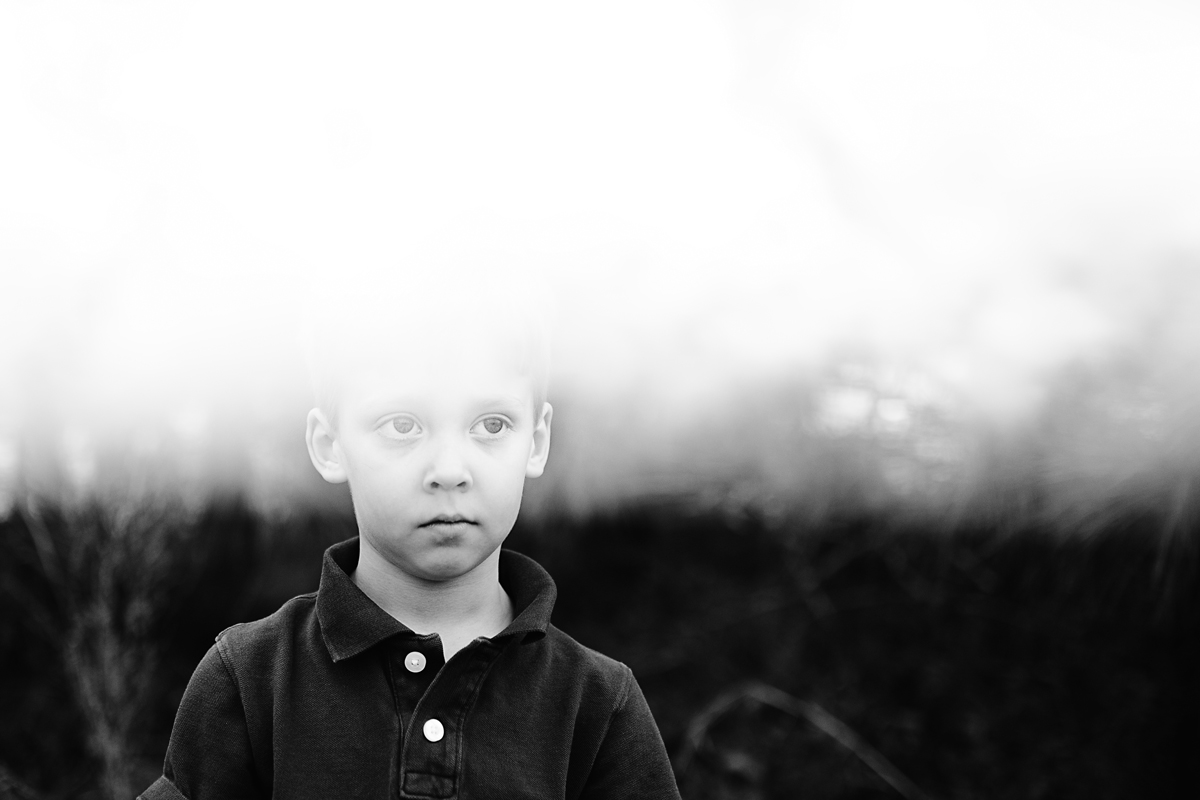
With a prism, you can achieve interesting light and flare effects – such as rainbows, blur, “double exposure”, fog (or white outs) and light leaks. Try placing the prism along the bottom or top half of your lens to create a “fog” light. Or experiment with placing the prism just on one corner of your lens to create a smaller and subtler light flare.
The fun part really is experimenting and being creative!

-
No.02Use live view mode
Sometimes it’s hard to discern how the prism is effecting your image when you are squinting through the viewfinder (while juggling a prism at the same time). I’ve found that using the live view mode on my camera helps tremendously with seeing where the prism effects are landing.
In live view, you can easily move the prism around to create a light look you love.
-
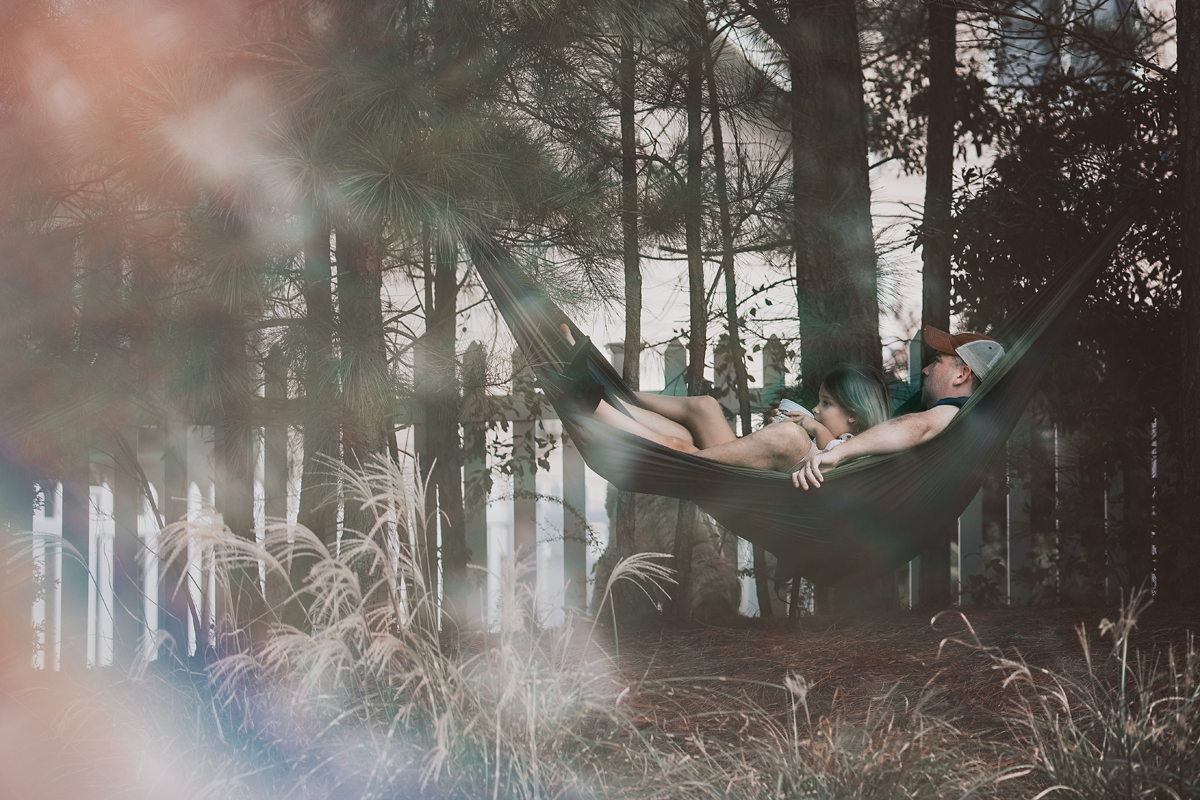
No.03Look for textures + patterns
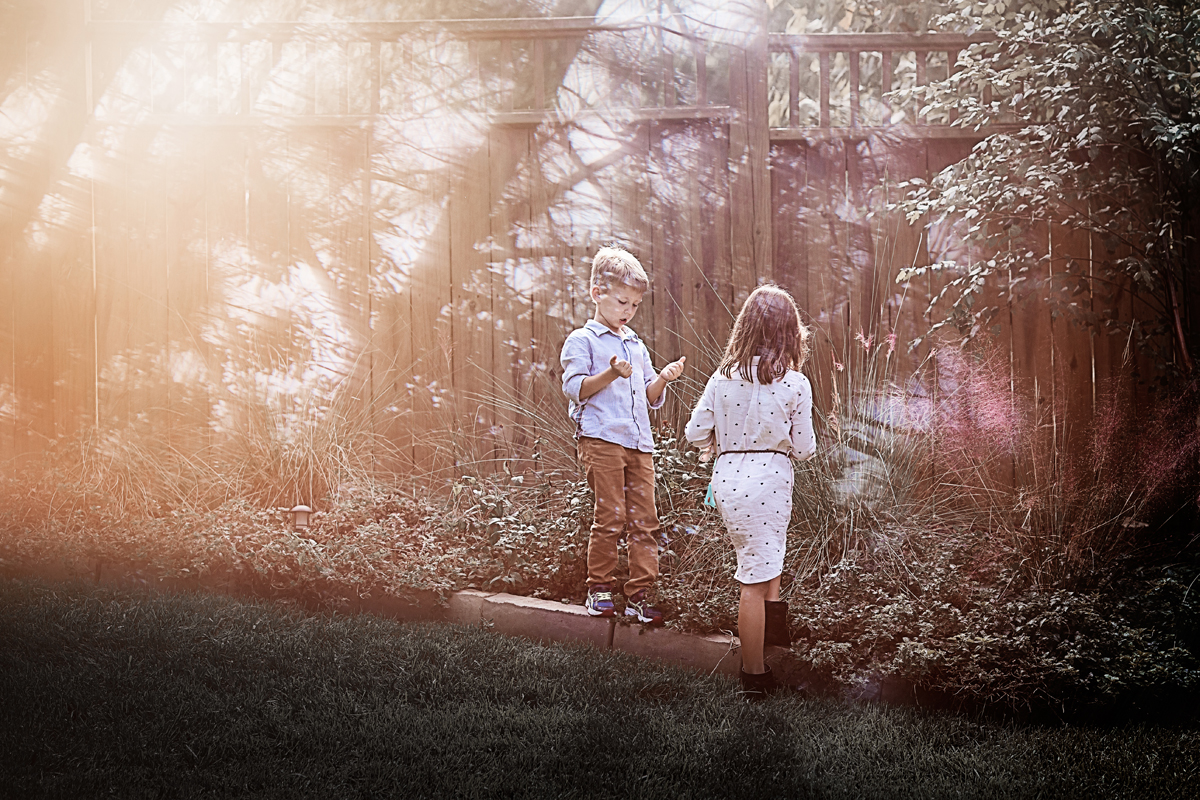
Interesting backgrounds with lots of textures and patterns can create almost a “double exposure” or mirrored effect when capturing an image with a prism. Practice rotating your prism until you see the “double” or mirrored effect on your screen!
-
No.04Be patient
While prism photography isn’t necessarily a defined art, it definitely takes a little bit of patience and practice to achieve these unique effects. When I first started experimenting, I found that being a “silent observer” and using my prism to photograph my kids from a distance was best for me. It allowed me to move my positioning/angle while experimenting with the placement of the prism.


Experimenting with something new is a great way to keep those creative juices flowing! If you ever find yourself in a rut, grab out your prism and go play around!
Read more about gear that can help spark creativity:
– 8 Perfect Times to Use a Tilt Shift Lens


No comments yet.