Lightroom is an extremely powerful tool when it comes to organizing and editing your photos. It’s so powerful in fact that its difficult to know everything it can do for you when you first start using it. For photographers who have been using Lightroom for years, these things may be an old hat to you, but if you have just started learning the program or haven’t been using it for very long, these three “tricks” might be eye opening resources that help you edit and organize your photos much more quickly!
Read more: How to organize Lightroom with Collections and Collection Sets
-
No.01Paint Can
The paint can is a like a little secret gem that can make your culling or organizing a quick an easy process. When you are going through your images and rating them (or culling them) you can tag the images multiple different ways. You can label them with a color. You can give them a star rating. You can flag them. You can use keywords.
There are multiple different ways to tag images including right click or sometimes even clicking on the image it self (for star ratings), you can use number keys as well.
Personally, my favorite way to tag them is with the paint can!
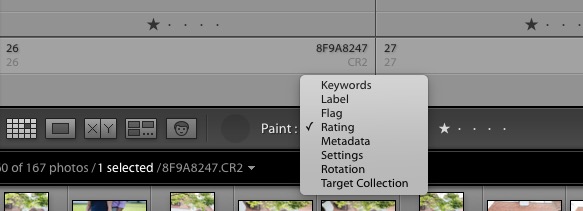
Right along the bottom of the image when in loupe mode you will see the paint cant. All you have to do is click that and then click whatever label you want to “load up” the can with. Then all you do is go through the images and click once on each image that you want to assign to that label.
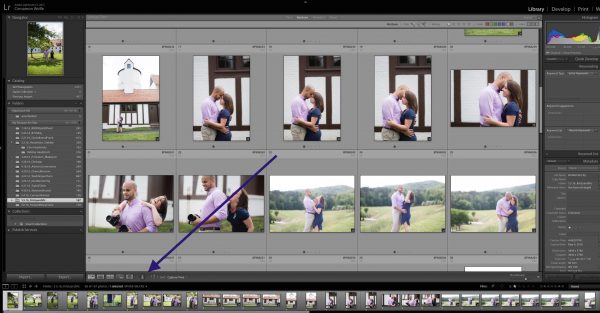
For example, when I go through my initial cull, I tag all “keepers” with a 1 star. I can load up the paint can with a 1 star rating and then simply scroll through the whole set of images, clicking on each photo that I want to assign that tag and then click “Done”.
Then, let’s say I want to color label all of the images that might be ring shots as RED. I can load up the paint can with “red” and then go through and quickly click on each image that is a ring shot and it will assign it the color red. Badda Boom, badda bing…my images are quickly and efficiently organized just the way I want them.
-
No.02Smart Collections
Once you have your images labeled or tagged, you can utilize smart collections to take everything one step further. When you create a smart collection you are basically creating a separate and unique folder that can point you to all of the photos that meet some certain criteria.
Dang that sounds complicated right? Let me explain with an example.
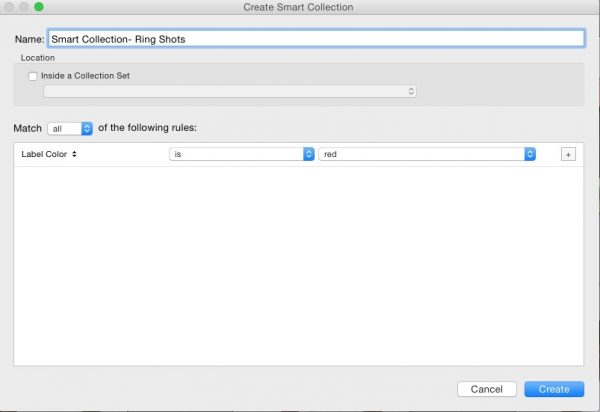
My current Lightroom catalog is for 2016. All sessions I do for 2016 will be in this one catalog. But because I create a separate folder for each session, I’m looking at images from one session at a time. Let’s say I’ve consistently tagged all of my ring shot images as “red” from all of my sessions and now I want to do a blog post highlighting all of my favorite ring shots. Instead of looking through each individual session and filtering down to the ring shots and then exporting I can create a smart collection that essentially shows me all of my “red” (ring shot) images all at once and I can export them as one big group.
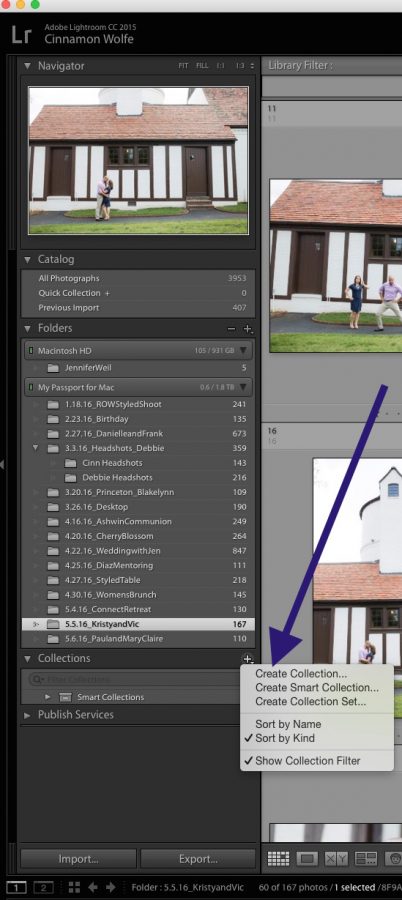
All you need to do is create a new smart collection and tell it to show you all images that meet the criteria of being coded “red”. Then every time you code or tag an image as “red” it will show up in the smart collection! You can then view them all together and export them all together as well. Brilliant!
-
No.03Straighten Tool
This is a tool I use on almost every single image because I cannot shoot straight to save my life. When cropping an image you can straighten out the horizon a couple different ways, but the straighten tool is my absolute favorite because it makes so much sense and is so accurate.
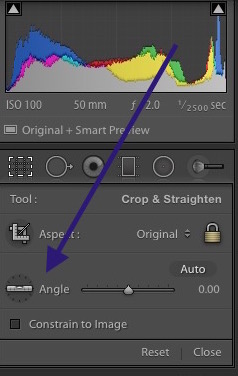
When you open an image that is crooked, you can click crop and then click on the little tool that looks like a level. Then you simply draw a line on the image using something in the image that is straight as a guide. LR will auto adjust the image to align with that line that you just drew. With two clicks your image is perfectly straightened out based on whatever horizon or lines you have in your image to use as a guide. I cannot recommend this tool enough as a way to quickly go through our images to make sure they are straight.




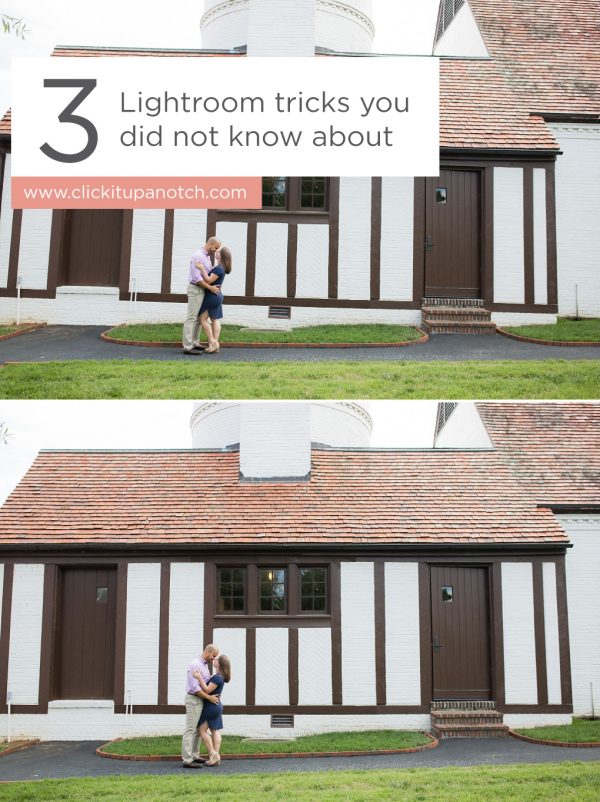






Now if we can get our friends to use the straighten tool on their iphones before facebook posting, such a simple tool!
The paint can was new to me! Thank you.
The paint can was new to me also, thanks.
Having the caps lock on while rating helps cull faster – it allows you to automatically advance to the next image (I also rate with stars but find it faster to just hit 1-6(6 being red, which I use for my details set).
The great thing about the paint spray is you can really load it up with anything- keywords, a single adjustment (i.e noise reduction, brighten +5, anything!)