Hi all, today I wanted to show you one of my basic clean edits that is in my workflow. I love this photo of my daughter that I took with my Lensbaby Spark but as you can see it needs some brightening and warmth to it. So we will start with my SOOC photo.
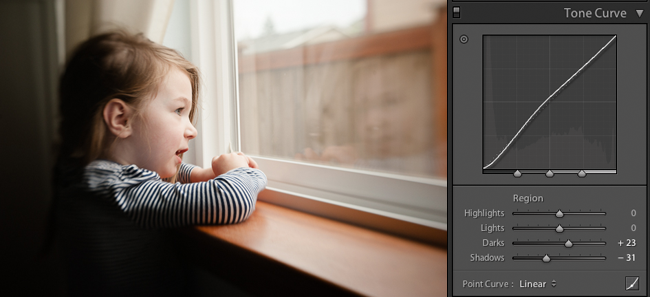
First I start with my photo in Lightroom. How much editing I do in LR is on a picture by picture bases. But I can almost 100% guarantee that I use the tone curve on every photo. Below you can see the adjustments I did on the tone curve and I also warmed the photo up by adjusting my White Balance.
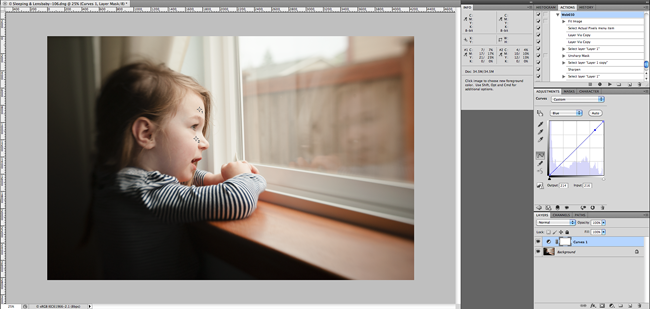
After that I head straight into Photoshop and put the finishing touches on my photo. I always start with my skin. I either drop two or three points and check my CMYK values. I found that it was still slightly cool in spot so I used the curve layer and increased the yellows just slightly.
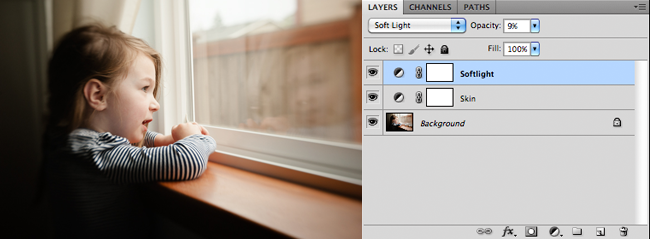
My second step again is to use a curve layer and change my blending mode to soft light. I love doing this because it gives my photo a slight pop. You must use this blending mode with a light hand or it can look over done. As you can see I only used it at an opacity of 9% and it gave the perfect amount of pop!
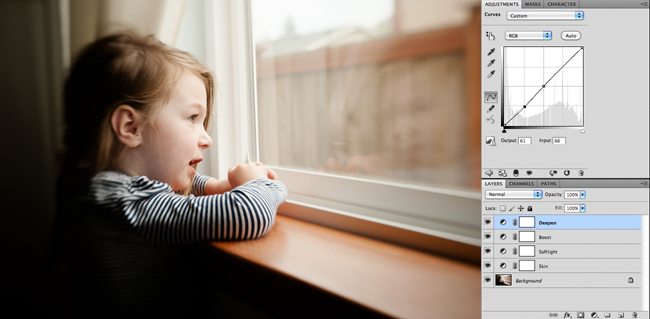
Next is a midtones boost, it just brightens up the photo and anything that seemed a bit dull has some life now. To do so, just grab another curves layer (are you noticing how much I love curve layers) and drop a anchor point right in the middle and drag it up to your liking.
After I do a midtones boost I always go back in and deepen my shadows that might have been brightened when I didn’t want them too. I always set a anchor point in the middle because I don’t want my midtones to be affected by this layer and erase everything I just did. I again drop another anchor at the half way mark between the bottom and the midtones and drag down to my liking.
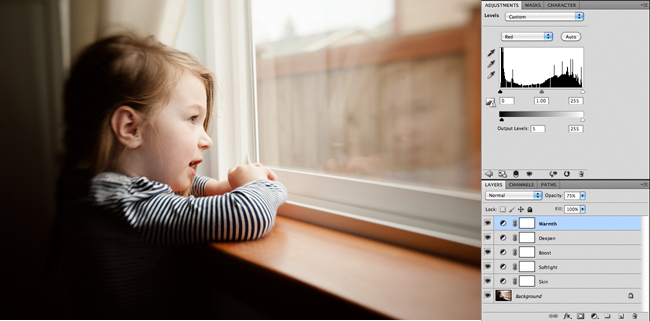
Last but not least, I am a lover of very warm photos. So sometimes I will use a levels layer to warm it up just a bit more. So with this one I went onto the RED and increased it every so slightly to +5 to give it that extra warmth that I love.
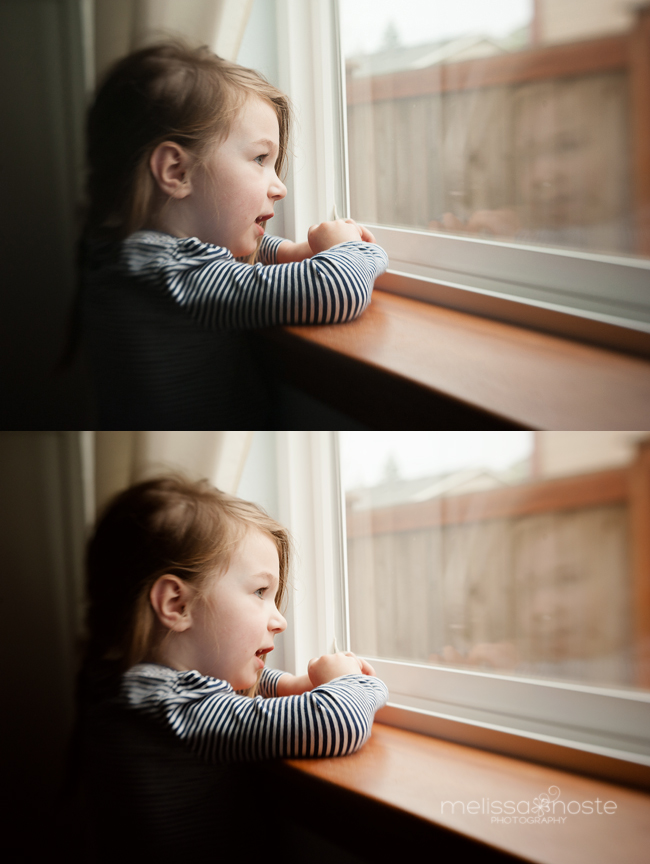
And here is a before and after of the finish product. Please let me know if you have any questions!
Disclaimer: This post contains affiliate links. Thanks in advance if you purchase something and support Click it Up a Notch.






Love this! So simple. I hate how my photos always look ‘dirty’ when SOOC. Then I end up going overboard. Which takes a long time. Which more importantly takes time away from other pictures. Which makes me a “one-snap-wonder” :)
Thank you so much for sharing this! I have been using LR and the RGB values for my curve/skin adjustments. Can you link me to a tutorial using photoshop CMYK values?
Do you happen to be a ClickinMoms member? If so I can link you to a great tutorial on there. Also they have a skin workshop in their store that is an incredible in depth book on skin tones for both LR and PS. It’s a bit pricey but CM is having a sale right now and you can get a bit cheaper. It’s well worth the price though, the book has an amazing amount of information.
NIce job Melissa! Great edit!
I would also like to know more about using photoshop CMYK values , do you have a link to somewhere I could learn more?
Do you happen to be a ClickinMoms member? If so I can link you to a great tutorial on there. Also they have a skin workshop in their store that is an incredible in depth book on skin tones for both LR and PS. It’s a bit pricey but CM is having a sale right now and you can get a bit cheaper. It’s well worth the price though, the book has an amazing amount of information.
Just found this article :) I too would love to know the values – i sign up for the newsletter – is that the membership you are referring to?