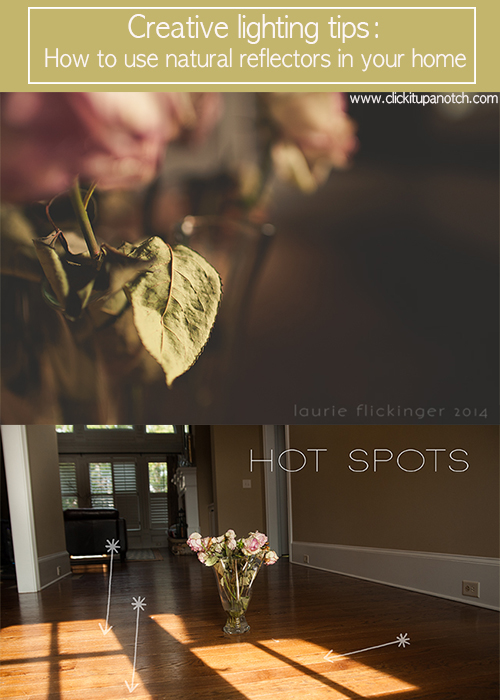
It is no secret that I love dramatic lighting. And I love shooting indoors, especially during the winter months. But as the winter drags on, I feel the need to get a little creative to keep all of my pictures from looking the same. One of my favorite things to do is to play with lighting.
Lighting is the most important factor to me when I am pulling together and idea for an image.
If the lighting is boring, there are very few cases I can think of when just a pure moment, or expression, or captured emotion, made a wow! image for me. Would I ditch those images capturing amazing emotion (with so so lighting)? With my mommy goggles on, no way! Absolutely not! (I would never throw away those precious images)…but, mommy goggles off, nope, not a chance of adding it to my portfolio. And whether you are in business or not, building a collection of images that you can be proud of, where the technical aspects of photography and emotive aspects come together, should be important to you! 
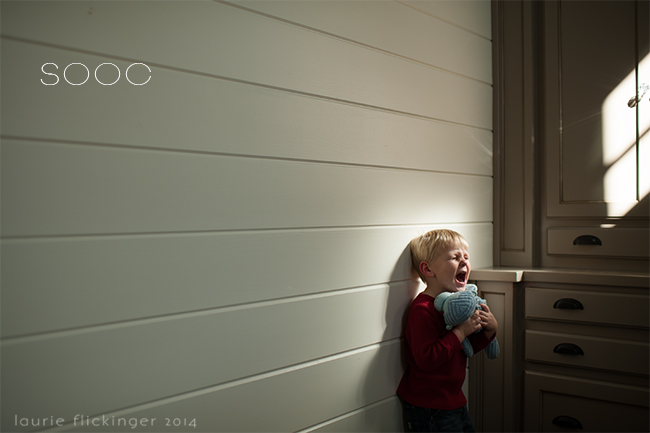
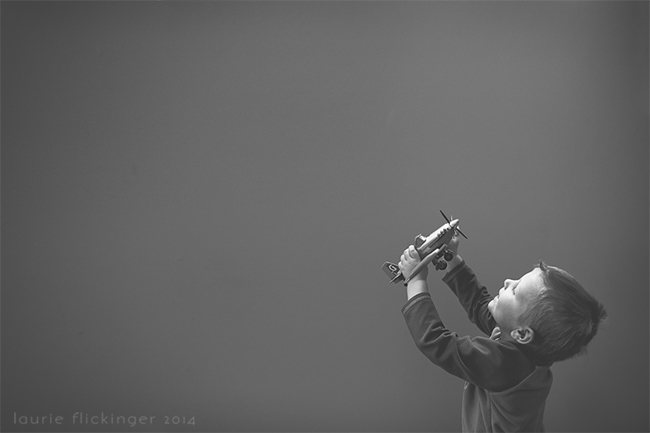
Nikon 105mm f/2.8G | ISO 500 f/5.6 1/80 (little slow there)
Today, I am going to talk about using natural reflectors to light your subject and how you can use it along with the inverse square law.
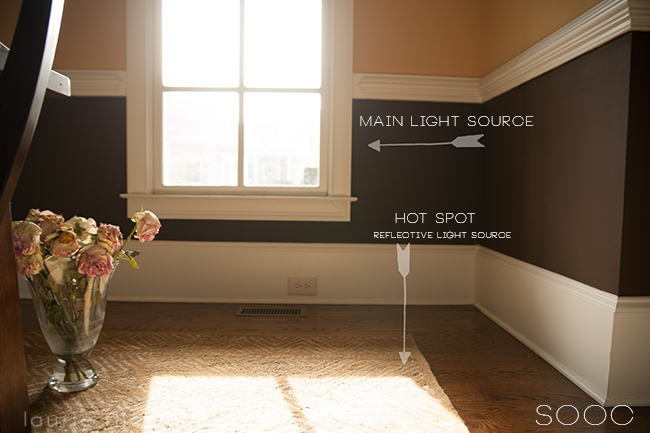
A reflector is a tool that you use to bounce light back onto your subject. I have this one from Photovision . They are usually white, but you can also get silver/gold to cool/warm your image. So a natural reflector is something that is already there reflecting light. There is nothing extra to put into place, it just happens to be there in nature, in or in this case, your home.
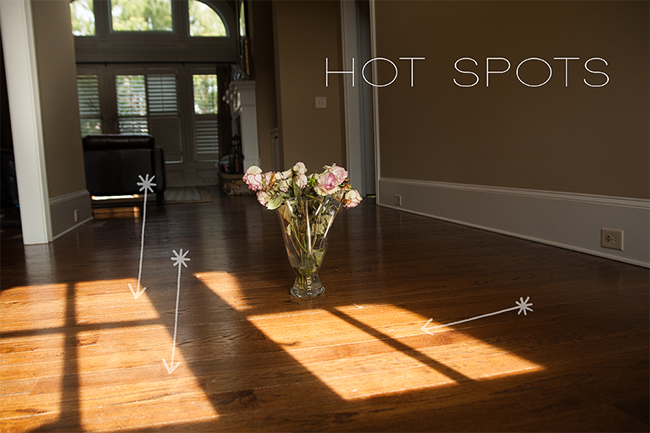
It can be the hardwood floor, carpet, couch, the wall, white bedspread, or a white baseboard or door. Basically, anything that light is hitting and bouncing off of can be used as a natural reflector. Lighter colors work best as darker colors absorb more of the light and are less reflective. Because I love dramatic lighting so much, I’m going to talk about what I call “hot spots” and using those as natural reflectors.
 In photography, I can think of two ways that the term “hot spot” can be used.
Hot Spot:
1. A blown out area. An area in an image where one, two, or all three of the channels are blown, where there is decreased or total lack of detail in highlights. When all three channels are blown, it will be a bright white area in the image.
2. An area on a surface where direct light is shining in through a window. Hot spots provide areas of intense bright light streaming through a window or doorway. This is the type of “hot spot” we will be discussing today.
When a subject is placed near a hot spot, the light bouncing onto the subject will be brighter than background areas making it and optimal spot to apply the inverse square law to light and photography. In the upcoming photos, notice how the ISO is typically pretty low for indoor shooting.
 I always like to include a nerdy tidbit for those like me who like to know the technicals behind why we do what we do and why it works…so those cool photographers who don’t care, skip to the next paragraph. For those nerds like me, keep reading!
Wikipedia defines the inverse square law (when applied to photography) as “the inverse-square law is used to determine the “fall off” or the difference in illumination on a subject as it moves closer to or further from the light source”. Simply put, that just means that the subject is most illuminated when closer to the light source (duh!) but as the distance away from the light source is doubled, you get a quarter of the intensity or amount of light.
So, what will you see in camera? The the background will appear much darker the farther away from the light source. The brighter the light source, the greater the fall off. This is the “how” behind images with really dark backgrounds that appear almost black. And because the way a camera “sees” isn’t as advanced as the way the human eye can see (the camera can’t record the dynamic range that the eye can see), often, this effect is exaggerated with a camera. 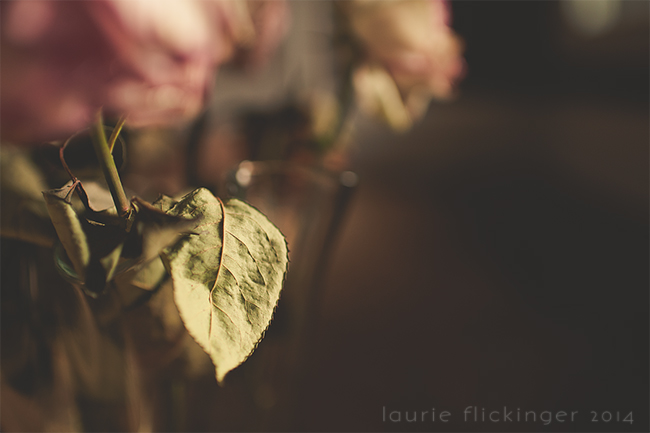
Nikon 35mm f/1.4G | ISO 250 f/1.4 1/1000
In the following image, the hot spots brighten the shadows a bit on the subject. The main light is the window light (indirect), the hot spot reflect light back into the shadows so that the rest of the image isn’t completely in shadow, but a few details are still maintained, even while blurred.
Nikon 35mm f/1.4G | ISO 250 f/1.8 1/640
Now on to the basics.
-
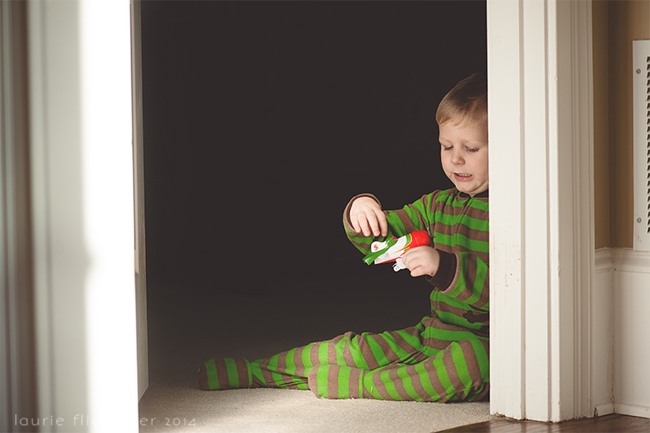
No.01Spend a little time looking around your home for hot spots and think of what kind of story you want to tell.
Do you want drama? Then this tutorial is for you. You can use either the actual hot spot, by placing your subject near it (like I did with the, um dead, roses)!! Or look for where the hot spot is bouncing the light. My youngest is standing in the reflected or bounced spot of light.

Nikon 35mm 1.4G | ISO 200 f/2 1/500
-
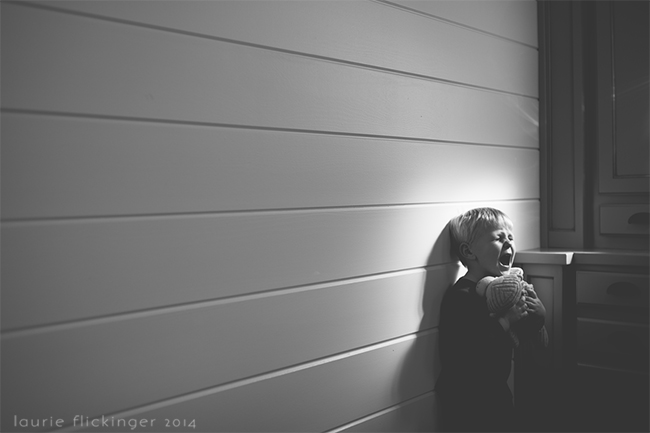
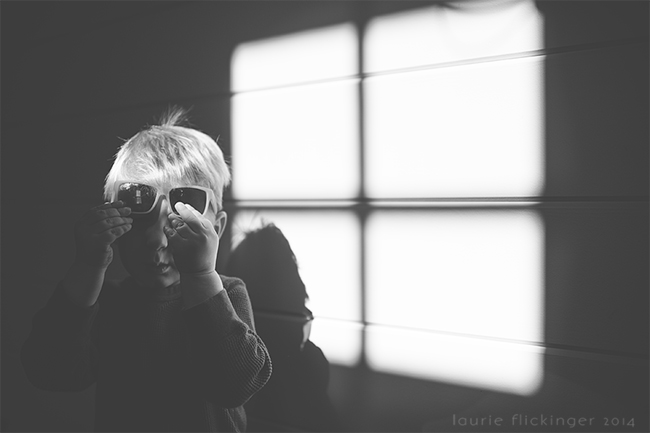
No.02Place your subject near a hot spot, or for a really dramatic look, you can place your subject in the hot spot.
In the hot spot will provide some really dramatic lighting with some major light fall off. The back ground will more than likely be completely black. Some might describe this as “bad” lighting..or say “don’t place your subject in direct light”… but I think it is all about how you use your lighting. It’s a choice depending on what mood you want for your image.
Take note of the darker rooms. To the eye in real life, they don’t appear this way, but in camera, depending on what area you want to expose for, this is an example of the inverse square rule I mentioned above. I exposed for the brightest area of his face in this image.
Lensbaby Sweet 35mm Composer Pro | ISO 2000 f/??? 1/500 (aperture doesn’t show in camera data with Lensbaby)
-
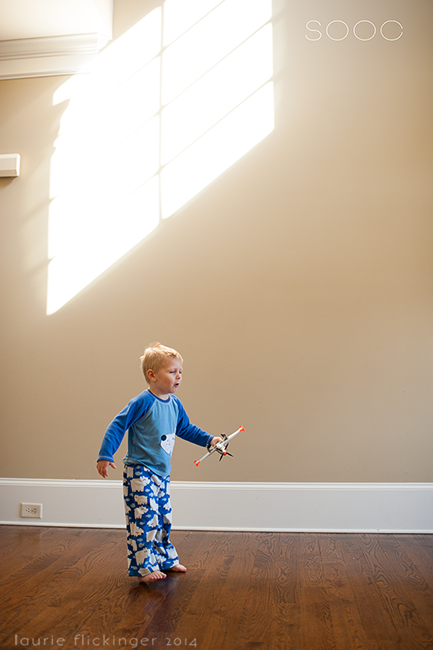
No.03Watch your hot spots throughout the day.
Like all light, they will move around. Lots of opportunities to seize!
Notice again the inverse square rule in action below.

Nikon 105mm f/2.8G | ISO 500 f/3.5 1/320
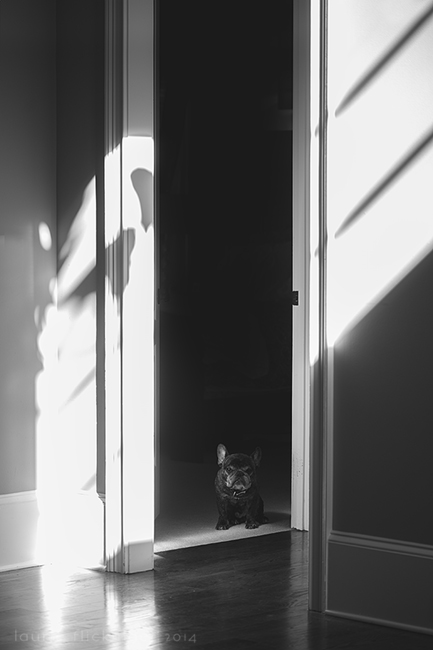
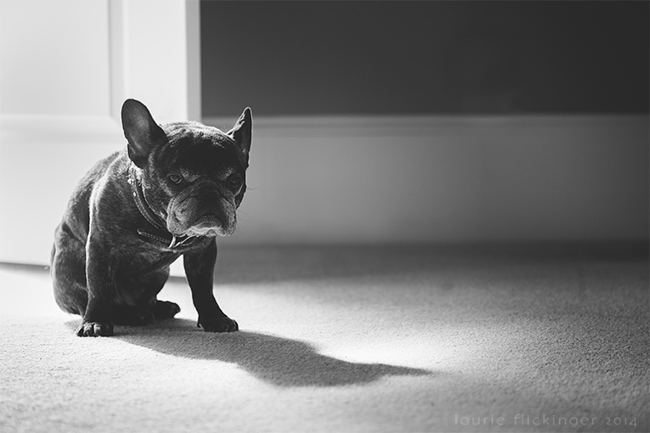
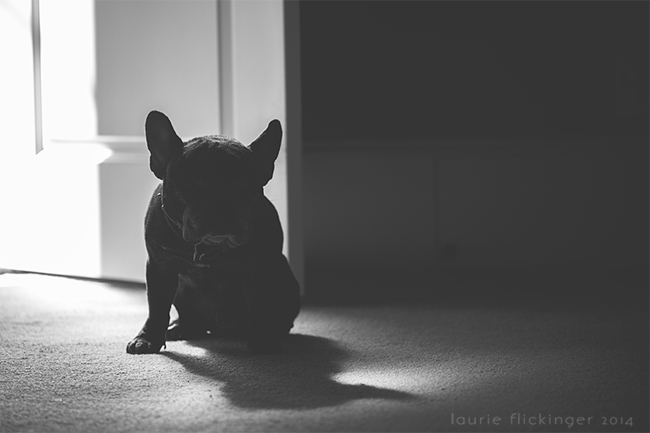
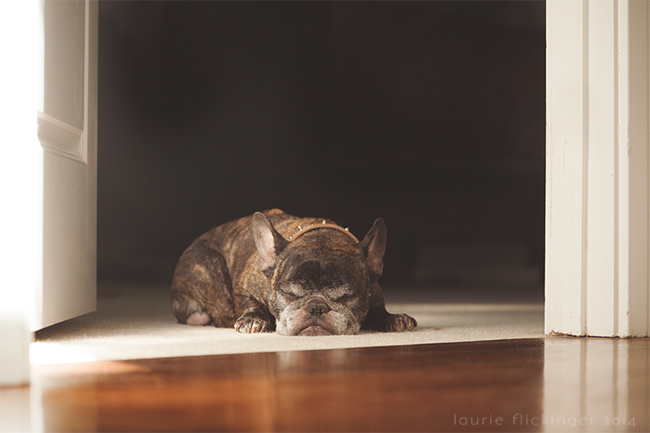
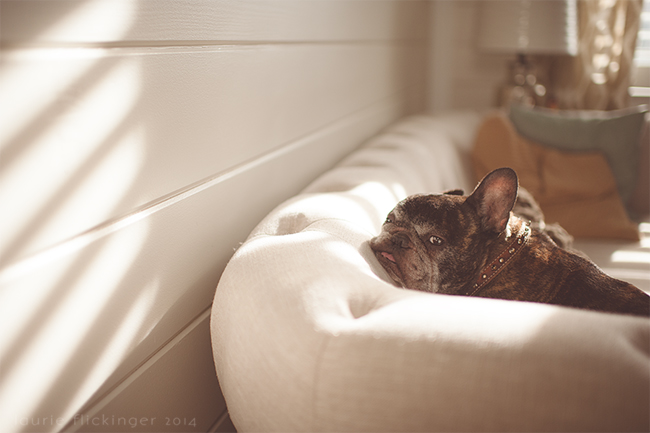
The following images, Sanford (our little Frenchie) is in the same spot. The differences are how I changed my position or turned him to face a different direction. I played with different exposures. I used underexposer for more drama in the silhouette. I opened or closed the door more to manipulate the light that was bouncing off of the doorframe and white door. Think about the light you have and how you can manipulate it for different looks.
Nikon 105mm f/2.8G | ISO 500 f/3.5 1/80
Nikon 105mm f/2.8G | ISO 500 f/3.5 1/200
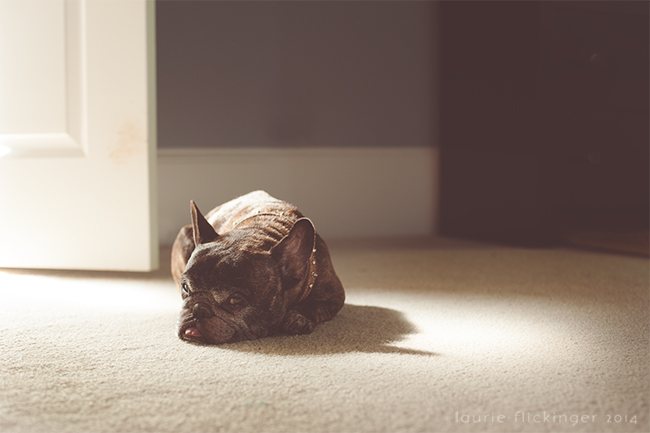
Great example of inverse square rule:
Nikon 105mm f/2.8G | ISO 500 f/3.5 1/320
Nikon 50mm f/1.4D | ISO 500 f/3.5 1/80
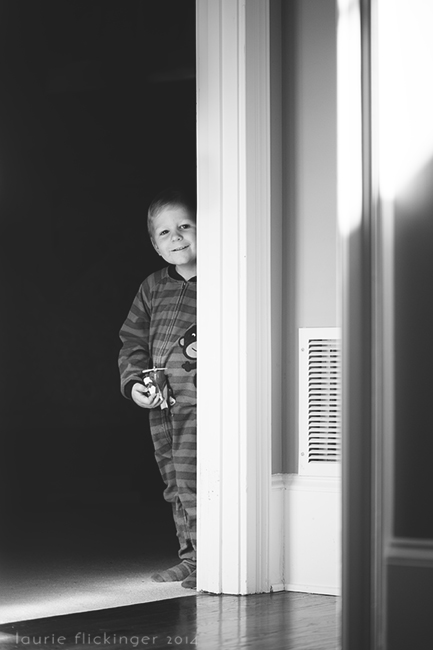
And here is a person in the same spot, if you would rather see a person rather than a dog!
Nikon 105mm f/2.8G | ISO 200 f/2.8 1/250 (both images)
-
No.04Get creative! Anything goes!
I don’t mind the hot spots showing in my images. In some images, it is more of a distracting element and I may crop or clone it out, in others, the lines of the hot spot can be used to lead the viewer. Below, I like the lines in the image. The light is reflected back onto Sanford making his face brighter. It isn’t for everyone, but I’m just putting it out there that it’s okay to have “blown” areas sometimes, as long as it adds to your story.
Nikon 35mm 1.4G | ISO 250 f/1.4 1/1000
Nikon 35mm 1.4G | ISO 200 f/2 1/8000
One more pullback:
Nikon 35mm 1.4G | ISO 800 f/2 1/1000


Check out Melissa’s post about how to edit an image using dramatic lighting.
Hopefully, if anything, this post has given you some ideas about using unconventional light in your photography. Now, go take a tour of your home and find some new spots to shoot in! Feel free to ask questions in the comment section!


I learned so much from this, Laurie!!! Can’t wait to see what I can apply to my photos…grabbing my camera now!
Thanks girl! :)
Wonderful tips! And, I love the dog’s name. :-)
Great post & inspiration for the winter months! ;)
Thank you so much for this tutorial!!! I’ve struggled to get that dramatic light in my photos. This makes so much sense!
This is a awesome tutorial!! I’ve tried to understand the inverse square law so many times, and I think it’s finally clicking after reading your article with all the picture examples. Thanks! This also inspires me to use my little window hotspots…I’ve just always seen them as too bright to use. I’ll try to think outside the box a bit more.
Yes! Think outside the box! There may be a situation that this type of lighting will be perfect for :)
Wonderful post! Thank you for sharing.
Thank you for your post and encouragement to embrace dramatic lighting. It gave me a boost to get the camera back out. I grabbed the camera and shot these today. They are posted at http://twodozencookies.blogspot.com. I would love feedback. Thanks again!
Your images are beautiful and inspiring. Wonderful job capturing all the “little” moments.
Amazing tutorial!! Thanks so much for this!! :)
The pullbacks remind me that I should be able to “work” my home more by focusing my intentions. Instead of just thinking ugh, there’s no perfect set up here. Thanks!
Thanks so much for another great tutorial! I love learning new techniques or the the technically to why a certain photos look better.
LOVE this post. So much great info…. absolutely fantastic!! Thank you for sharing! :-)
You did an amazing job on this post Laurie! The explanation and examples worked so well together. The pull backs were my fav. Love learning from you, even if you are “nerdy”!
such fantastic tips! thank you much for posting, especially loved the explanations and settings.
I love what you guys tend to be up too. This type of clever work and reporting!
Keep up the good works guys I’ve included you guys to blogroll.
Found this article very insightful… thank you so much!