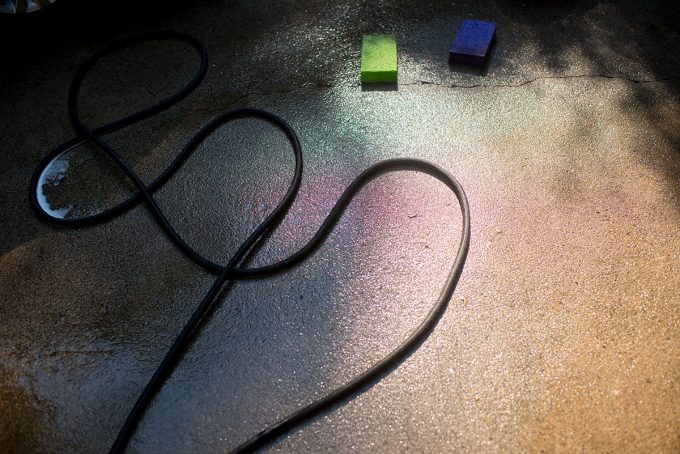
Have you ever noticed that areas in your images take on a halo, or magenta/red/purple fringe? That is called chromatic aberration and it occurs most often in high contrast scenarios.
Read more- Correcting Lens Distortion in Lightroom
I live on the lake, and take tons of water shots. I notice it most often in water splashes, or areas where bright highlights and darker areas of the image meet.
-
No.01Why Does Chromatic Aberration Occur?
For those that love a good technical explanation (like myself), chromatic aberration by definition occurs when the lens fails to conjoin all of the wavelengths of light to the same conversion point (thank you wikipedia).
Simpler put, the colors of light (red, green, blue) are not coming together at the same position on the sensor and can cause a halo/fringe effect that can vary in color on your image. Sometimes it will look magenta and green, sometimes a white halo, other times a purple halo.
In photography, this is often called fringing, while fringing is not always caused by chromatic aberration. Regardless of its cause, in Lightroom, it can be corrected in much the same way.
-
No.02How Do I Prevent It?
High end lenses: While this will not prevent chromatic aberration completely, it occurs more commonly in kit lenses, and lesser expensive lenses. The pricier lenses have an extra coating that can lesson the effects of fringing.
Center your subject: Chromatic aberration happens more often in the corners and edges of the image.
Avoid using the fully wide and fully zoomed focal lengths of a zoom lens: We’ve all heard that zoom lenses are best somewhere in the middle (whether talking aperture or focal lengths. Well, the same is for preventing chromatic aberration. Avoid shooting at the extreme ends (either fully zoomed in or out).
Stop down: Same goes for aperture. Stop down your aperture (higher number).
Avoid High Contrast Scenarios: Water droplets, trees, fences, lines, buildings…
-
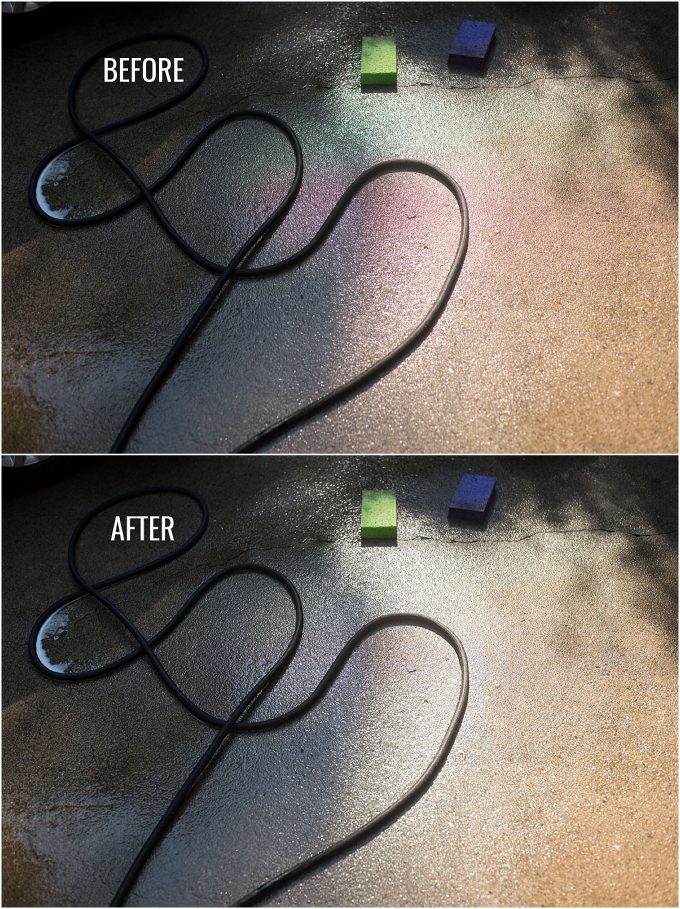
No.03How Do I Correct It?
That list honestly, makes me cringe, and in a lot of situations that I shoot in, it would be a big drag on my photographic vision. So, if like me, you would rather sacrifice chromatic aberration for vision, watch the following screen capture to correct your image of chromatic aberration.
Luckily, Lightroom has a little panel that addresses this problem easily. Follow along with the screen capture below to see how.


No comments yet.