
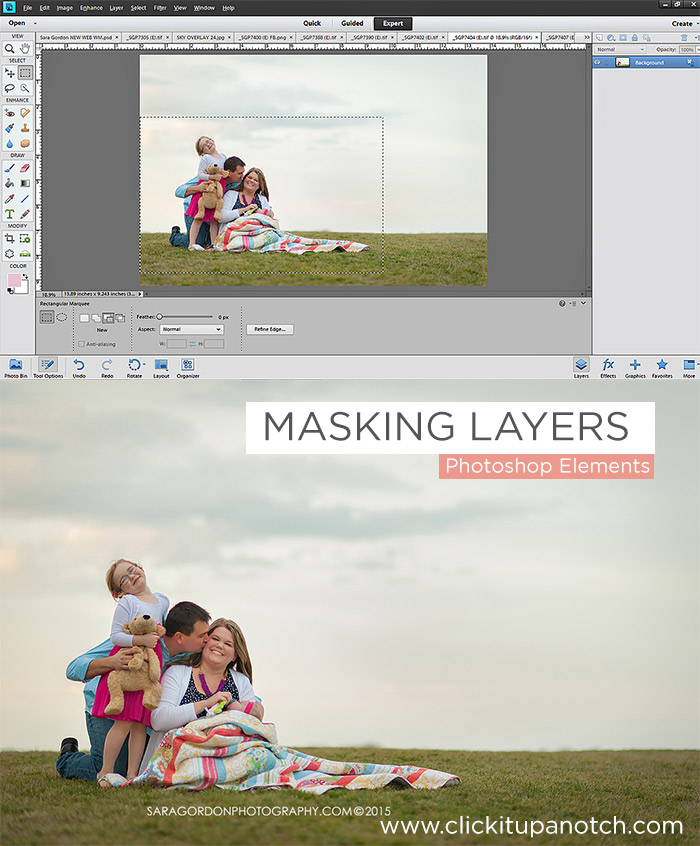
Since discovering Lightroom, I only use Photoshop Elements for minimal editing. I don’t need to use the full version of Photoshop and have taught myself a few tricks here and there to achieve what I want using PSE. Today, I will be covering masking layers. Using masking layers, you can blend two photos to achieve various outcomes. My favorite: head swapping! Currently, I own PSE 11, but there are newer versions out there. This should work with any of them. In fact, I’ve done it using PSE 7!
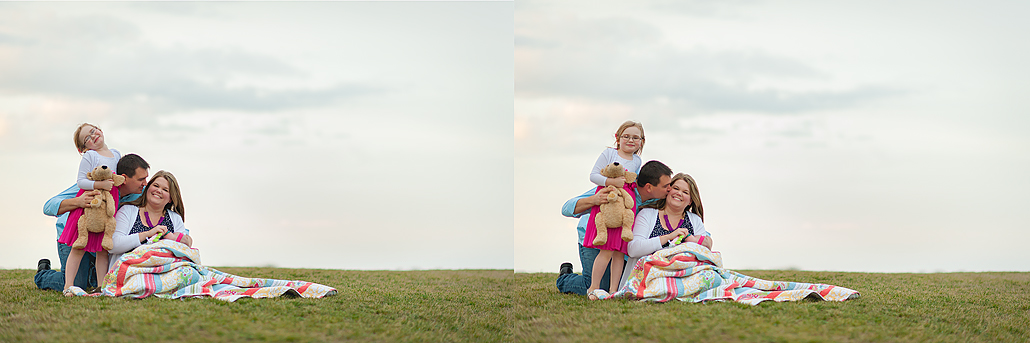
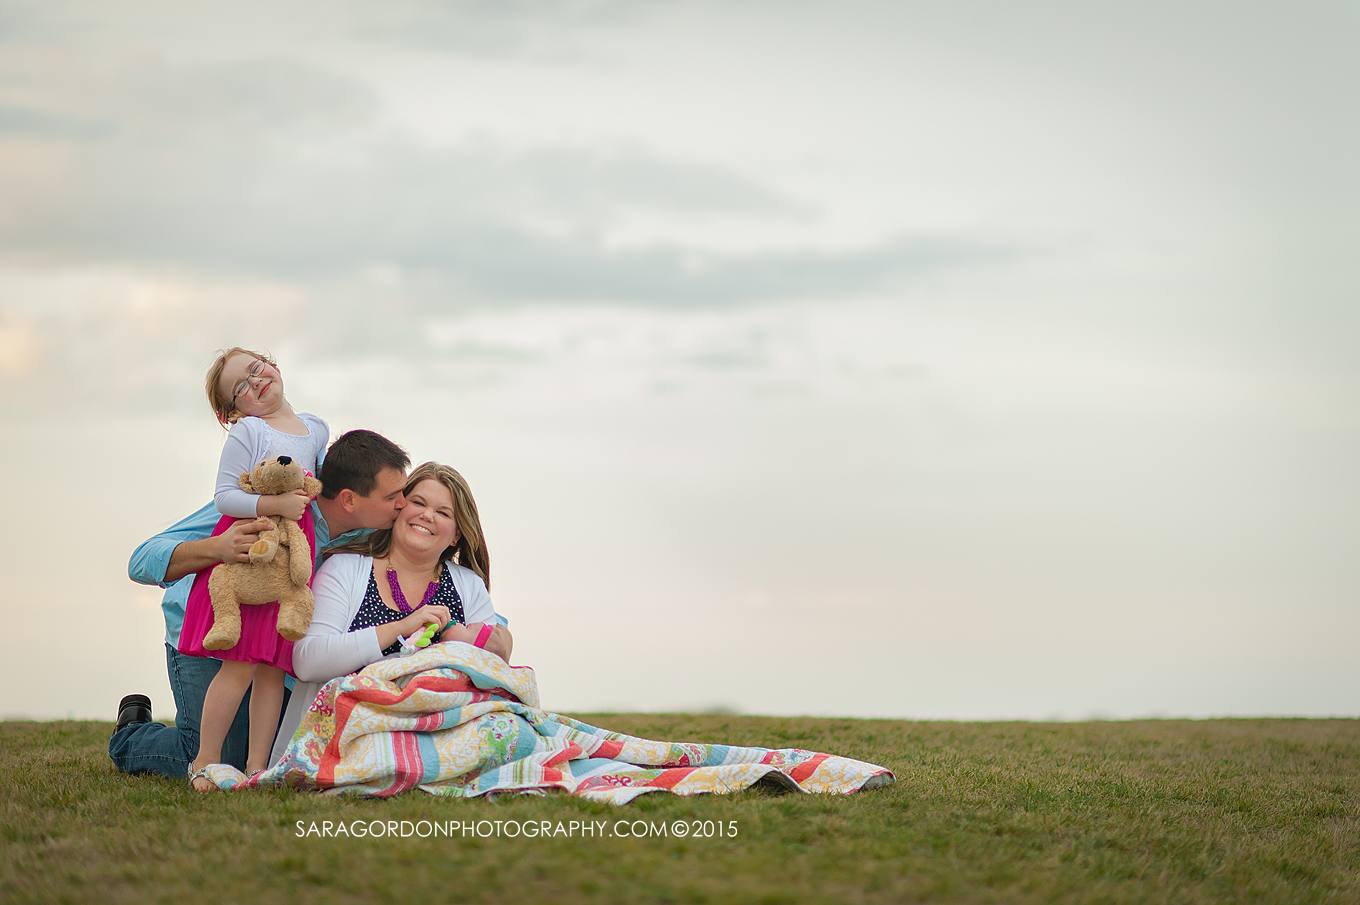
Mainly, I photograph families and young children. Photographing little ones alone is a piece of cake to me, however, when it comes to the family portrait… that’s a bit different. I will be using my latest session, which features a family of four. The last two family photographs I took were somewhat imperfect to me. The children were done, it was late and the sun was setting soon to disappear. It was dark and cloudy. I took out my flash and trying my best to not make it any more stressful for Mom and Dad, shot away without much direction given. I asked Dad to give Mom a kiss on the cheek and as he did, their 5 year old daughter gave me the cutest expression! In the following image, Dad actually kisses Mom and their 5 year old’s expression had changed and she was also a bit out of focus. All this happened within seconds apart, of course. Images are both straight out of camera.
Being the perfectionist that I am, I purposed in my mind to join them. I must add a disclaimer; I don’t do this often and certainly not with every family photo. I am a lifestyle photographer and prefer natural poses. That being said, I guide the family into the poses I envision.
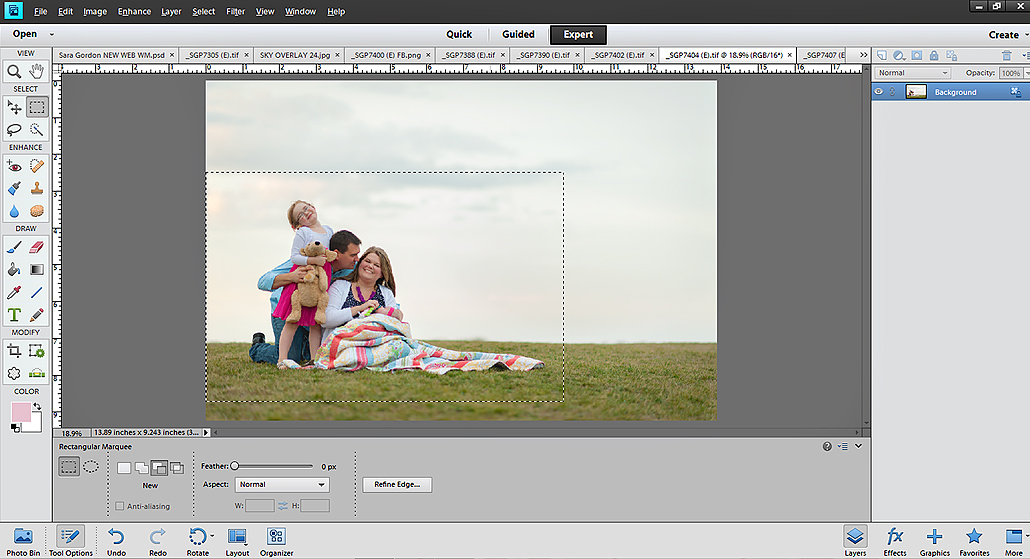
First, we are going to open up both files in PSE. You should see them in the photo bin below. I usually click on the least favorite of the images at this point. Using the rectangular marque tool on the upper left corner (, I select part of the image I want and copy it (CTRL + C on a PC). I then click on my favorite image and paste my selection onto it (CTRL V on a PC).
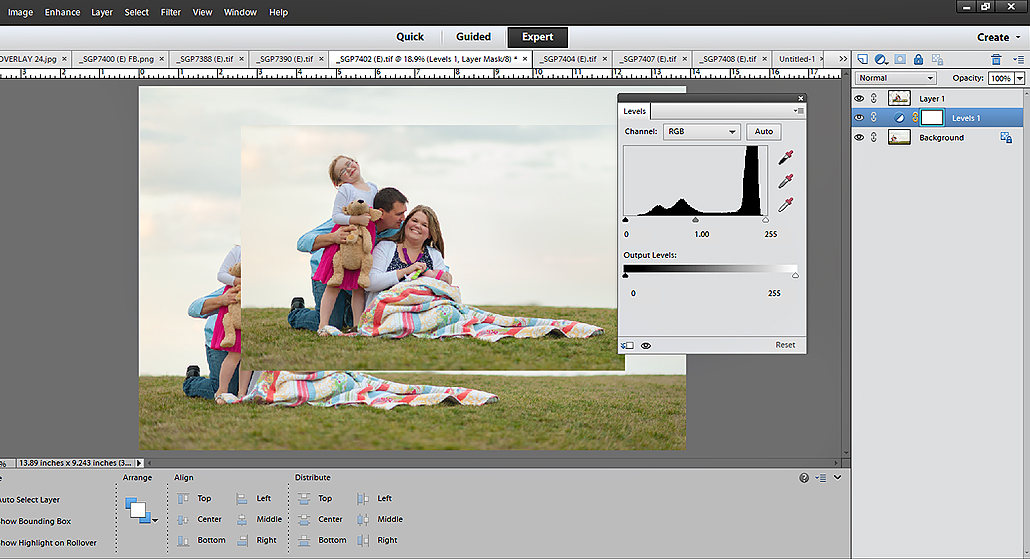
I then create an adjustment layer (top right corner, below closing X). Select “Levels.” This box should pop up. Close it. We won’t be using it.
Now, click on Layer 1 and change the opacity to 50%. This will help us position it where it belongs.
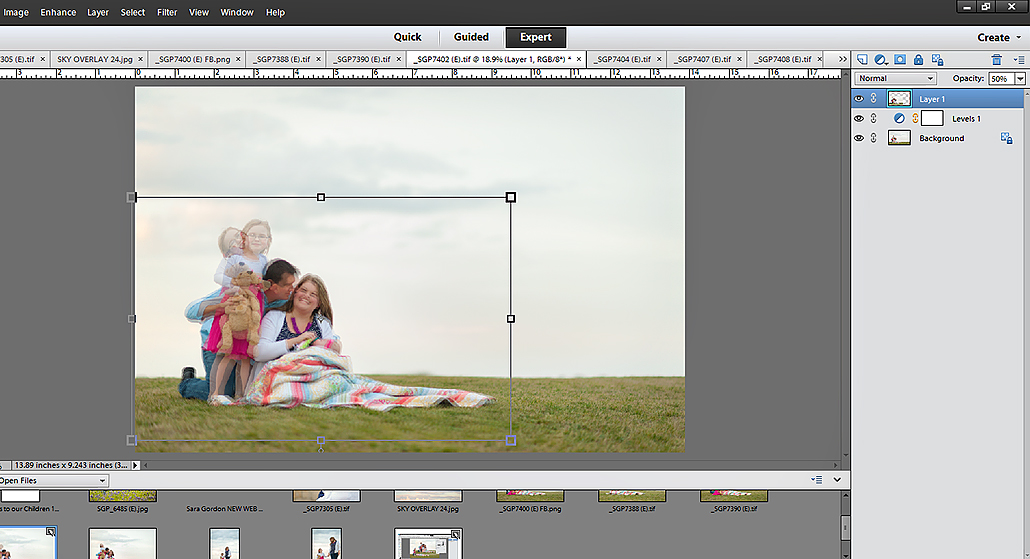
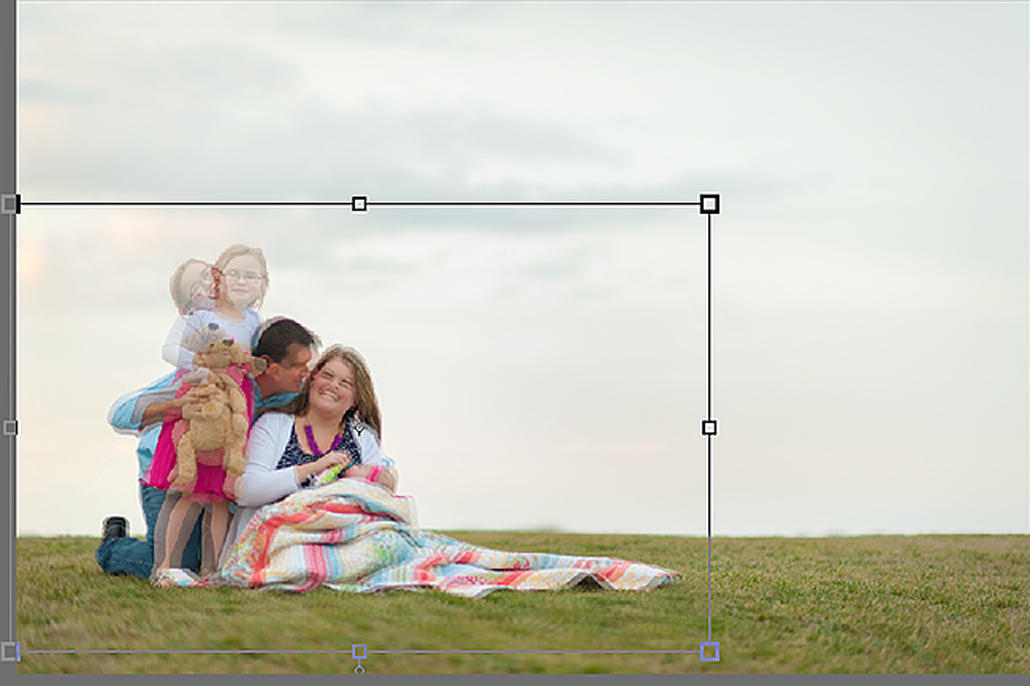
Here it is right above where I want it. This is probably the most difficult part of the tutorial, but it gets easier with practice. Focus on positioning the head you want above the one you don’t. I didn’t worry too much about the surroundings, as they will be “masked off.”
Here’s what I got so far:
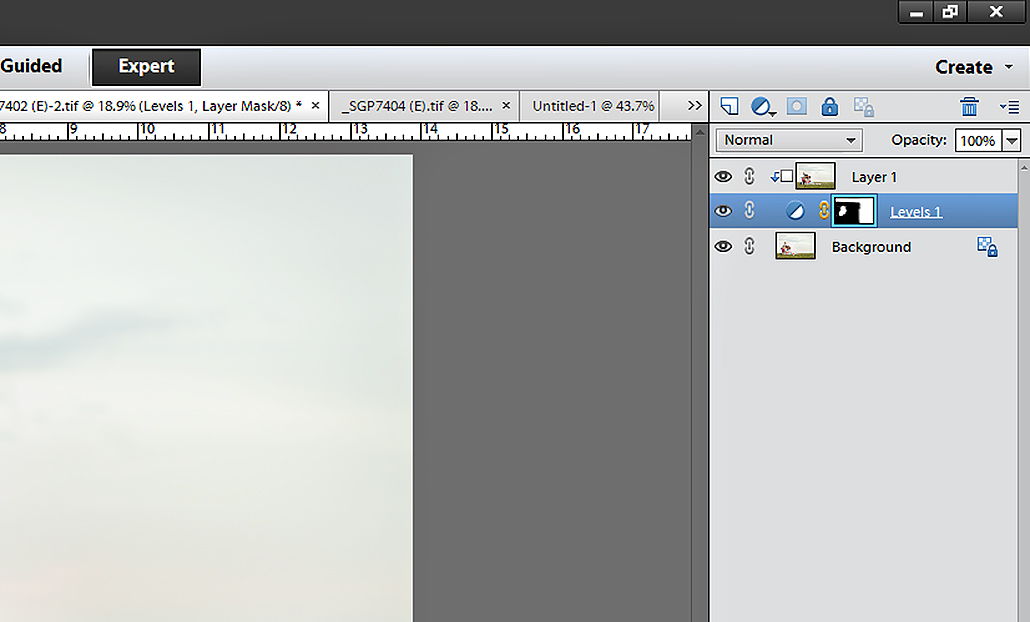
At this point, the opacity of layer 1 can now be increased to 100%. I select Layer 1 and create a “clipping mask” by clicking CTRL and the letter G on a PC. I select the levels layer below and with my paint brush selected on full opacity (100%), I paint with black the entire selection I pasted. You can do the entire image; it won’t affect it and does make it easier. Continue using the paint brush, but change the color to white. I paint over the head and shoulders of the image to “reveal” the image below. Sometimes, you have to include a little more of the body, depending on how much those little ones have moved. I believe that in this photo, I had to include the stuffed animal, whose name is Torah, by the way. Zoom in, decrease the size of your brush, and get as detailed as possible! Switch the color of your brush from white to black until you reach your desired outcome.
It is important to make sure your brush is set to 100% opacity at all times!
Make sure all layers are at 100% opacity. When complete, right click on the background layer and flatten your image. You are done!
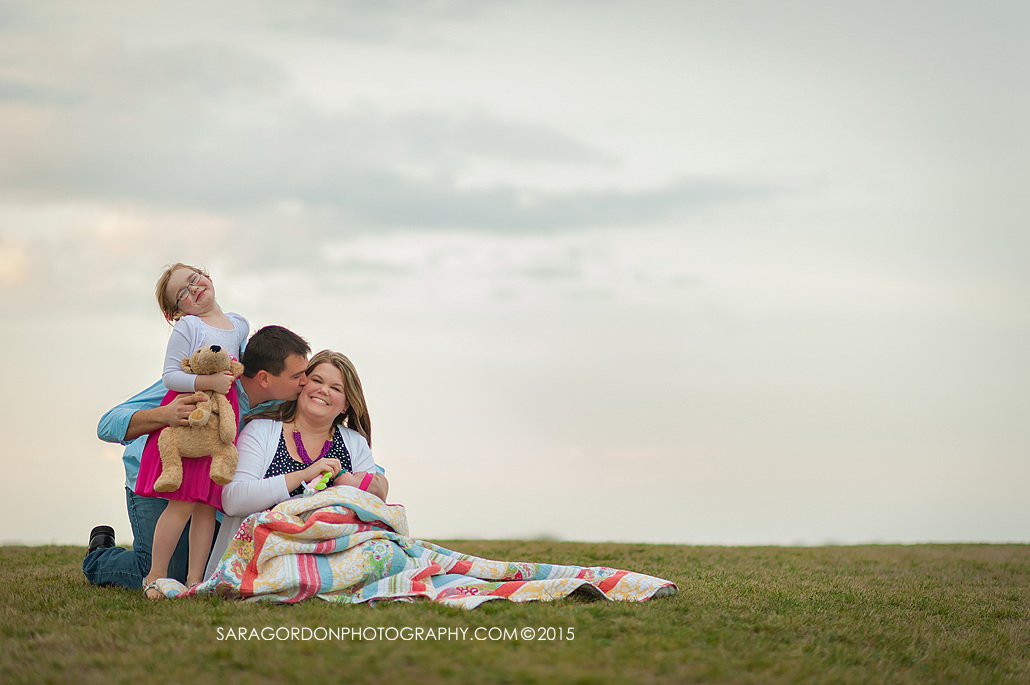
There is probably better and easier ways of doing this out there, but this is what works for me and I have gotten quite fast at it. As usual, I advise you to do what works best for you and stick with it. This technique has been a life safer to me at times and I hope it helps you in some way.
Don’t need a head swap, but want to try sky overlays? Same technique! I did it below:
In summary:
1. Choose your favorite photo.
2. Click on least favorite and select area to copy.
3. Copy and paste area unto favorite photo and set to 50% opacity.
4. Reposition pasted image (layer 1) to fit image below.
5. Create clipping mask by selecting layer 1 and clicking CTRL and the letter G on a PC.
6. Increase opacity of layer 1 to 100% and paint over it with the color black.
7. Change brush color to white and paint over areas you want to “reveal” zooming in and out and changing the color of your brush from white to black until desired outcome is reached.
8. Flatten image and you’re done!


Thank you for this! I’m going to have to try it.
It’s a lot of fun, Karen! And a life saver when you need it! :)
I feel so famous! ;) This is a great tutorial Sara.
Thank you, Tammy! ;)
Thank you Thank you Thank you!