My personal shooting and editing style is to keep it simple and get as much right “in camera” as possible.
With four small kids and a deployed husband, I don’t have the time to be editing photos all night long.
Over the years, I feel that I’ve developed a personal style that has been called, “light, airy and soft”.
I don’t usually have high contrast images and I’d say most of my shots have a matte feel to them.
A lot of this is done in camera, I shoot mostly during the golden hour. I love me some backlighting and haze. Those shooting conditions naturally lend themselves to a more hazy matte look.
But when I don’t get that look in camera, I’ve found it’s fairly easy to replicate with a little bit of photoshop editing.
Tips to getting a matte finish with Photoshop editing
I use CS5 after I’ve done all my RAW touch ups with Canon’s software (Digital Photo Professional), I adjust white balance with the color temperature sliders, bring down highlights, and sharpen. Then I open my image in Photoshop.
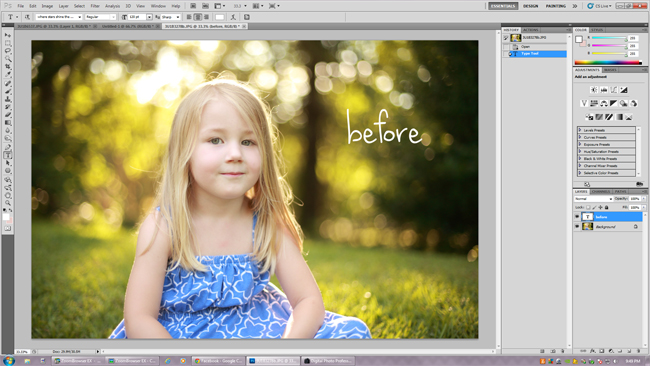
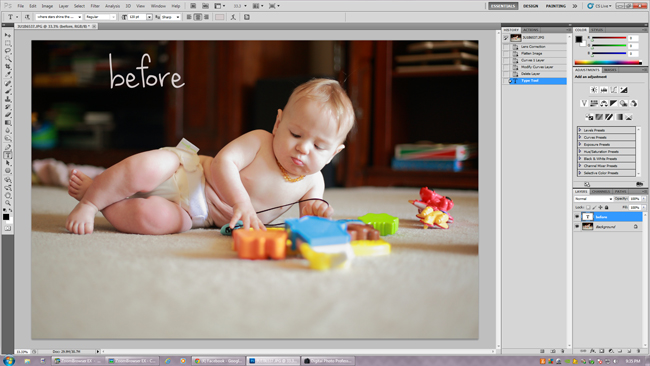
This is my basically SOOC shot.
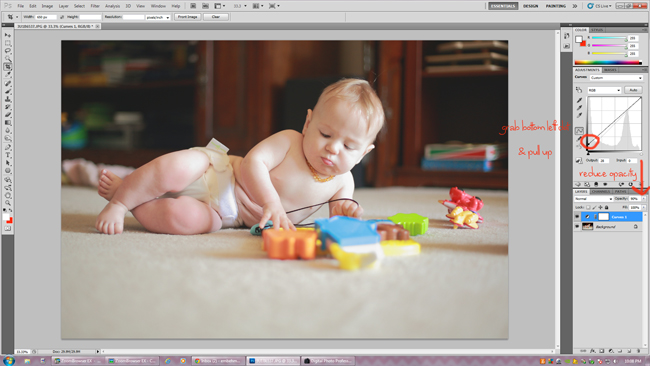
I make a new curves layer, pull up the bottom left hand dot (Output). I play around with it but generally, it looks like the image below.
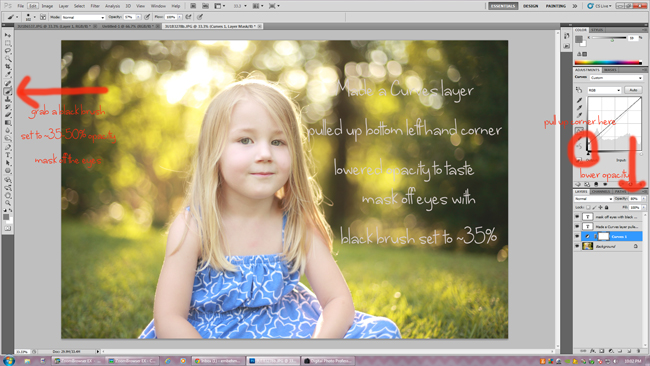
I reduce the opacity to taste and mask off her eyes.
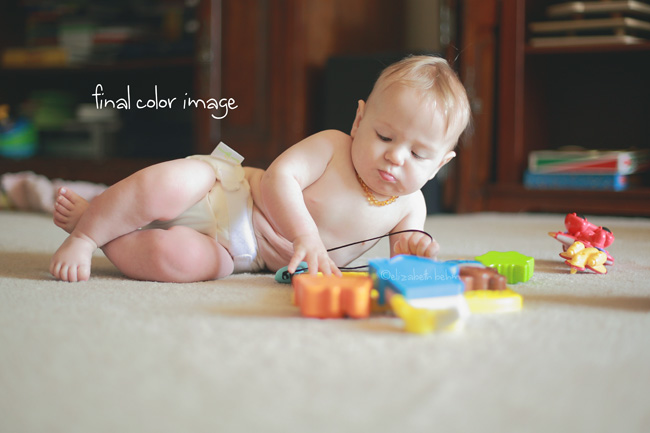
Sharpen/flatten and ta da! My final image.
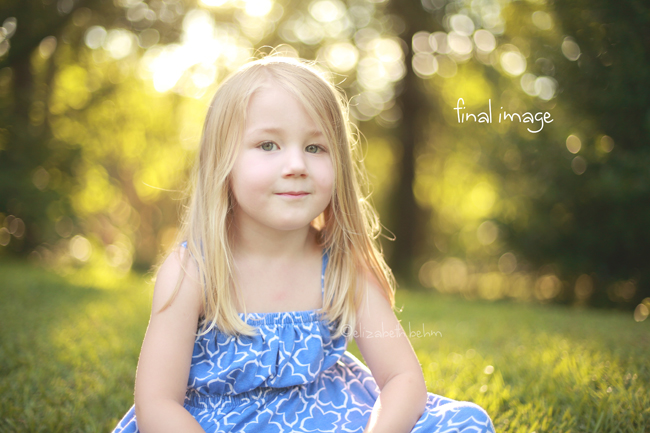
It’s not a huge change in this image, but it adds a little polish to the final image. Kind of like the cherry on top of your whipped cream.
I also use the matte processsing on indoor images.
The light is coming from over my shoulders when I was shooting, and there’s more contrast in the background than I’d prefer.
Same idea as before, new curves layer, pull up output dot, and reduce layer opacity.
I also took out a bit of red from this image and then sharpened and flattened.
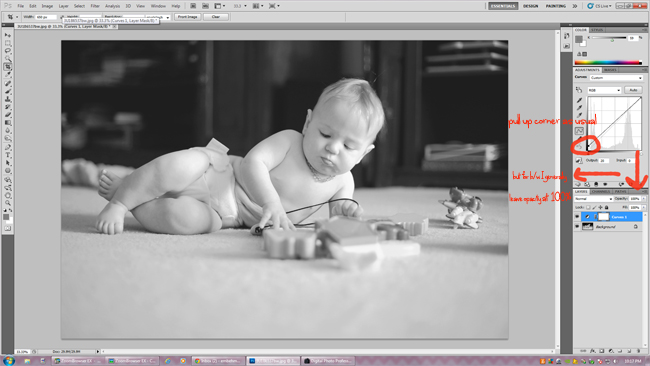
It’s also fun to add more matte to a black and white image in the same way. After converting my image,
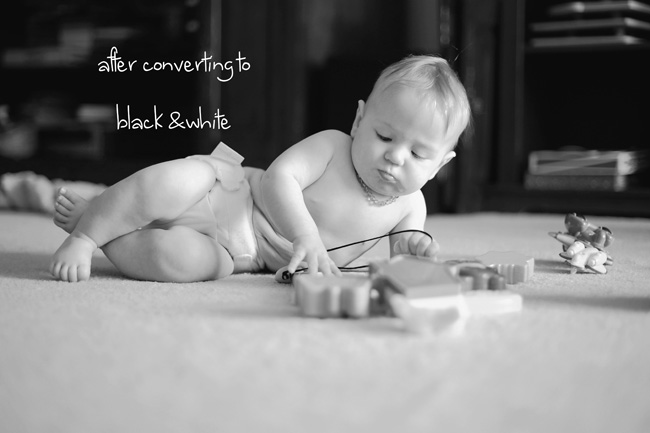
I make another curves layer just like before, pull the left corner up BUT this time (and for most of my black&white images) I leave the
opacity at 100%.
Then I fiddled just a bit with brightness and contrast, sharpened/flattened. And went on my merry little way with a lovely soft black&white image of my
youngest squishy little one.
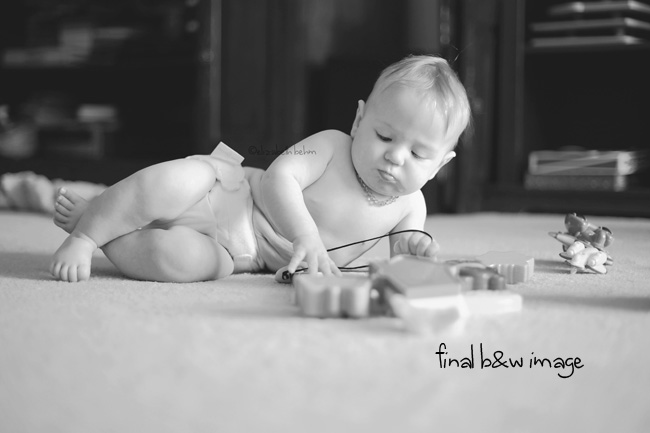
It’s not a huge dramatic change, by any means, just a little extra something special.
![]()
 Liz Behm – Guest Post
Liz is a mama to four, retired from business and happily back to MWAC status.
Surviving (another) deployment by continuing her Project 365 into it’s fourth year.
Website | Pinterest | Facebook | Instagram


very nice effect, I’ll have to play with that :)
I love me some Liz! THanks for sharing! <3
Fantastic tutorial and stunning images! Thank you for sharing your process Liz!
Liz I love your style! Great info here – thanks for sharing!
Great post Liz! <3 Thanks for sharing.
Love this, beautiful images. You do totally rock it in camera but your edit subtly enhances the awesomeness!
Awesome tutorial! Pinned! ~Lisa
o god! you had had beautifully original pics already! whatsoever the editing its gonna be pretty well i think. thankyou for sharing, so do i love the matte ones.
What a great tutorial! I was wondering, how would you achieve this look in Lightroom? I don’t have photoshop but would love to learn. :)
Comment thanks your tutorial