One of my favorite features of Lightroom 5 is the Spot Removal Tool. Holy cow! This bad boy makes it so easy to remove just about anything from your image. Obviously, I always say try to get it out of your frame prior to taking the photo, but let’s be honest, sometimes you just need to clone out some things. This is when the Spot Removal Tool becomes you best friend.
In this super short video, I show you how to use the Spot Removal Tool. Not only are you able to use it as the circle like in previous versions of Lightroom but you are able to use it as brush to make different shapes to remove what you need.
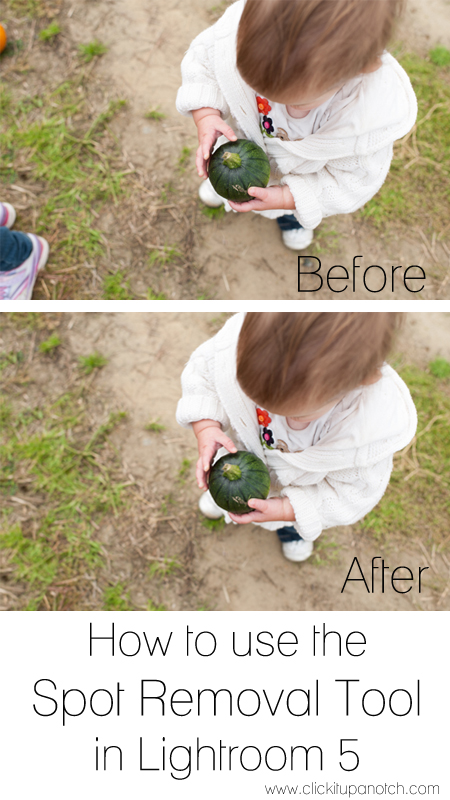
Before

After

One thing I forgot to mention, make sure that the spot that Lightroom chooses to replace your object with is IN the frame of the photo. Not outside your image.
Have you used the Spot Removal Tool?
Watch more Lightroom Tutorial Videos
– Noise Reduction Video
– Before and After Editing: Underexposure
– How to Create Your Own Preset
*This post contains affiliate links. Thanks in advance if you purchase something and support Click it Up a Notch.


The spot removal tool is really useful, and something that doesn’t get mentioned as much as some other Lightroom features, so I am glad to see this post and video. Personally, I don’t use Photoshop very much any more with all of the things you can handle in Lightroom alone.
Thanks! I love that feature too.