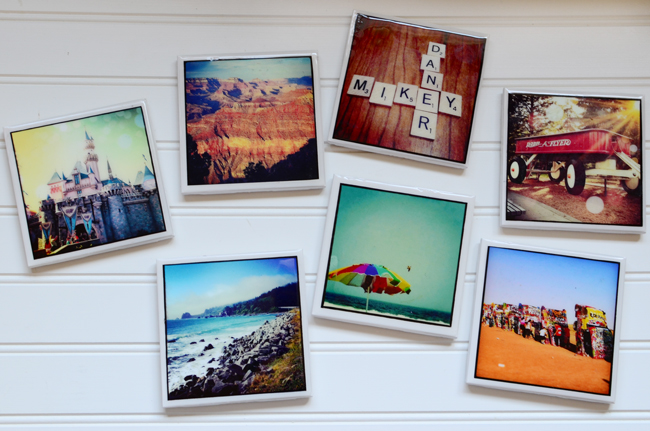
These resin photo coasters are a perfect gift for almost anyone in your life. What grandmother wouldn’t love a set of DIY photo coasters with her grandchildren on them? What mother wouldn’t love a set of coasters with her children’s drawings on them?
Easy to make DIY photo coasters
They are easy to make, great gift ideas, and don’t take much in the way of materials! The total cost for a set of 8-10 DIY photo coasters would be less than $10, with plenty of resin to spare to make more. The resin gives the coasters an almost glass-like appearance which makes them super shiny and highly durable. You can always put photos on glass as well.
You can make them with your children’s drawings, your favorite photographs or even memorabilia such as ticket stubs or newspaper clippings. If it’s the latter, or your children’s drawings I’d suggest scanning them and getting them printed on photo paper because once it’s put in the resin you’ll never get them out again. The glossy coating of the photo paper works well with the resin. Pretty much anything flat that’s printed on glossy paper will work.
What You Need for DIY Photo Coasters
1. Resin
I prefer the two part epoxy resin. Check your local craft store- it is usually in the glue section. You do not need a lot for each coaster, so unless you are making a lot of coasters, go with the smallest bottle!
2. 4-inch White Tiles
You will need one for every coaster you wish to make. Check your local home improvement store- mine were a mere .18c each.
3. Photographs (or scanned artwork, memorabilia, etc)
They’ll be cut down to a 4 -inch square so make sure whatever you pick will look good in that format! You’ll need a favorite photo for each coaster. You may want to have extra photos printed.
4. White craft paint
5. Brush/Foam Brush
6. Glue Stick
7. Craft felt
You need one 9×12 sheet for every 6 coasters. I went with black so that it doesn’t show any stains that might get on the bottom of your coasters due to everyday use. You can also cut smaller squares for each corner to create felt pads.
8. A disposable cup and spoon
Reuse some of those coffee cups- the paper cups with no ridges works the best.
9. A well-ventilated area away from small children and pets.
Resin is a very toxic substance- please make sure you are working in a well ventilated area where you will not be disturbed by any children or pets.
Each brand of resin is different, so read the directions that come with your resin thoroughly. I will provide plenty of tips for working with resin, but be sure to follow the directions that came with your bottle.
Don’t be intimidated. It is very easy to work with and once you see the wonderful, professional-looking results you can achieve with it, you’ll be hooked.
Once you’ve gathered all your ingredients and cracked open a window, let’s get started.
How to Make DIY Photo Coasters
Cover your work surface to protect it from the paint and resin. Re-using plastic bags works best because if something sticks it’s easier to pull it off of the plastic bag than it is to pull it off of paper.
Step 1: Paint the edges of the tiles
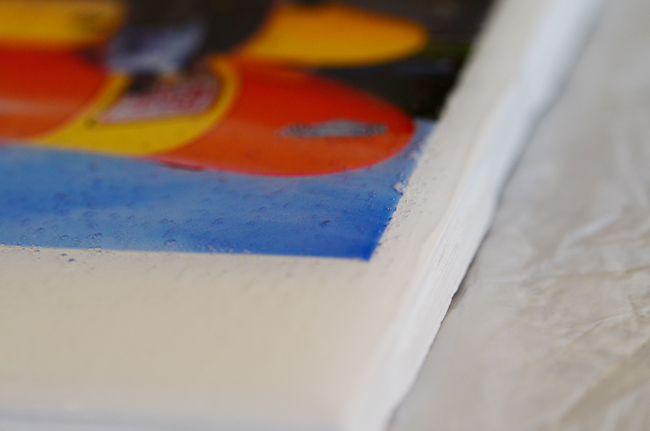
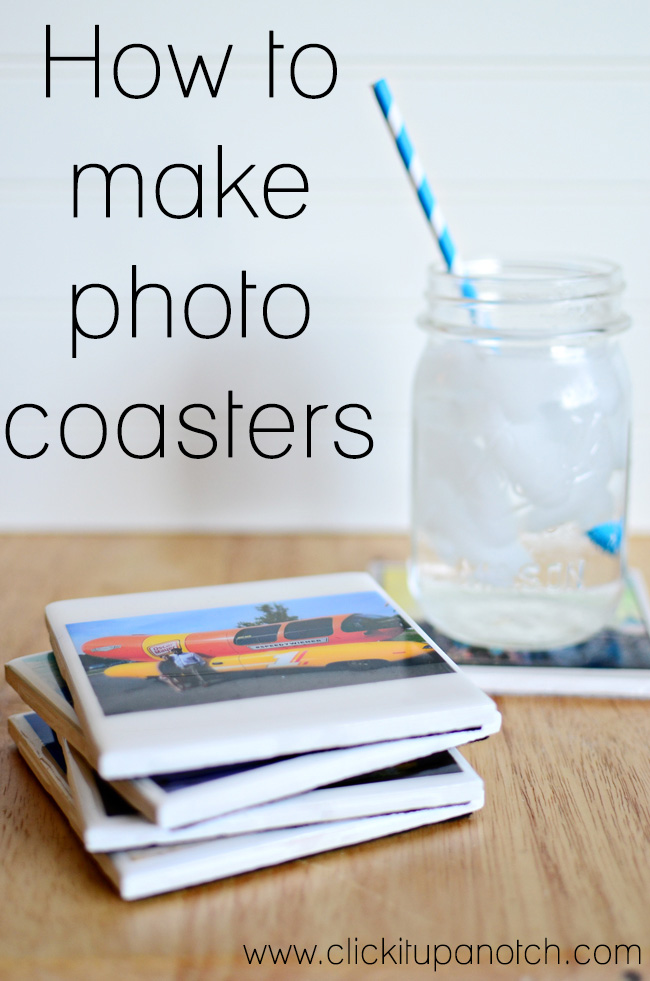
Paint the edges of your tiles with the white paint. This step is optional, however, I think it makes the final product look more professional. In the photo, you can see that the top one is painted and the bottom three aren’t.
Step 2: Trim your photos down for your DIY photo coasters
Since, it won’t take too long to wait for the painted edges to dry, you should trim your photographs down. I trimmed mine down to about 4x4in (Just under 3.875 x 3.875) You don’t want your photos to go to the edge of the tile- you want them to be about 1/4 of an inch smaller than the tile. You want to ensure that the resin will fully seal the photograph down to the tile.
Step 3: Glue photos to center of tile
Next, Use a glue stick to glue the photographs to the center of each tile. Make sure you press down firmly. Set aside to dry.
Step 4: Prepare the resin
While the tiles are drying, begin to prepare your resin.
If you bought the two part epoxy resin, you need to mix together these two parts. These parts must be mixed in equal proportions in order for the resin to harden properly. I use a plastic teaspoon to do my measuring- you’re going to want something disposable.
Each coaster will need about 2 teaspoons of resin to cover them, so for 4 coasters, I measured out 4 teaspoons of part one of the resin and 4 teaspoons of part two of the resin.
Stir the resin together. Set a timer and stir for a minimum of 2 minutes. Stir like you are whipping eggs, pausing every 30 seconds or so to scrape down the edges and bottom well. You really want to ensure that this is mixed well.
If you are stirring properly, lots of little tiny bubbles will appear- don’t worry, they’ll come out later!
Step 5: Spoon out resin onto your DIY photo coasters
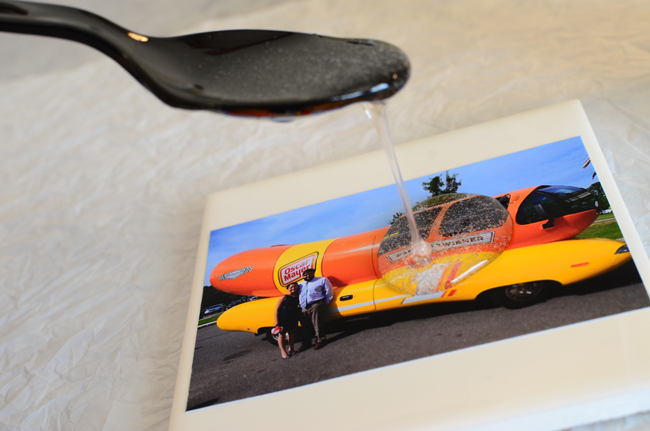
After you are done stirring, line up your tiles on your covered work surface and get ready to make some magic. Carefully, spoon out one teaspoon of resin and pour it gently in the middle of the tile. Next, pour a second teaspoon right on top of the first. Then using your spoon, very gently push the resin outward to the edge of the tile. You need an even coat of resin from edge to edge, stopping just a hair shy of the edge of the tile.
Step 6: Repeat for each tile
Repeat for each tile. When completed, take a flashlight, get down low and examine each tile to make sure that you didn’t miss any spots.
Step 7: Get rid of the little bubbles
If you have little bubbles take a deep breath and slowly exhale your hot breath over each tile. The carbon dioxide will help pop all of those little bubbles. Please make sure you turn away from the tiles before inhaling again though. You don’t want to breathe in the resin. Repeat as necessary to remove all the bubbles from your coasters.
Step 8: Wait for them to dry
Now you must wait patiently for the tiles to dry. For a thin coat such as this, it will take between 48-72 hours for a full cure. Within 24 hours you should be able to handle them. However, we recommend to wait the recommended time to insure they are completely dry and you don’t leave any dings on your photo coasters.
Step 9: Glue felt to the bottom of your tile coasters
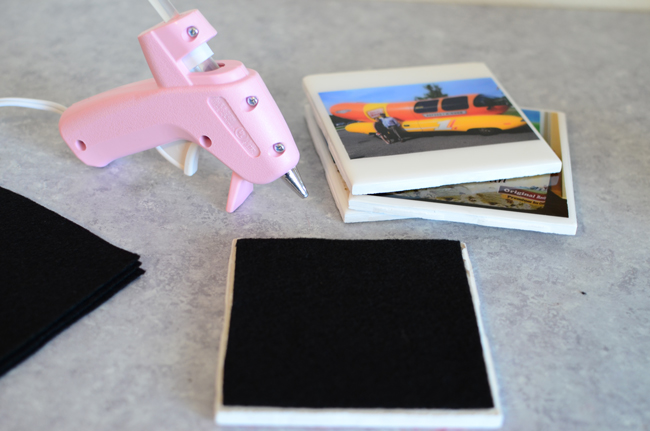
Next, glue felt to the bottom of them to help protect your table. Cut felt into 4-inch squares and hot glue to the bottom of each coaster.
Step 10: Enjoy your photo coasters
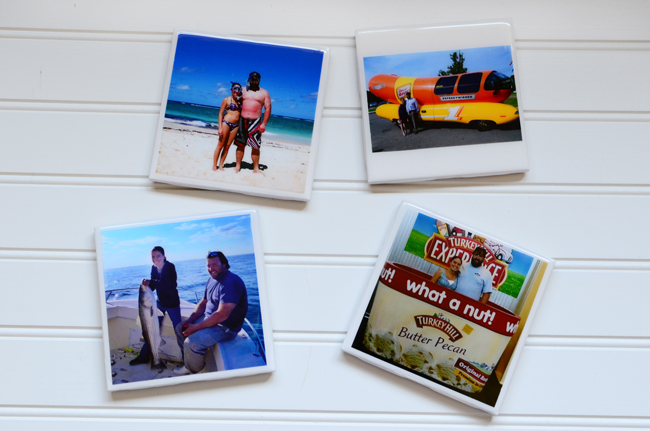
Package them up, give them as gifts, or put them to good use in your own home. The tile coasters above are going to be an engagement gift for a friend. The resin is tough and protects your photos well. It also makes for easy clean up- just wipe them off with a damp cloth if they get any stains on them.
Here’s the set I made almost 2 years ago – I’d say they held up well! They still look as good as the day I made them!
Read more photo gift projects
– 26 unique photo gifts ideas
– DIY picture frame clothesline
–8 Easy to Make Photo Gift Ideas for Everyone in Your Life




Thanks Dana. I’m doing this, maybe even today! new scanner already coming, a box of tiles from a garage sale, paint, photos galore, PLUS the most creative 5 year old artist. Even the epoxy is on hand. I’ll have to send lots to walmart for the glossy part, but boy am I excited! Bless you!
This is a very cool idea, thanks for sharing the step by step!
What a great idea! I have recently started to like diy projects from the heart and this is perfect.
How cute, I love them:)
I started this project – Im making 14 coasters (2 sets) – epoxy isn’t cheap – but I did find at Joanne Fabrics a product that seems to be the same – called Crystal Clear Floral setting resin – 12oz for $13, where epoxy is $5 for approx 2 oz. Do you know if this floral setting resin is the same idea?
Hmmm…I’m not sure if that’s the same thing- I know that stuff is used for making fake flowers appear to be suspended in a clear liquid, but I’ve never used it for anything other than that.
However, if you are at JoAnns, download their app- there’s always coupons for at least 40% off one item (sometimes it’s 50%), and for this project you really won’t need much resin.
If you do go ahead and use the Floral resin, let me know how it works!
I’m curious to know if you tried the Crystal Clear Floral setting resin and if so, how did it turn out?
Hi! I realize this comment was posted ages ago, but I wanted to be of some help, possibly. I purchased the Crystal Clear Floral resin for this project, and there are a couple of differences between it and the EnviroTex resin I have. First, it’s a lot more “runny” than the EnviroTex, and it takes longer to harden. I used it for a coaster about 45 hours ago, and it is still very, very tacky. I made the mistake of putting my finger on one of the sides were the resin had run off, and now there’s a very visible flaw in it. :(
Second, the floral resin isn’t quite as clear as the EnviroTex (which dries crystal clear with a lovely glossy finish). I’m not sure if the image I used was just a bad match, because it’s a mainly yellow/orange/red image, and now the resin has an odd, almost yellow tint. The floral resin also seems to have disturbed the ink in some areas.. maybe that is the reason for the tint.
I’m hoping a change in paper will result in better reactions with the floral resin.. I really want to love this product, lol. Because, while I LOVE the results I get with EnviroTex, I do not love paying $11.99 for 2oz at my local crafting store.
Made these for my hubby for Christmas. Super excited at how they turned out! I learned few things along the way. One was to let them dry on wax paper or freezer paper next time. I placed them on plastic grocery bags in a box so I could more easily hide them from hubby on top of my bookshelf. The resin dripped off and the plastic bags stuck to them very badly but I learned how to get it off. You take a heat gun, luckily I’m a stamper to so I had one, heat the unwanted resin, hold it there for about a minute and then scrap it off. Most of mine was on the bottom so I just took off enough to wear it would set level. It did mare on of the six I made but I can redo it later.
I know quite a few people I’ll be making these for presents next year!!!! Thanks for the tutorial!!
I made four of these as practice for myself, they turned out awesome! Thanks for the great idea and the step by step tutorial. I tried leaving the coasters on wax paper, but the resin that dripped over did cause them to stick to the paper. Thanks Carrie (above comment) for the how to on removing the resin/paper….I’ll have to try it. Anyway I learned after the first one that if you set the coaster on something, I used shot glasses, while pouring the resin and while drying, it doesn’t stick to anything. Now I’m going to make more for gifts. So excited!
I’ve tried four of these for the first Time and the ink has run so bad you can’t see the picture,, so I tried midge podge on the picture to let it dry and try resin on it and it did the same thing. What am I doing wrong?
Hi Mysty!
While I’m not 100% what could have gone wrong in your case- I’m thinking maybe the Mod Podge reacted with the Epoxy. What kind of photographs were you using? Were they ones you had printed at a photo printing place, or were they ones you printed yourself from your computer? The type of printer used might have some sort of a reaction with the epoxy. Also- what kind of resin did you use? Let me know and I’ll see what else I can do to help!
Misty — That happened to me the first few times too. Here’s what worked for me: If you are printing your photos at home, print them on cardstock and don’t use the “photo setting” — use the regular setting. Then, adhere the image to the tile using Mod Podge on the back first. Let that dry about 30 minutes (I would stack the tiles on top of one another to really stick the picture down). Then using a 4″ sponge brush REALLY REALLY lightly apply the first coat of Mod Podge to the front of the image. Try and do this in one or two passes. Let it dry, sand and repeat. I did 4-5 coats on mine before I polyurethaned them; epoxy wasn’t an option because of how many I was doing.
I made coasters as a favor for my wedding. It was a TON of work (2 coasters per guest X 100 guests), but they were a huge hit. And we love visiting with friends and seeing them in their house. We did not do the epoxy step — we actually used polyurethane (two coats) and they’ve held up really well.
What a great idea for a wedding favor!
Did anyone experience mugs sticking to the coasters?
Hi, I have, Did you find a way to fix it?
I am also wondering how the resin vs. polyurethane held up. I made some with polyurethane and when I had a cup of hot tea it stuck. Now my coster has a mark from the hot cup. I did use mod podge then sprayed the poly over it. Any ideas?
Is it possible to use black tiles (and paint) or would something ruin the look?
Hi there. I am working on several sets of these for Christmas gifts for my boyfriend’s family. I have some epoxy resin coming in the mail but purchased some epoxy last night at Ace to get a head start on my project. The stuff I purchased was a five minute set variety and it dried so quickly that it clearly wasn’t going to work. Is there a specific type of epoxy resin I should ask for at the store in case I have the same problem again? How long did your resin take to dry? Thanks!
I did these today. I also used the quick set epoxy, but overall it worked fine – you just have to work quickly. I followed directions above except used greyish tiles and skipped the white paint step. I did 8 coasters in all and used a LOT of the epoxy resin. I also could never get the air bubbles out of mine. But, overall – I really like how they came out. Thank you for the great DIY project!
In all of my research on this technique I have read over and over again that you can get rid of the bubbles by blowing on each one with a straw or using a small blow torch to blow them out just by bringing the torch close to the bubbles. Also the best type of epoxy to use is the Envirotex and use a foam brush to spread the epoxy. Hope this helps.
I have made some tiles, it seems like warm cups and cold cups stick to the tile any recommendations? I use Envirotex resin.
Hi there!
I made these for Christmas last year and they turned out great! I printed them at home on card stock and did not use any modge podge but they still turned out perfect! The only problem I’ve noticed is that they tend to stick to beverages when you actually want to use them as coasters. Any suggestions for how to fix this? I plan on making more as a wedding present. Thanks!
HI,
I have purchased all of the materials to make the coasters but…I have called numerous stores here in Denver and cannot find 4×4 non glossy white ceramic tiles anywhere. I have tried Hobby Lobby, Michael’s, Lowe’s just to name a few. Everyone sells glossy tiles – help I am trying to make Christmas gifts!
Glossy tiles will work that’s what I used
I found the tiles at Home Depot. Lowes only has the polished while tile in the 4 inch size. I was a little surprised.
Cynthia
Best explanation of using resin I’ve ever seen. It looks scary when I see it but with your help I am willing to try.
On the 2nd set of coasters, did you have the photos printed with a black border or did you outline them with a marker?
What’s Taking place i’m new to this, I stumbled
upon this I’ve discovered It absolutely helpful and it has aided me out loads.
I hope to contribute & help different customers like its aided me.
Great job. latahza
I have made a lot of these coasters and just love them. To prevent cups from sticking to them, I have used furniture wax on them which seems to help.
can some tell me whats the best paper to use to print the pictures on. cardstock paper, glossy photo or non glossy paper
I’ve made them but not with pixy all midge podge and the spray over it .make pretty coaster .and next project is tables with pictures on the glass
I just poured the epoxy resin mix over my first coasters, and if they look this great when they dry , I will be making tons more! I appreciated the step by step instructions!
Joanne
The plastic bags underneath is not a idea. I recommend setting them on cups or something else raised up so the epoxy drips have somewhere to go as it’s drying. I have an epoxy plastic bag nightmare right now and I’m not sure these coasters can even be saved.