If you want to understand Photoshop editing or Photoshop Elements editing easier, then you need to understand layers. My hope is that this tutorial helps you do just that.
What are Layers?
Layers are just like the projector you had in your classroom when you were younger. Oh boy, now I am dating myself. Your teacher used transparencies on the projector. She could stack transparencies on top of each other, she could write on one, she could add an entirely different piece to the existing one, or she could just add a little something.
The transparencies could always be taken off without affecting the main picture. That is what layers can do. You want to make sure every edit you do is on a layer, so you do not alter the original until you are ready.
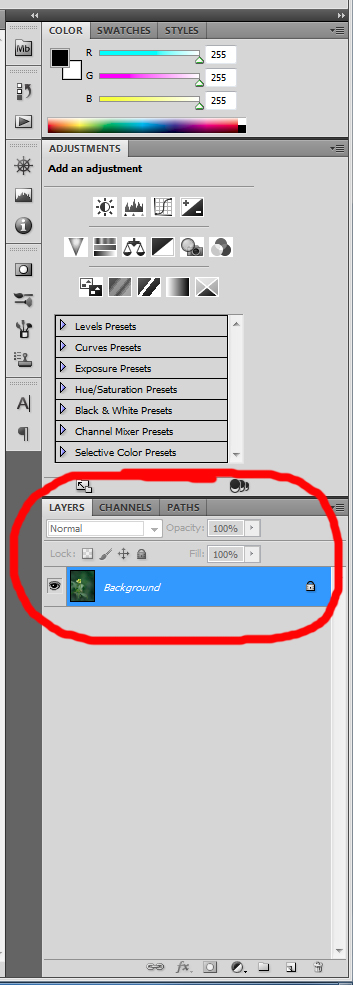
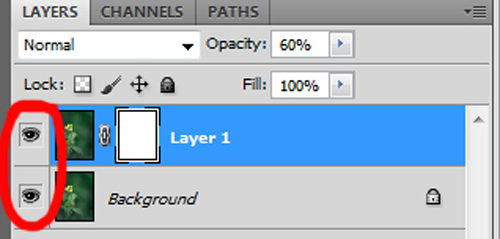
This is your layers panel.
Each layer is listed. The main photo is the background layer. It is always at the bottom, so you can stack layers on top of it, just like the transparencies.
How to Make a Layer
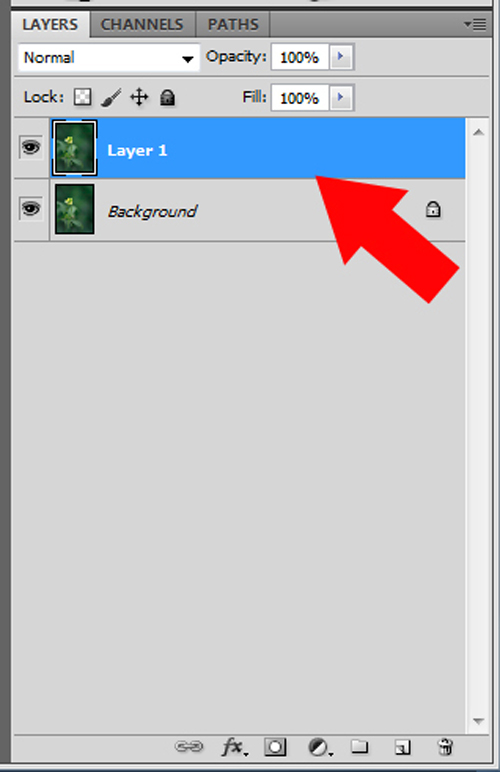
Whether you want to clone something out, dodge/burn, or any edit you want to make sure you do it on a duplicate layer. To make a duplicate layer simply press CTRL+J (or Command+J). Then a duplicate layer will appear on top of the background in your layers panel.
This will automatically be named Layer 1, but you can rename it anything you would like. Simply right click on the layer, go to Layer Properties, and then type in the name you would like.
Blend Mode
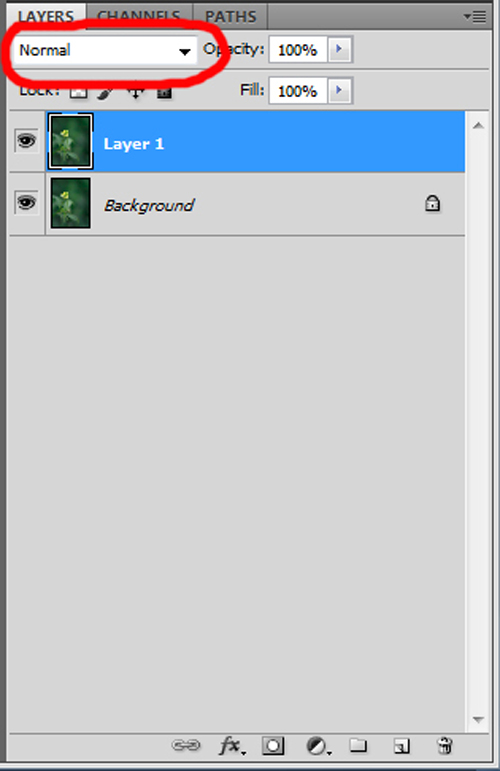
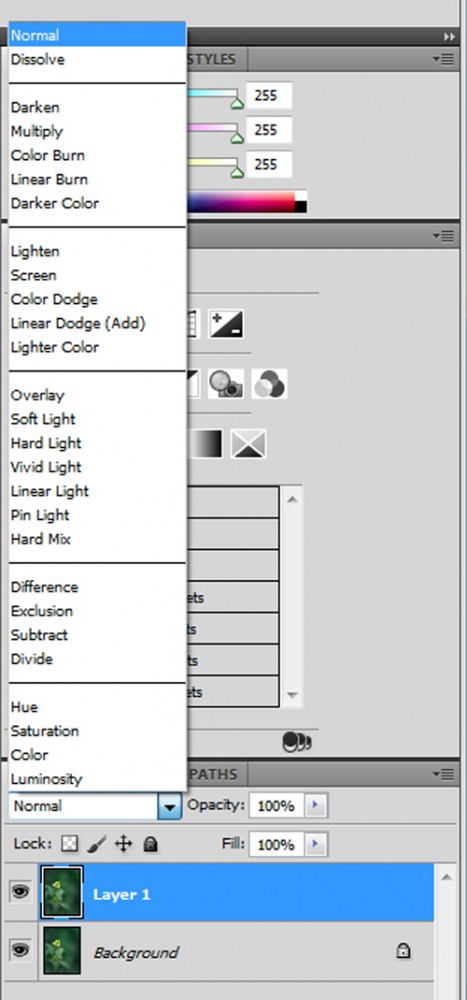
What? Did I lose you for a second? When you look at your layers panel you will see a box at the top that reads “Normal”. That is your blend mode. By simply changing the blend mode of your layer, you can alter your image with no other editing.
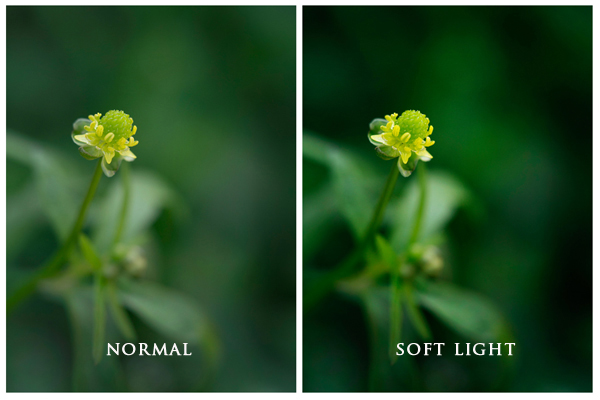
Now check this out. Here is a photo of a flower I took. Next to it is the same photo, but I changed the blend mode to “Soft Light”.
Just a slight difference, but it does give it a punch of contrast. There are many different blend modes and you can experiment and change them by simply clicking the drop down option next to “Normal” in the box. All of the different blend modes appear. Play around and see the different results you get.
How to Tone It Down
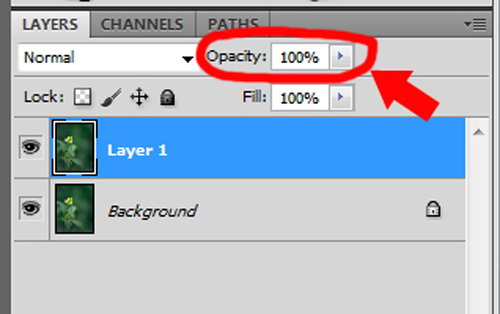
If the look of the effect or any other edit is just too much, don’t worry. Remember you have full creative control. You can easily tone down the look by adjusting the opacity level. You can find this to the right of the blend mode box. It reads “100%” at default.
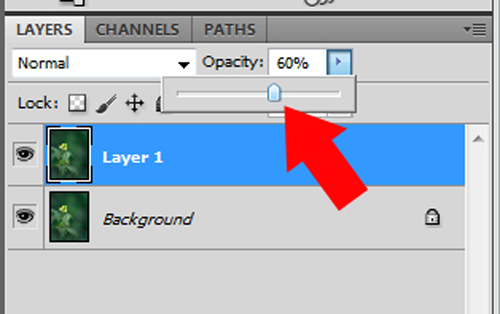
This means the layer that is selected (highlighted) in your layers panel is showing up at that strength. So right now you are seeing the edit at full strength. All you need to do is click on it and then slide the marker down to the percentage you want. You get real time results, too. So go slow and stop when you get the look you want.
How to Hide Part of a Layer
You have made a layer, you have edited, you have even adjusted the opacity, but it doesn’t look quite right. Is there a spot you don’t want that edit to show up on, but you want it to be on the rest of the image? Easy, now you make a layer mask.
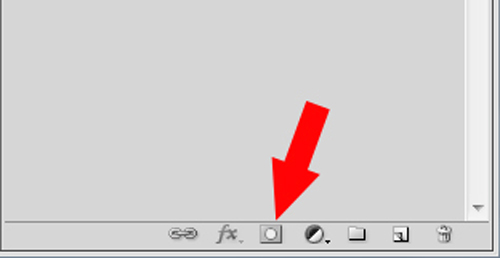
Stay with me, it is easier than you think. Make sure you have the layer you want to edit selected/highlighted in the layers panel. Now look at the bottom of the layers panel and you will see a row of icons. One of the icons is a rectangle with a circle inside of it. That is your layer mask. Click on it.
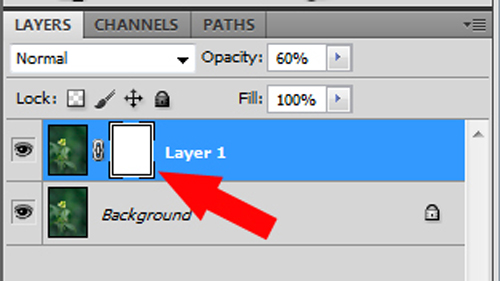
Now a white box will appear on your layer name in the layers panel.
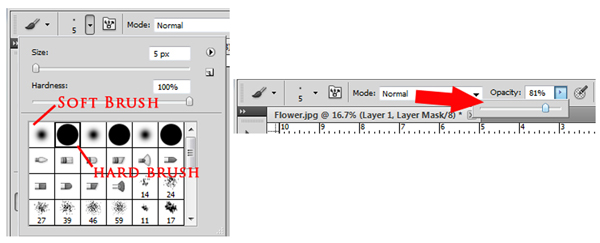
Go to the toolbar on the left side of your screen and select your brush tool. Near the top of the screen you will see options for the brush tool. The left side of this graphic shows the option of selecting a soft brush (think spray paint or airbrush with edges softly blending in) or a hard brush (think a regular paint brush covered with paint and the solid line it creates when it paints). The right side of the image shows the brush opacity box. This is just like the payer opacity, simply select the percentage of the brush you want it to appear at. The higher the number the more the brush stroke shows up.
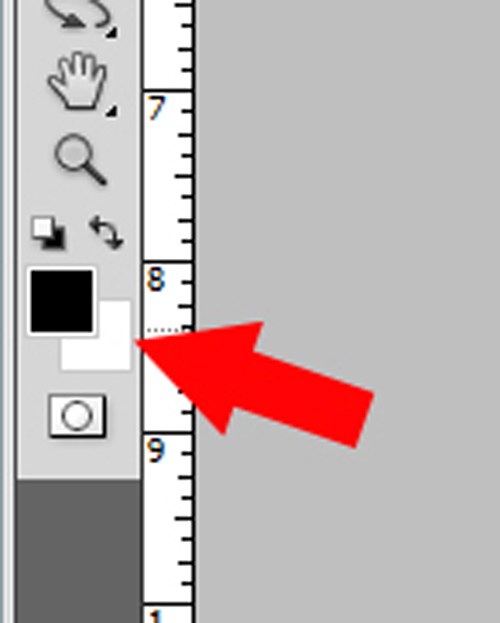
At the bottom of your tool bar you will see a square. It will likely either be black or white with the opposite color behind it. That is important for the layer mask. Remember this simple saying “White reveals, black conceals”.
Your layer mask that you created (just look at the third image up) is a white box. So that means all of your edit is revealed. Everything is showing up. To hide something on that layer mask, you need to select a black brush. So that box at the bottom of your tool bar needs to be black, so you can conceal.
You can simply change from black to white by pressing the “x” button on your keyboard. Whichever color box is on front, that is the color brush you have.
So the white layer mask is showing everything and you are now going to use your brush to paint away the part of that layer you do not want to show.
*Alternate tip: If you only want the layer edit to show up on a small part of the image press CTRL+I after creating you layer mask. This will invert the layer mask and make the box appear black. Now nothing from your layer is showing up (because black conceals). Use the brush tool set at white (white reveals) to make the part of the edit you want to show up appear.
Making Layers Hide
Just as your teacher could simply remove a transparency to take one aspect of the image away, you can do that with your layer. The icon that looks like an eye on each layer means that layer is visible.
Simply click on it to make the layer invisible. Click on it again to make it visible again. This is a great way to see the before and after from that layer edit.
Done Editing?
So you have done all of the editing with layers you are going to do. Now you can merge all of the layers together. You may have 3 or even 15 layers, but merging it all together is as easy as pie. Simply press CTRL+SHIFT+E. Any layers that have the eye on them (are visible) will now be consolidated into the background layer. If the layer was hidden (the eye was unclicked in that layer) it will still show up. You can make that layer visible now or you can click and drag it down to the trash can at the bottom of the layers panel to delete it.
There are so many more things to do with layers, but this is a good start to help you understand what they can do and how to work with them.






Thanks for a step-by-step description of how to use layers; this information is really helpful and timely for me. I look forward to sitting down to edit photos, and giving your suggestions a try.
By the way, your camera bags are lovely!
Take care.
Jean, thank you so much. I remember feeling so lost when I read things about layers. All of the tutorials just assumed I knew the function of layers and how to control them, but I didn’t. SO I would get even more confused. I hope this helps someone. ;) You can always email me if you have any questions. I will be more than happy to help.
Hi Kim,
Thank you so much for this little tutorial. I have always been intimidated by Photoshop and have tried to learn it a couple of times, only to be totally frustrated. It’s quite a coincidence that I came across this article but of late, I have been searching and trying to catch live shows and tutorials of how to use Photoshop. Again, I was frustrated. Your article has helped put a “light bulb” moment in my head. I love your teaching style and your examples. Looking forward to more articles like this. I can now go “play” with what I just learned from your wonderful and extremely helpful article. Thank you so much for taking the time to show us that we don’t have to fear this thing they call, Photoshop. Hahaha. :)
Thanks again,
Nhi
This is a great, great post. Thank you! I’ve been trying to find a really simple, step-by-step explanation of this and most things I find just don’t help me. I just got Photoshop and I am completely overwhelmed, so thank you again. :)
As someone new to Photoshop, working with layers is always a trial and (mostly) error process for me. This post really helps clear up some of the confusion for me! Thanks!!
I am another one who just had one of those good ol’ Lightbulb Moments after reading your tutorial. You have a real gift for explaining things!
Unfortunately, I only have Photoshop 6 Elements. I’m assuming the layer mask isn’t available on that version? I’m not seeing it.
Thanks again so much for taking the time to explain this subject to people like me who have been hopelessly confused.
Becky
Thank you for a basic, straight forward and easy to understand article!!
This tutorial helped me SO MUCH! I’ve been taking a digital photography class.. and I just don’t click with the instructors teaching style. But THIS I understand! Thank you SO SO much! I could just HUG you! :)
So glad you enjoyed it! Kim did an awesome job with this post!
Wonderful tutorial!! I NOW UNDERSTAND LAYERS!!! Thanks so much!!
WOW! I am thrilled I GET it!
Although I am going to bookmark this tutorial, just in case! :) Thank YOU!
Also, a shout out to Kim & SHUTTER|BAGS….GORGEOUS!
I am sure alot of hobby mommy photog (like myself) dream of owning one, someday!
Thanks again, I feel challenged & confident to enter into the layer world now!
Yippee!
PS~any contest coming for the chance to own a SHUTTER|BAG?
Thank you, thank you, thank you! I did a photo shoot the other day for my neighbor, who just happens to be well known from his time on American Idol. The pictures were great, but it needed to fix a few things and I am a Photoshop novice. The adjustments were beyond Lightroom’s capabilities and I just couldn’t figure it out. Then I remembered I saved this post on my iPad. You solved my problems in no time at all with your easy to follow instructions. Thanks again!
Awesome tutorial. Thank you so much.
Are these raw photos you work with?
It would ne really great if when doing these tutorials you made then printable so that we could practice them
I Just whant to lear about Photoshop
Brilliant Idea
https://hearthis.at/downtempo-dj/psybientmusic/