Remember the days when we used disposable cameras and you had to take your film in to get developed? In an excited rush you’d rip open the envelope of photos only for some of them to have the focal point not where you were hoping.
Thankfully now with our big fancy DSLR cameras, we are able to be very selective with where the focus point is in every single picture. This allows you to be creative and nail your focus more often than we did back in the 90’s.
Table to Contents
- What does focal point mean in photography?
- What is an example of a focal point?
- Where should I put my focal point?
- Where to put your focal point for more than one person
- What focus mode to use for Nikon
- What focus mode to use for Canon
- What focus mode to use for Sony
- How to get creative with your focal point
What does focal point mean in photography?
Focal point in photography is the point your camera uses to make the sharpest part of your photo.
When you look through your view finder you will see a red dot or red square. This is your focal point.
ISO 100, f1.8, ss 1/100
You may see one or multiple focal points when looking through your view finder.
Being able to choose your focal point allows you to tell the camera where to focus. When shooting on Single Point AF (Nikon) and One Shot AF (Canon) you will move your focal point around to your subject.
What is an example of a focal point?

A focal point is any part of the image that you want to draw the focus into. Sometimes you will want something in the foreground in focus and then blur the back ground.

This is an example of what not to do, that is unless you didn’t want the cute child in focus.
But really if you are going to put the focal point in the background you want it to look more intentional.
Focal point in foreground

I love to take a photo where the person is blurry but an object is not so you don’t need to focus on the eye. Of course, not all my pictures are like this but it is nice to focus on the details.
Here are a few examples to when I focused on the details and not the person. Sometimes these pictures tell a better story than if you had the subject in focus. 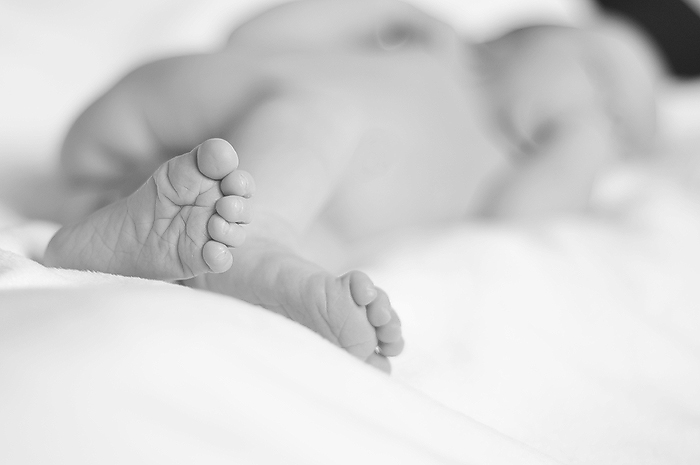
Take a look at my aperture (f-stop) in these as well, since that plays a big roll in what is in focus as well. I typically like to shoot wide open when I’m capturing a specific detail.

Other times, especially in portrait photography, you will want the subjects eye to be the focal point.
See here my top 7 Tips to Take Sharp Photo which will only help your portrait photography.
Where should I put my focal point?
Aim for the eyes
When shooting people you want to make sure that your focal point is on your subject’s eye. We are naturally drawn to a person or animals eye when we look at an image so you need to make sure that is the sharpest part of the photo.

Missing the focus on the eyes
In this photo I didn’t put the focal point on my eyes and the focus fell on my shoulder and shirt. That wasn’t exactly what I wanted and it didn’t make the photo stand out like it could.
The key to changing your focal point is being able to put your “square” or “dot” on your subject’s eye. It is important that when taking a photo the eye is the sharpest part of the image.

Remember when I talked about aperture and how depending on what it is set at, the focus slowly lessens as you move away from your focal point.
Where to put your focal point for more than one person
Choose just one eye for focal point
When you are shooting more than one person, you should choose one of the subject’s eyes to focus on. 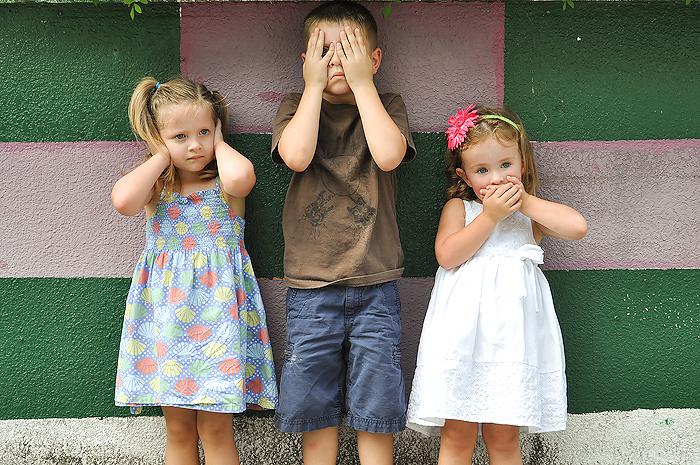
Keep your aperture high enough
Make sure your aperture is at a high enough number that the whole subject is in focus.
My focal point was on the child in the middle and my aperture is at f4.0 to make sure all 3 kiddos are in focus.
Adjusting your aperture will be found in manual mode or in aperture priority mode.
Missed focus on multiple subjects
In the picture, I focused on the oldest child. The problem with this picture is my aperture was at f1.8 (rookie mistake). This was taken about 2 weeks after I started to shoot on manual. 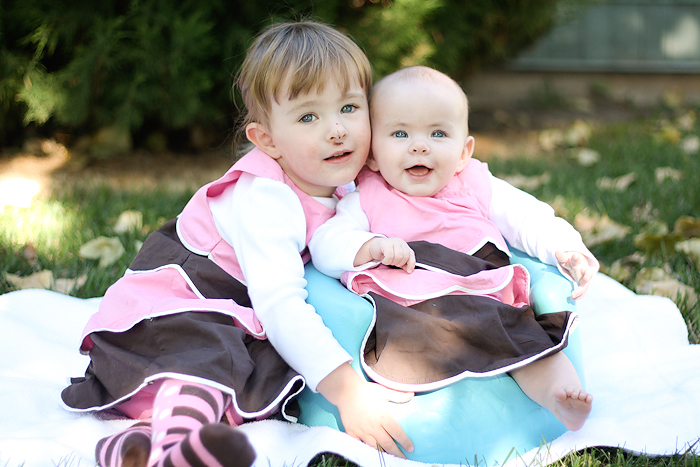
Here is a close up of the eyes. You can see here how they are not in focus. In this photo I should have raised my aperture instead of having it wide open so both girls would have clear eyes.
Here are a few more Reasons Why You Have Blurry Photos.
Zoom in on the eyes to double check
Remember you can zoom in and check this before you move on to another photo. This will save you frustration later on because you can’t really get rid of a missed focus blur.

Another tip if to try to once you have the focus on the eyes is to Create Catchlights.
What focus mode to use for Nikon?
It is extremely important to change your focal point in photography because this allows you to choose what is in focus and not your camera. You will need to go into your main menu to change the setting.
It is ideal to have one focal point which means you need to choose the correct focus mode.
Single Point AF (AF-S) [RECOMMENDED]
This setting allows you to place a single focal point anywhere in the frame you want in focus.

Continuous (AF-C)
This mode is best for moving subjects like sports and wildlife as the camera tries to predict where the subject will be when you push your shutter button. Plus if the shutter is pushed half way down the camera will continue focus and refocus on the subject as it moves. You must follow the subject with the focal point in order for this to work.
AF-A the camera switches between AF-S and AF-C depending on if it thinks your subject is moving or stationary.
Dynamic Area AF
This setting allows you to choose how many focal points you want – 9, 11, 21, 39 or 51 depending on which camera you have. You set the single focal point on a certain area of your frame and then other focal points add as a backup to get what you want in focus.
Auto Area AF
This setting allows the camera to decide what is in focus.

What focus mode to use for Canon?
One shot AF [RECOMMENDED]
This settings allows you to place a single focal point anywhere in the frame you want in focus.
Al Servo
This mode is best for moving subjects like sports and wildlife as the camera tries to predict where the subject will be when you push your shutter button. Plus if the shutter is pushed half way down the camera will continue focus and refocus on the subject as it moves. You must follow the subject with the focal point in order for this to work.

Al Focus AF
The camera switches between Al Servo and One shot AF depending on if it thinks your subject is moving or stationary.
AF Point Expansion
This settings allows you to set the single focal point on a certain area of your frame and then other focal points add as a backup to get what you want in focus.
Automatic AF Point Selection
This setting allows the camera to decide what is in focus.
Read more: How to Shoot in Manual Mode
What focus mode to use for Sony?
Continuous AF (AF-C) [Recommended]
When you have the shutter button halfway pressed this mode will focus in as you move. This is ideal for faster moving subjects like sports or kids.
Single Shot AF (AF-S)
Press the shutter button down halfway on the subject, once that is done the focus will be locked. This is recommended for subjects that will not be moving like landscape shots.
Automatic AF (AF-A)
AF-A Is only available on some Sony cameras that are A-mount. This focus mode will determine whether or not the subject that you have selected with your shutter button is moving or still. Then it will decide automatically which focus mode to use, single or continuous.
How to get creative with your focal point
It is amazing how much you can change a photo by just moving the focal point around. If you feel like your photographs are lacking something, play with the focal point and see the difference.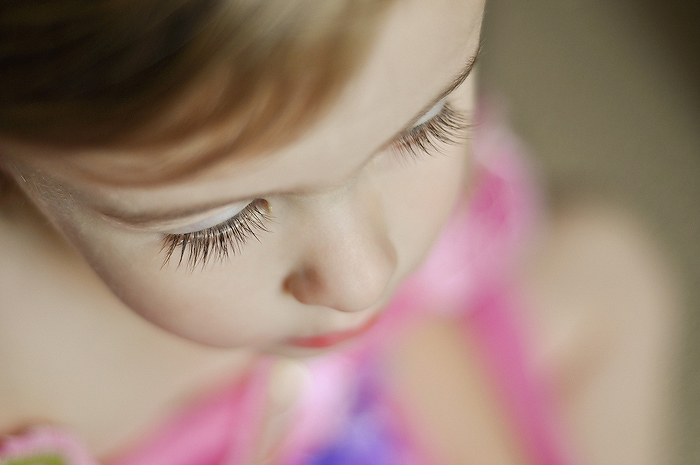
This photo could have been a normal picture of a child but instead I changed my focal point to be on her eyelashes. So now I have a beautiful photo of a detail I don’t want to forget.
Get close then select focal point
In the photo below you see a branch of pink blooming flowers. I could have taken this picture from further away and it wouldn’t have had the same effect.
In this one I am up close. You can see the details on the petals and because of the focal point being in the foreground, and my aperture being at f/2.2 the blur in the background just adds to the photograph.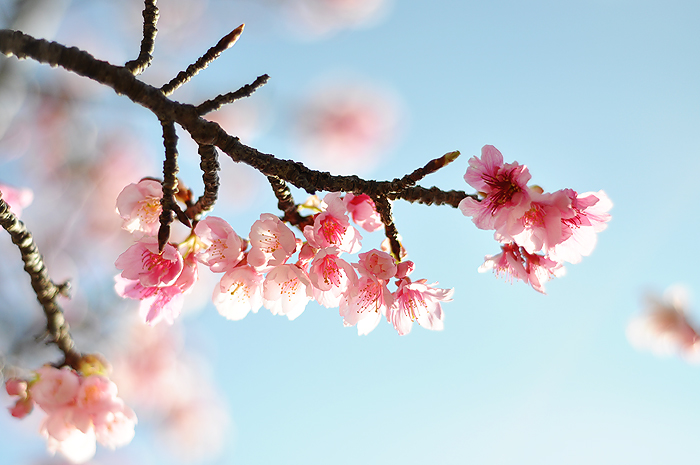
Now it is your turn!! Go out this week and take your photos in manual mode and change your focal point. Take some of your subject with it on their eye and some focused on an object. Have fun!!
Read more about Focal Points
– 10 Incredibly Easy Tips to Take Silhouette Photos
– How to use Kelvin for White Balance
– 5 Tips for Freezing Motion in Photographs
-How to Shoot Still Life Photography to Push Your Creativity


