
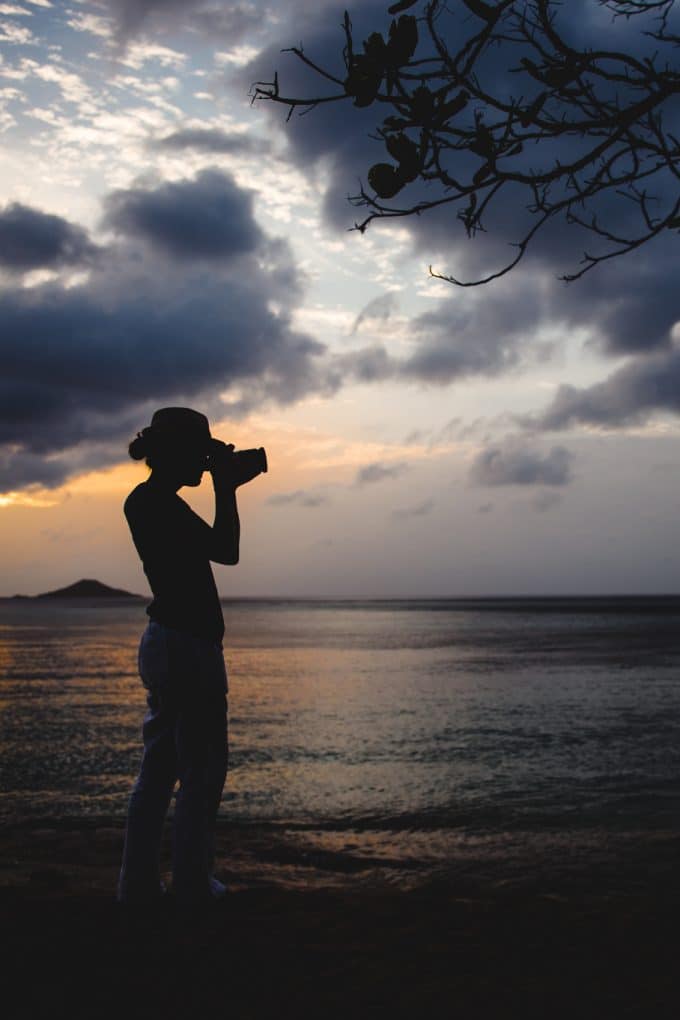
Have you ever looked at a beautiful artistic shot of a silhouette with a magnificent sunset in the background? Your eyes are drawn to the dramatic image and your photographer heart needs to know exactly how to capture a sunset silhouette.
Maybe you have tried to replicate one of these images before and it just didn’t go so well. Or maybe you were stuck on auto mode on your camera and your flash kept coming on. We all know the struggles of learning a new skill.
Thankfully we are going to break this sunset silhouette image down for you so you can get out there tonight and actually master a beautiful photograph this time.
Table to Contents
What is the silhouetted effect?
Simply put the silhouetted effect is when your subject is in front of the light source. Being in front of the light source will cause the subject to be completely backlit. That means your subject will not be exposed allowing only a dark silhouette of their body to appear in the image.

Read more: 5 Must try back lighting techniques
How do I take a sunset silhouette photo?
Put your camera in manual mode
To take a sunset silhouette you are most likely going to need to put your camera into manual mode. If you are not able to adjust all of the settings the camera will do it for you and cause the flash to come on and ruin the sunset in the background.
Read more: How to shoot in manual mode
Set your aperture
Set your aperture (f/) to 8.0 or more narrow (larger number). This will create a large depth of field and allow you to have a clear subject. Lowering your aperture will also give you a starburst effect from the sun.
Read more: Everything you need to know for unique lens flare photos
Keep your ISO low
You naturally will want to raise the ISO when it’s darker outside, but you don’t want to do it in this type of shot. The higher the ISO the more noise will occur. With your subject appearing blacked out, that noise will be very evident on your subject, which we don’t want to happen.
Have a fast shutter speed
I always say to start at a 1/125 for shutter speed when you are shooting people. You may have to go faster if you want to catch an action shot like a parent lifting up a child in the air.
If you are shooting something that will not be moving like a tree or an object you might be able to get the shot using a lower speed like 1/125
Read more: How you should be freezing motion in your pictures
Select your focal point
The focus of the sunset silhouette should be on the contrast area of where you subject meets the sunset. If you are using a person, then I typically focus on the outline of their head.
If you focus solely on your subject your camera may be searching for something to focus on since there isn’t enough contrast for your camera to lock focus. If you are using an object like a tree or animal thats where you focus. This will help create a sharp outline.
Meter, focus, shoot
Now the fun begins! Place your subject where you want them. Keeping all of those settings in mind, you are going to meter off of the sky. Find a brighter part of the sky (not the sun directly) and adjust your settings for that spot.
Then place your focus on your subject, don’t adjust your settings! Your meter may dip drastically to the underexposed side but don’t worry. Remember we want your subject to be underexposed. Make sure they are composed how want them and then take the photograph.
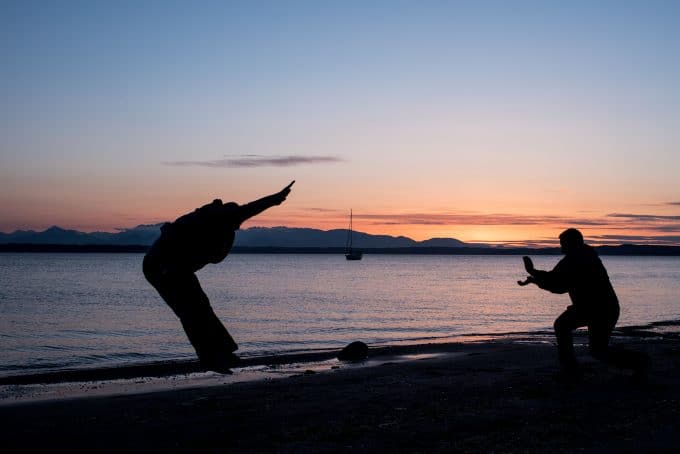
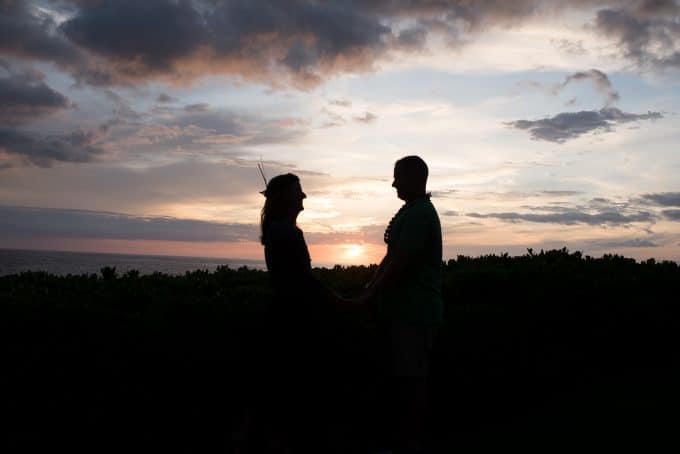
How to pose subjects for sunset silhouettes
The beauty of a sunset silhouette photo is in the contrast of the artistic background to the subject. This is a great way to embrace low light photography considering you will not have much light to work with.
Create an interesting silhouette
If your subject is a human, you will want to pose them in a way that creates an interesting silhouette and so you can tell that it’s a person.
Do this by having them move their arms or legs away from their body. For example two people could be holding hands side by side but with distance in between them to have the background come through between them and create the silhouetted effect.

Keep in mind with silhouettes you don’t want too much distance between people. You will likely need to encourage your subjects to get closer and closer in order to create that sense of connection.
If not, your subjects will appear awkwardly very far away from each other where in real life it isn’t seem that far apart.
Read more: 6 Steps to creating a Silhouette
Tips for sunset silhouettes
Have a clean subject
You want to have a photo that has minimal distractions. That way all of the attention goes goes to the beautiful sunset and the silhouette of your subject.
Read more: 10 Incredibly easy tips to silhouette photography
Know when to take the sunset photo
Go out during golden hour and start practicing. Many times you will take a lot of photos before you get the sky exactly where you want it.
Remember sunsets are ever changing so if you don’t love how the background looks, just wait a little bit and more colors might come out.
Ultimately you want to go before all of the light is gone out of the sky, no light means no silhouette.
Get low
There are two main subjects in a sunset silhouette photo, the silhouette and the sunset. Like I previously stated, you don’t want too many distractions even from the ground. So get low to the ground. I find it easiest to lay down on my stomach to take this photography.
Laying down will allow a nice clean image with minimal distractions and a lot of subject and sky, the perfect combo.
Use a tripod
Due to the time of day and the type of shot you will be shooting in very low light. Some cameras are pros at this and others like entry level cameras might struggle a bit more.
To help avoid blurriness or camera shake, you can use a tripod and a remote to avoid any unnecessary movement. This will also let you be the subject or at least a part of the subject. Just remember to put it low to the ground if you need to help eliminate any distractions.
How to edit to a sunset silhouette photograph
I fully believe in you to be able to capture this artistic shot! You will be able to get a beautiful sunset with a captivating silhouette all from your camera.
However you might be interested in knowing how to enhance your photo even more in post processing. I use Adobe Lightroom as my go to editing processor. I am going to give you a few tips to make your image really stand out using Lightroom.
Exposure
First thing I do is adjust the exposure. Slide the tool either way until you get just the right lighting you desire. This might brighten up your silhouette but don’t worry we will adjust that next.
Contrast
Adjusting your contrast will make your silhouette stand out against the sunset. It will also adjust the colors in the sky a little bit.
Blacks
One of my favorite tools is the black adjustment. You will want to lower down the blacks to make that silhouette really stand out and actually be black. Doing this will create a nice contrast in your sunset and subject.
Shadows and highlights
The next two adjustments will be to lower the shadows and raise the highlights. These type of adjustments will be to your discretion so if you lower your shadows and it takes too much out of the sunset then try to pull that back out with the highlights.
Colors
Go into the HSL panel and you can start adjusting the different colors in the sunset. This can be a fun thing to play around with and really pull out more of one color if you desire.
I recommend adjusting the hue, saturation, and luminance of the primary colors of your sunset. I don’t like to go overboard and make it look fake, but enhancing those colors will give you an appealing and beautiful photos.

Read more: Editing silhouette photo in light room
Have fun capturing your sunset silhouette photo!
These are such a fun way to capture a memory of a special time and place. They look beautiful hanging on the wall or as a phone background. Have fun experimenting with the sunset and posing your subjects. You can do it, I believe in you!
See more for documentary style photography- 8 Ways to Weave Intentional Design Into Documentary Photography


No comments yet.