This summer with all the sunshine and gorgeous sunsets, I challenged myself to practice manipulating lens flare to enhance my images. You may have noticed the use of flare as a rising trend in editorial and fashion photography.
I love the look of warm sunlight enveloping subjects in a photograph! Some may see lens flare as an annoyance or something to avoid. However, it can actually give your images a beautiful, dreamy sense of mood if you learn how to control it. I want to share with you some tips to enhance your photos with lens flare. But first, lets discuss a little more about what it is.
Table to Contents
What is lens flare?
Lens flare is when the light rays from the sun enters your lens and hits your camera sensor directly. This occurs when you are shooting directly into the sun.
It differs from backlighting in that the rays of the sun are not only lighting the back of your subject, but also entering your camera’s sensor. This can result in low contrast haze, overexposure/washed out subjects, specs of scattered light, or halos on your images and subjects.
The good news is, with a little know how there’s ways to make flare work for you! Lens flare can actually be quite flattering in portraits, creating soft skin tones and a beautiful atmosphere. There’s typically 3 types of lens flare.
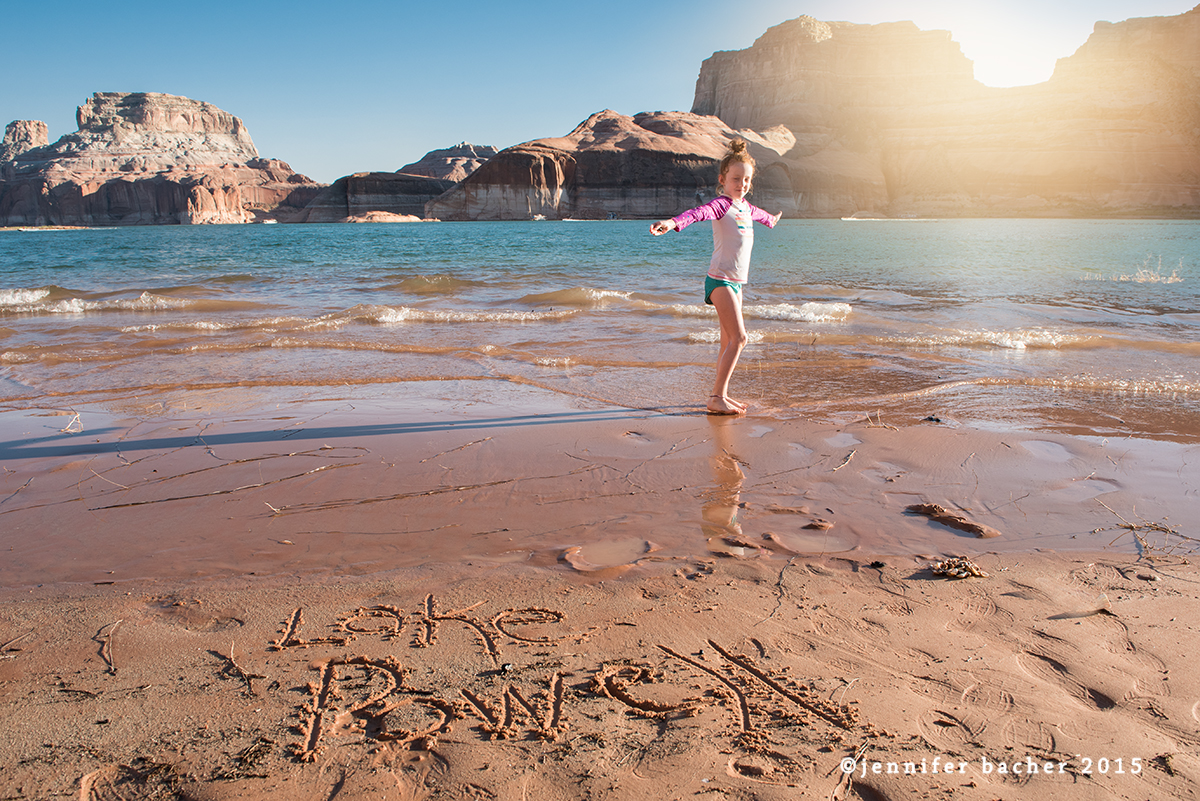
3 Different types of lens flare
Circular
Circular is where circles of light, hexagon looking shapes, or halos appear, usually making anything within the shapes overexposed. This typically occurs when the sun is near the horizon.
Angular
Angular is when the light or sun is outside the frame, creating a streak of light across your photo.
Diffused
Diffused is a hazy glow that appears across your image, sometimes creating an overexposed look with the shadows appearing flat.
Read more: 6 Steps to Create a Haze Effect in Photos
How to create lens flare
With a little practice, you should be able to recognize these different looks. Ok, on to how to achieve them… Here’s 6 tips on making lens flare work for you:
Change your angle to the sun to move the halo or spots off your subject
Try standing on something and shooting down on your subject, or moving slightly to the left or right so your subjects or an object is partially blocking the rays.
If the sun is directly behind your subject, some of their body might disappear as it is taken over by the flare. Sometimes you may want to embrace this!
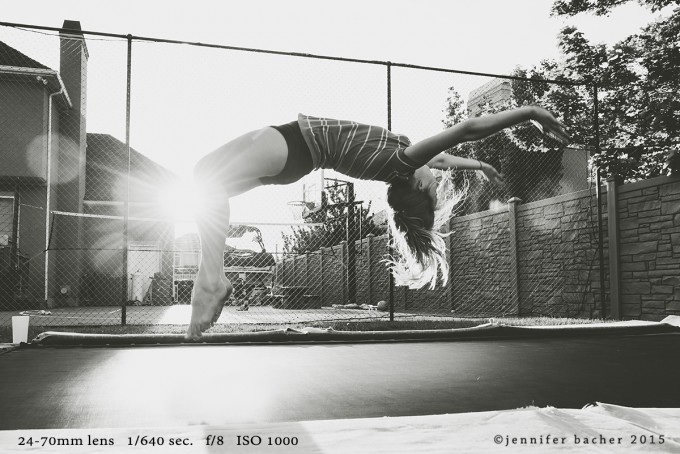
In this shot I positioned the sun so it was peeking from the corner of the roof. I moved slightly to the left of my daughter so the spots were not leaking on her face.
However, if you don’t want any of your subject to disappear in the flare, for example if you want to preserve detail in a bride’s dress, simply change your angle or position to the sun so it is entering your lens or the frame in a different spot, but still illuminating your subject.
Tools to optimize lens flare
Use a reflector
When shooting with backlight, use a reflector to bounce light back onto your subject from the front.
This will still allow the soft look of haze, but create more contrast on your subject. Use the silver side of a reflector if you want to offset the orange light from the sun.
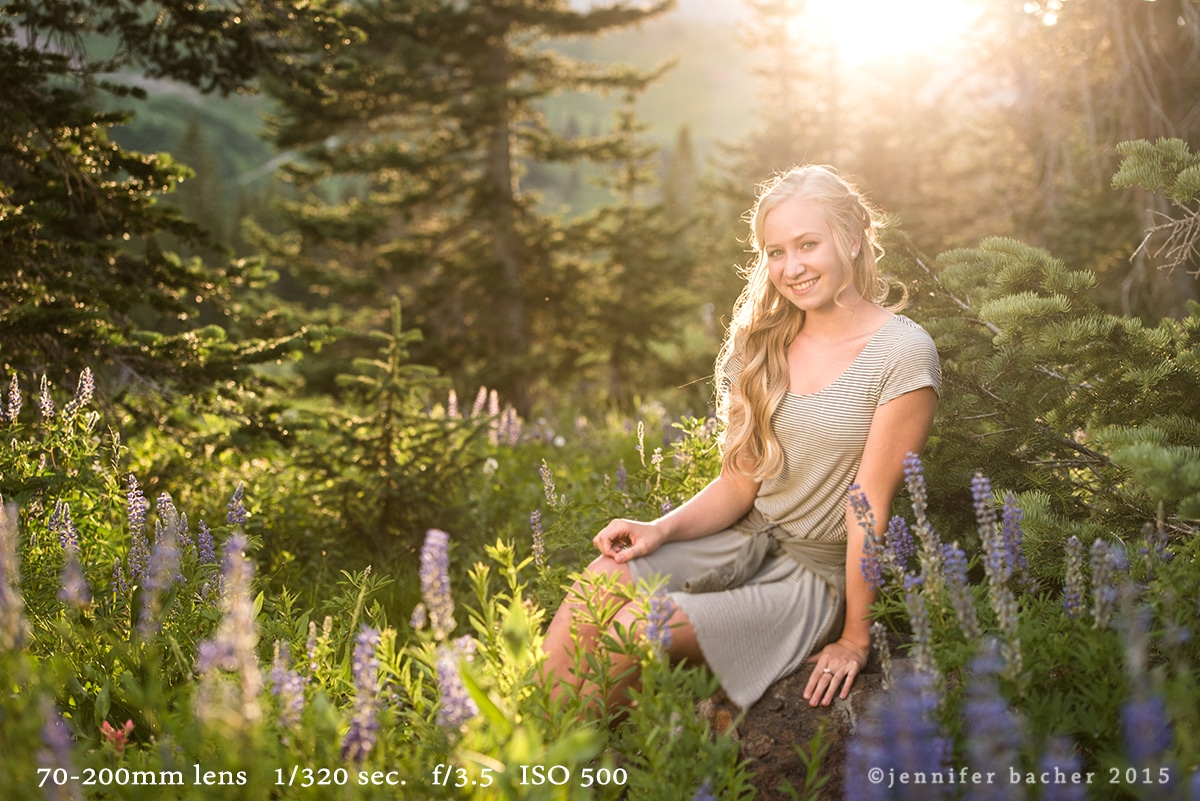
Use a zoom lens and/or a wide-angle rather than a prime lens for lens flare
Flare occurs when sunlight has to travel through the lens elements. Zooms have more internal elements than primes, making them a better choice for creative flare.
A wide-angle lens also has a greater angle of view, which lets in more light from the sides. Remember to remove your lens hood. They cast a shadow over the front element of the lens to prevent flare.
We don’t want to prevent flare, we want to encourage it! The flare in this image was captured using my Nikon 24-70mm lens with no hood.
Read more: 5 Reasons to Shoot with a Wide Angle Lens
Using manual mode to get a lens flare
On auto, most cameras will automatically meter for the brightest area of the frame, leaving everything else dark. Not good if you don’t want your subjects to be dark! So using manual mode will allow you to control every factor.
Spot meter
Spot meter on your subject’s skin. I like to meter at least one stop below zero because there is plenty of light coming in.
I place my hand over the side of the lens to block the sun while I meter and focus, then pull it away to allow the light to enter the lens before I click the shutter.
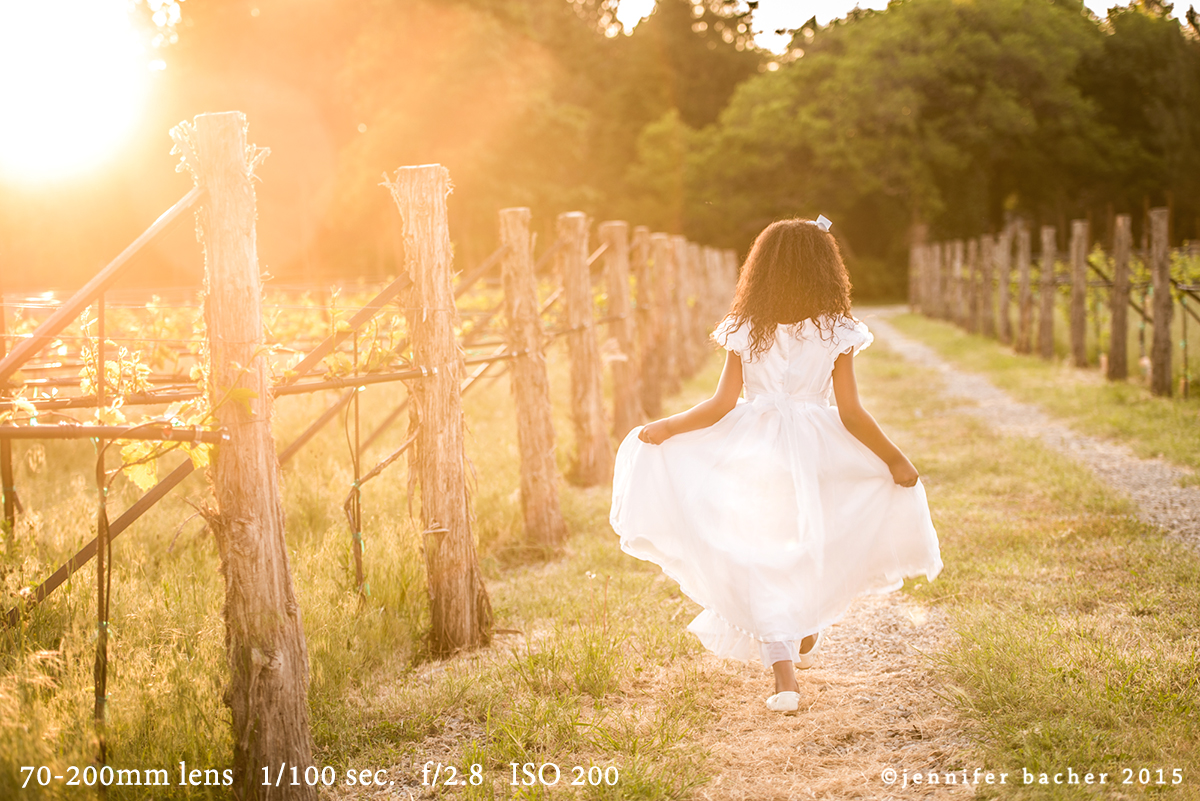
Slow down the shutter speed
The longer the shutter is open, the more light gets let in. So a slower shutter speed creates more flare. I am usually hand-holding my camera, so the lowest I go is 1/60th.
Read more: How to Take Unique Photos that Wow Using Slow Shutter Speed
Smaller aperture
A smaller aperture creates a more dramatic look of defined circles/halos/sunbursts. I usually choose f/8 or higher if I want the flare more defined.
Watch your highlights
It’s easy to overexpose and white wash everything, so watch your highlight indicators on the back of your camera and make sure important parts of your subject aren’t blown.
Read more: How to Shoot in Manual Mode
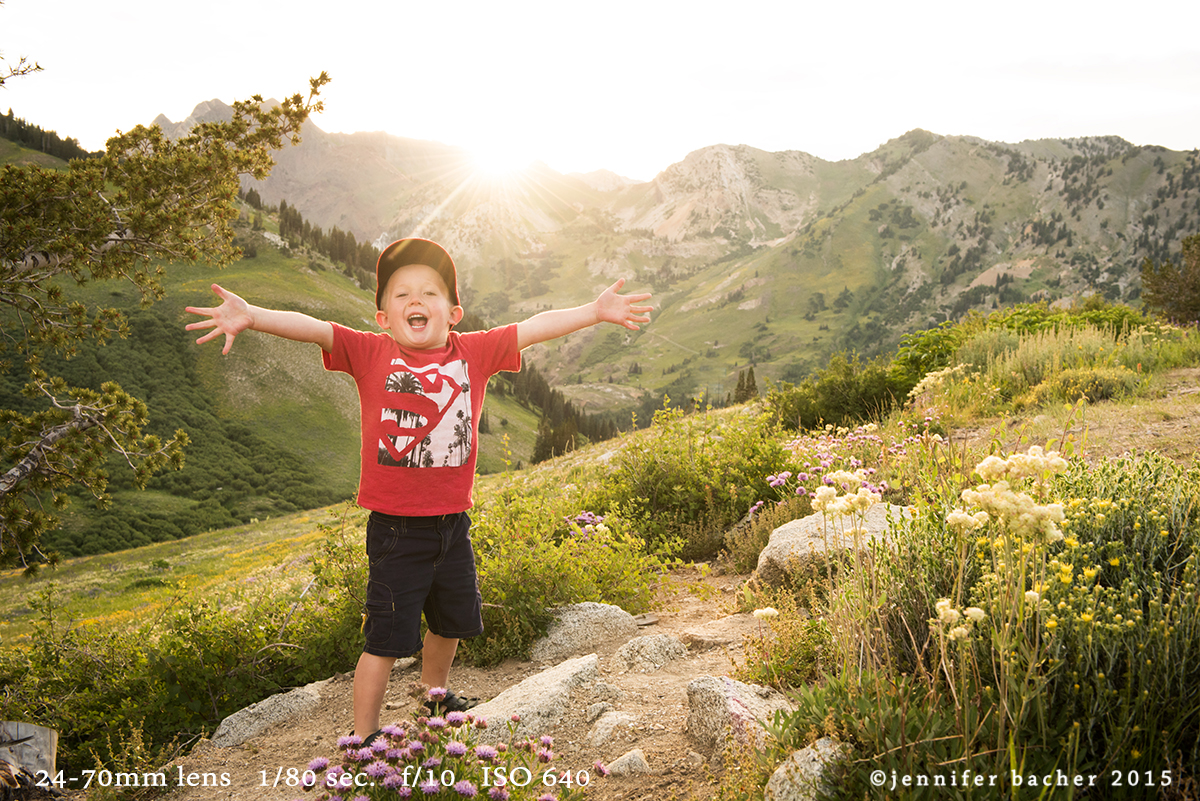
Capturing the perfect starburst
I love the look of a creatively placed starburst! It’s a pretty way of showing the viewer the position of the sun in an image. And doing it in a way that is more pleasing to the eye than a big bright spot.
Close your aperture down to f/8 or higher
This will better define the starburst. A wide aperture like f/2.8 will diffuse the light and cause it to lose clarity. I recommend starting at f/8, taking a test shot, then increasing your f/stop numbers and adjusting exposure until you arrive at the look you want.
Read more: Simple Guide to Understanding Aperture (and How to Use it)
Place the sun slightly behind something
As you look through your viewfinder, place the sun slightly behind something, as if it’s peeking out. The idea is to get only some of those rays entering your lens, not the entire sun.
Underexpose
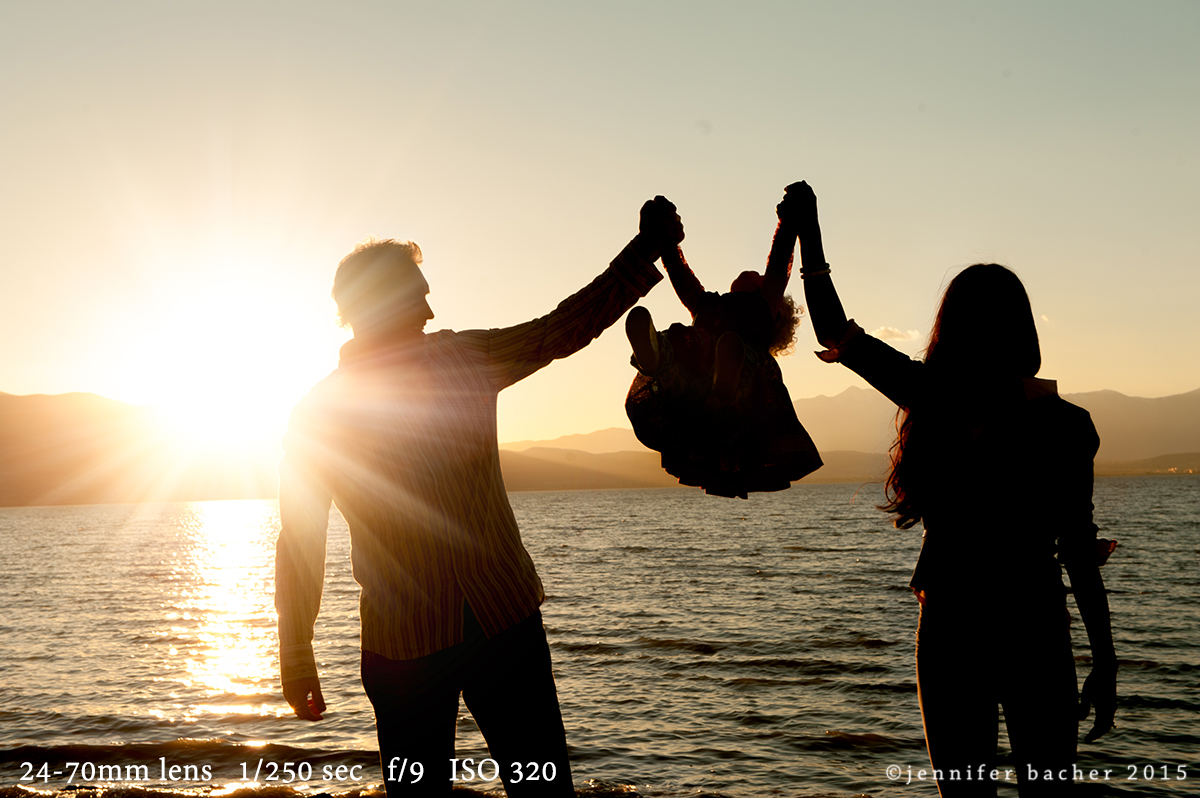
Underexpose if you can. This lowers the light in other areas of the image, drawing attention to the brightest part, the starburst. Silhouette photos are the perfect setting for capturing a dramatic starburst!
Read more: Everything You Need to Know to Capture & Edit a Stunning Sunset Silhouette
Read more: Master Backlighting Photography in 8 Simple Steps
How to edit lens flare in post processing
If there’s too much haze, use levels and curves in Photoshop or Lightroom to add contrast.
Sometimes flare can cause your image to look flat. To regain depth and define your subjects better, experiment with darkening your shadows. In addition to adjusting levels and curves for contrast, sometimes I play with the clarity slider in Lightroom, or darken the blacks.
You can also clone out any extra-unwanted light leak spots in Photoshop or Lightroom by using the clone or spot removal tool.
Read more: 8 Foolproof Lightroom Tips for Editing your Photos
Example of lens flare
In this fence shot at dawn I wanted to remember the feeling of warmth and a fresh start to a new day. I wanted the sun to be the subject of my photo. For this image I used my 70-200mm lens and spot metered on the leaves.
Then I changed my position to the sun so it was peeking between the fence post and the leaves. I changed the f/stop several times until I achieved the clarity I wanted at f/22.
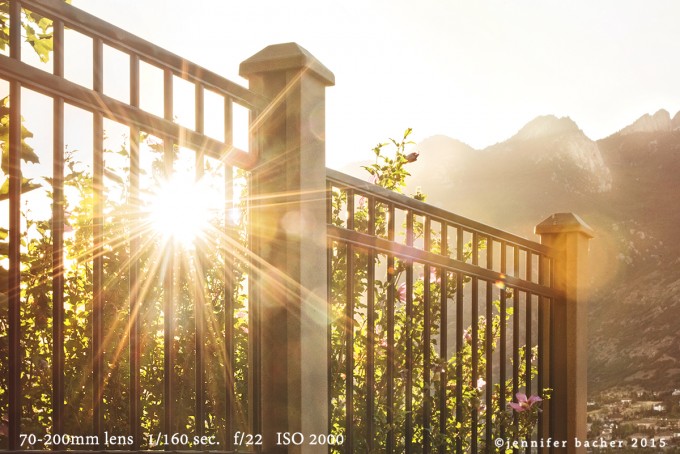
The best way to make lens flare work for you is to practice! I challenge you to take 10 or so shots of the same thing, changing your position to the sun and your subject each time, as well as your aperture and shutter speed. Do not erase your images so you can compare how you arrived at your favorite shot!


I love the look of light leaks. I did a similar post on my blog recently. https://lisahurstphotography.wordpress.com/?s=light+leaks
[…] http://clickitupanotch.com/2015/08/what-is-lens-flare/ […]
[…] What is Lens Flare: Friend or Foe? 5 Tips for Achieving Artistic Lens Flare How to Use Lens Flare to Your Advantage […]
Thanks for the info. I am going to try the lens flare shot.I haven’t done any of those.Looks remarkable indeed!.