
One of the most popular questions I receive is “How do I capture a sharp photo?”. When you are photographing kids, dogs, or even spouses it can be a challenge to get your settings correct so you can freeze the moment.
There are several factors that play into creating tack sharp images so my goal in this post is to help you make sure your photos are sharp every time.
Table to Contents
What is a Sharp Photo?
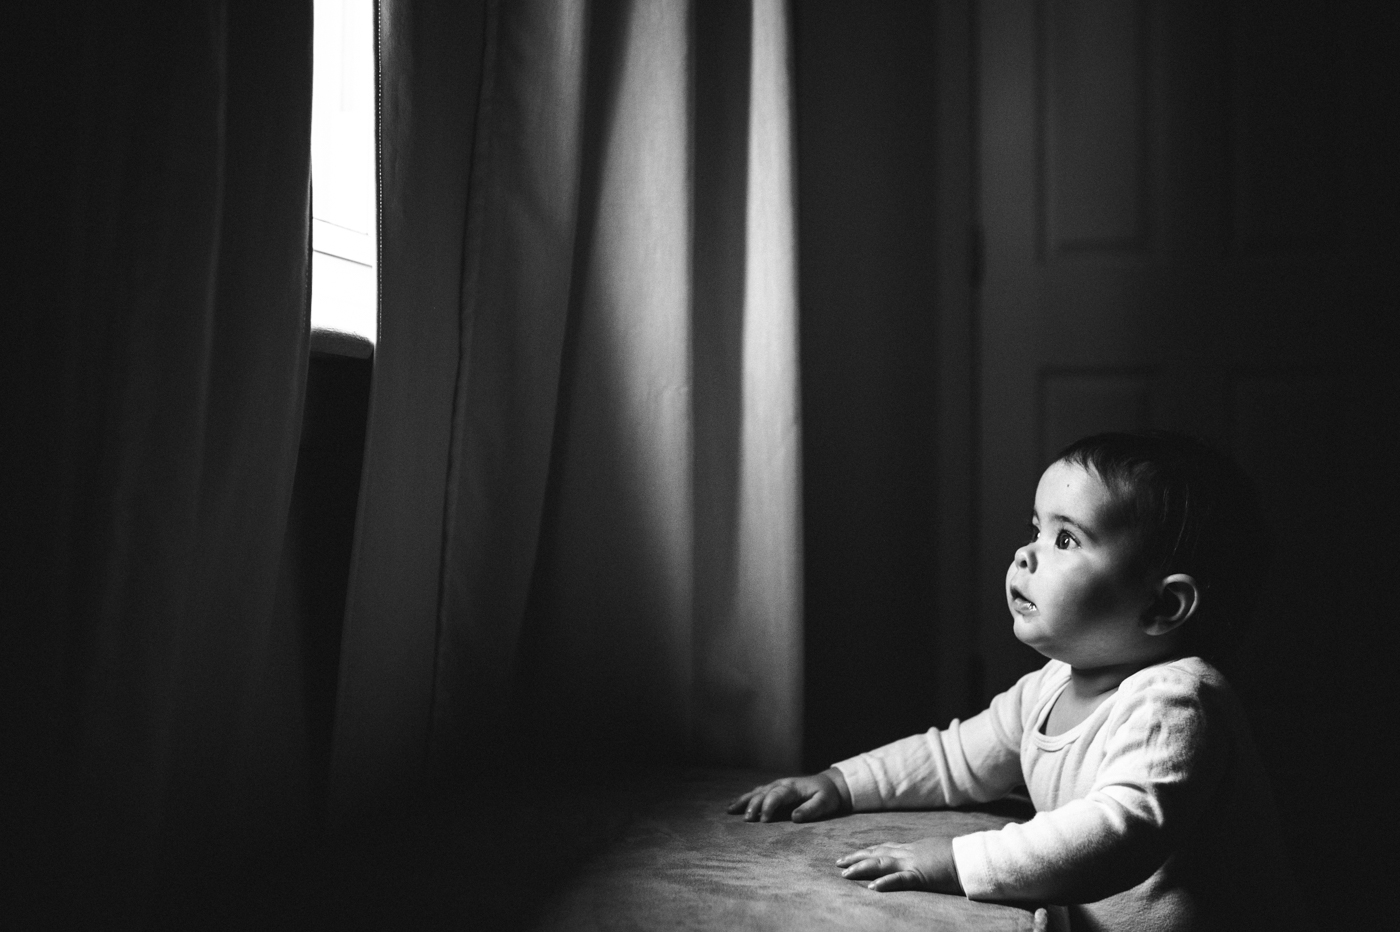
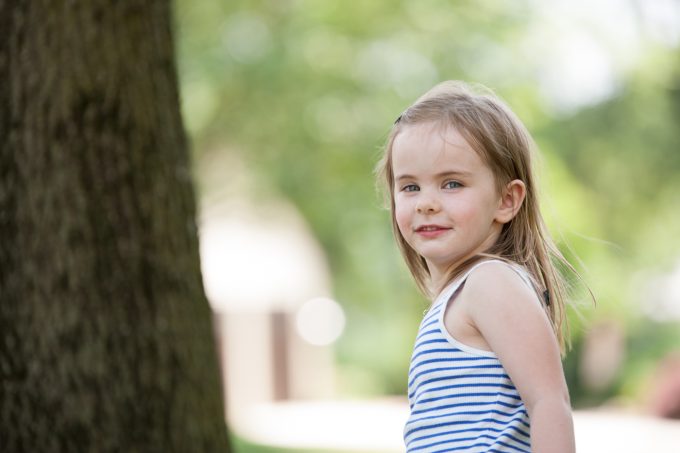
A sharp photo is an image where the subject of your photo is in focus and is very clear. There is no unwanted blurriness on your subject.
Often times if your subject is a person, you will want to keep the focus on their eyes. If the subjects eyes are in focus, it will be a sharp photo. Likewise if the subject of the photo is actually the persons hands, then you will want their hand to be sharp.
How to Achieve Tack Sharp Photos
I have narrowed down a list to 7 tips. This should help simplify getting that photo nice and sharp.
Once you work through these tips, I guarantee you will be much happier with how your photos turn out. Say goodbye to unwanted blurry photos and hello to sharp images!

1. You need a good lens for sharp photos
I hate to break it to you but a kit lens (the one that came with your camera) doesn’t take a sharp photo as others.
I typically recommend the 50mm lens or a 35mm lens. Both of these are affordable options that allow you to stop down your f/ and give you the nice blurry background with a sharp focus.
That being said, you shouldn’t rely on your equipment to take sharp photos. Just because you have a super expensive lens doesn’t mean you are going to get sharp photos if you don’t know how to use it.
The same thing can be said for a kit lens, if you use it right you can get some sharp photos.
Read more: What lens should I buy first?
2. Make sure your shutter speed is AT LEAST 1/125 for a sharp photo
We talked about this when we discussed shooting in manual mode but it can’t be said enough.
If you are photographing a moving subject you need to stay above 1/125.
I have even read some people say they don’t go below 1/250 if they are photographing kids.
However, sometimes the lighting isn’t in my favor to shoot that fast. Personally, I don’t go below 1/125 if I’m taking photos of my kids.
However, if you want to create movement to show motion blur in your photo, you can do that as well with intentionally using a slow shutter speed.
Many street photographers will slow their shutter speed to create beautiful images. See how here Top 9 Tips for Remarkable Street Photography
3. Lock your elbows for sharp photos
Most of us are momtographers who simply do not have time (or energy) to have a tripod on us all the time.
So you need to be your own tripod. Here is how to do it.
Lock your elbows as close to your body as possible. It helps to separate your feet as well to give your body more stability. Then take your shot.
This will stablize you so your photos have less movement and can stay on focus. Staying focused is what gets us those nice sharp photos.
Just for you to get started- Basic Photography Tips
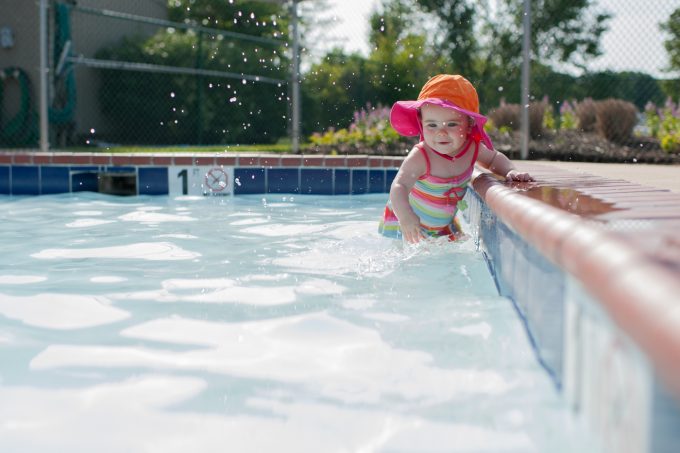
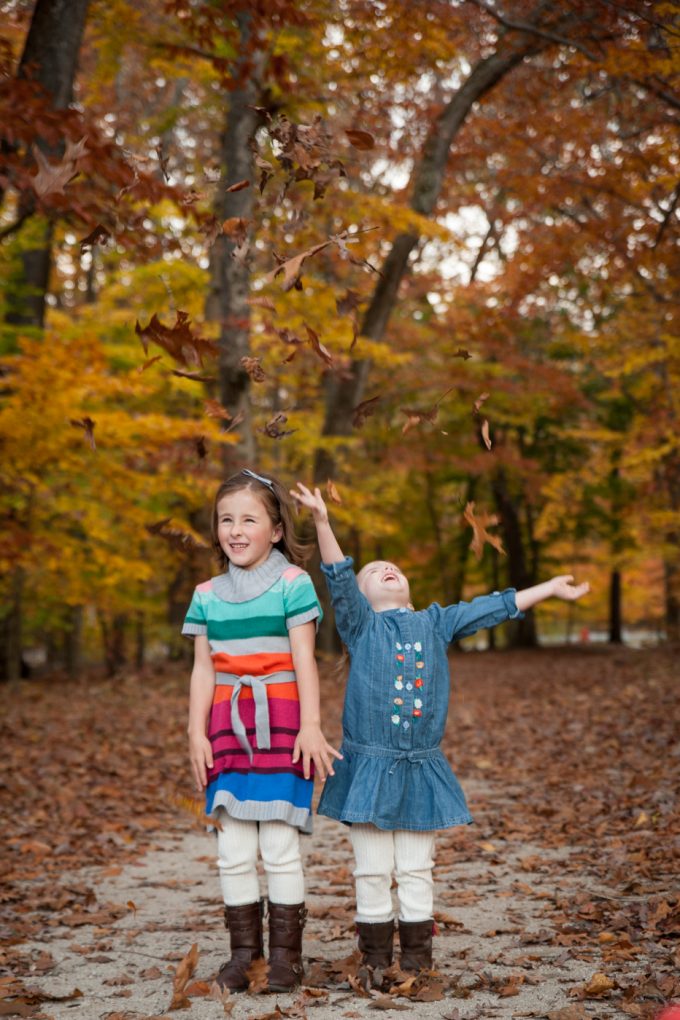
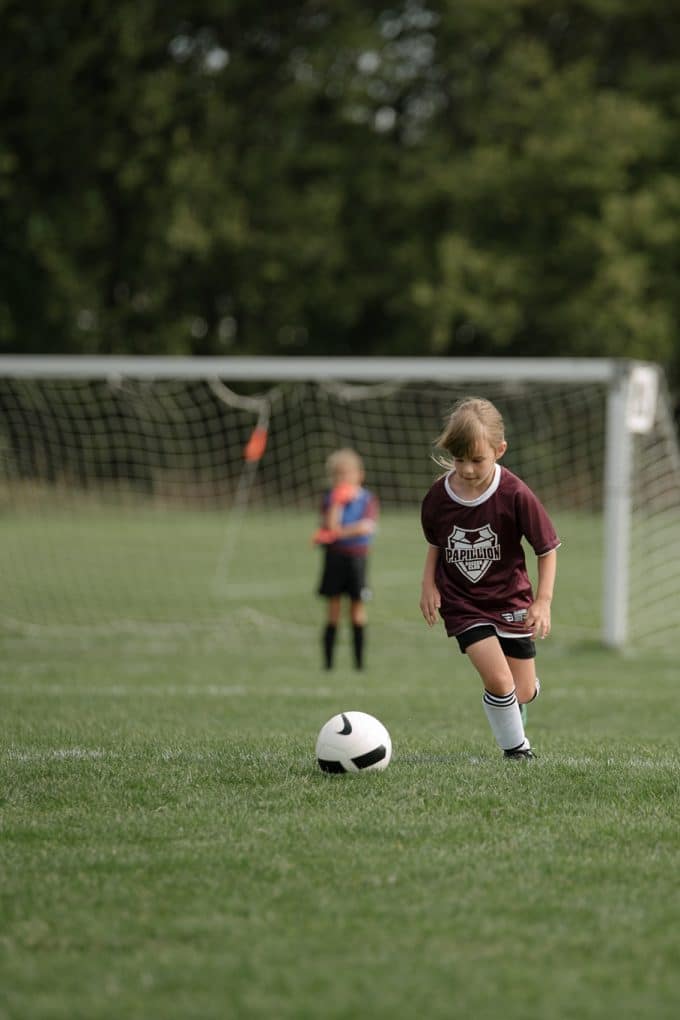
Sometimes we want to have motion in our photos but we still want it to be tack sharp here is how to freeze motion like the photo above. 5 Tips for Freezing Motion in Photographs
4. Avoid shooting wide open for a sharp photo
Having a lens that can shoot at f/1.8 or f/1.4 can be very tempting to want to shoot wide open (at the lowest number your lens can go.)
However, if you aren’t comfortable shooting at that aperture, it is very easy to miss your focus.
When you shoot with a wide f-stop it means that less of your image will be in focus.
Therefore, if your subject moves just slightly and you have the focal point on their eye then you could miss focus.
Instead, I typically shoot around f/2.2 to f/3.2 even when photographing just one child. Play around with your aperture and find the sweet spot on your lens.
Here is a deeper dive into aperature and the exposure triangle:
Simple Guide to Understanding Aperture (and How to Use it)
Complete Guide to Understanding the Exposure Triangle
5. Use back button focusing
Many cameras have the option to set up back button focusing which is one extra step to make sure you are capturing a sharp photo.
If you aren’t sure what back button focusing is or how to set it up, check out Do you BBF?
Read more: 6 Reasons Why You Have Blurry Photos
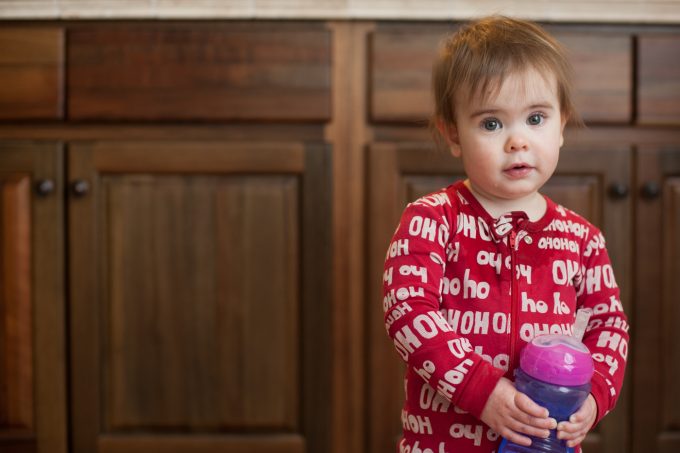
6. Change your focal point to take a sharp photo
Since you are shooting on manual mode and you know the importance of telling your camera what you want it to do.
It’s important to set up “Single focal point” which will allow you to adjust your focal point and place it where you want it in the photo.
When someone looks at a photo of another person they are naturally drawn to their eyes which means that should be the sharpest part of the image. Move your focal point around until it is on your subject’s eye. I typically choose the eye closest to the camera.
How to Fix a Blurry Photo
You’re not always going to get it right every single time. People move and that can completely blow the focus.
Unfortunately not all photos can be fixed in post processing. Here are a few things you could do to try to help.
Use Lightroom sharpening tool
This tool is best used in smaller places. So zoom into the eyes or where you really want it corrected and start there. Some photos will need less sharpening and some will need more just test it out to see what you’re looking for.
Turn a blurry photo black and white
I like to do this sometimes when I loved the photo but just didn’t love the focus. When I turn it B&W I can adjust the texture and grain and make it look more like art.
Embrace the mistake
Since most blurry photos can never be fully corrected, embrace the mistake and love the photo anyway. I can remember a time where I had so many photos of my kids that were not sharp photos. But I still tried and I still love seeing those tiny babies photographed. Even if their eyes aren’t crisp and sharp.
Keep trying, use the tips provided and I promise your photos are on their way to tack sharp nearly every time!
Frequently Asked Question for Taking Sharp Photos
There could be a variety of reasons for this but the most common mistakes photographers make is having their shutter speed too low, their aperture too wide or not selecting their own focal point.
The key to a sharp group photo is making sure your aperture is at a setting where everyone in the photo will be in focus. The aperture depends on how many people are in the photo and how many focal planes they are on in the photo.
Read more: 17 dos and don’ts for capturing group photos
It depends on the photographer but I like to shoot at f/3.2
Lock your elbows into your side, step your feet apart, or use a wall or a table to stabilize you.

I hope these tips can help you improve the sharpness of your photos. Please don’t rely on post-processing to “sharpen” your photos. This is definitely something you need to nail in camera. Practice, practice, practice!
Read more photography tips:
– 10 Incredibly Easy Tips to Take Silhouette Photos
– How to use Kelvin for White Balance
–5 Ways to Create Catchlights


I can’t thank you enough for sharing this. I’m going to pay extra attention to my shutter speed this week!
Such great advice. Thank you so much! xo
These are wonderful tips – I don’t mess with my focal points (prefer to compose/recompose) but everything you just said makes a huge difference. I just need to learn how to back focus…that would help even more!
Yes, I hear that is an extremely popular practice with Canon users :O)
I, too, need to learn to back focus. I must start practicing.
I have got to start saving moo-lah for a lens. I took some photos this week of 4 kids under 2. I struggled with focus to say the very least.
My question is how do I know the SS is 1/125 when I am looking through the viewfinder? Do you just snap the shot, then look at the SS, lowering the aperture if the SS is to slow? I tend to struggle to do all of it when I am in the moment trying to capture something.
You should be able to view what your shutter speed is when you are looking through your viewfinder. In my camera it is in the lower left hand corner when looking through my view finder. Depending on what type of shot I want I either lower the aperture number or raise my ISO. Don’t worry, the more you practice the easier it will be for your fingers to do all the work for you :O)
I love reading these articles because they’re short but inofamrtive.
I love your tips!
I changed my setters to back button focusing and love it!
YAY!!
Great post! Thanks for sharing these tips. I have most of them down, but it’s so nice to get a reminder. I’m still amazed at the steps that I go through to get a great shot. They’re becoming second nature, but whenever I explain what I’m doing, I’m amazed that I’m picking this up.
Love your blog! It’s crazy helpful!
I will be referring to this post often! This is in my top 3 of annoying problems that I have. I think it’s my shutter speed mostly . . .
Thanks Courtney!
Great tips. I tried the back button focusing a little, I need to practice more. It took a little bit to get used to.
This is a great post, Courtney! Thank you for all of this information. It is true, you often take such sharp photos.
Awesome..I’m going to keep in mind some of your tips, some I already used, yay me! :) I do have to tell you I’ve been struggling with moving my focus points. One reason is because things/people are moving. Any suggestions on how you manage that with your face pressed against the LCD screen? :) I have to agree with Ashley, at this point I’m extremely comfortable focusing and then recomposing.
~ingrid
If that is what you are comfortable doing and you are getting the results you want then GREAT! I know a lot of Canon people prefer to do it that way. Personally, I have better luck changing my focal point. I just move the toggle button with my thumb while my eye is still looking through the view finder. Lots of practice I guess :O) Do what works best for you and gets you the best results :O)
Thank you for sharing this, I always seem to forget something and it makes my pictures not quite as crisp, thanks for the reminder!
I finally had 2 seconds to myself – LOL! I LOVE your blog! Not only am I loving the tons of inspiration, your tutorials are wonderful. I’m trying to read all I can. Just added you to my RSS feed and I can’t wait to see more. (I sent you a quick email on my way out the door earlier today…hope that came thru. Thanks again for your sweet comment). Great to e-meet you! :-)
I know the feeling :O) Thanks for your kind words!! I’ll go check that email!
Thanks for the great tips! It seems I will have to invest in a better camera sooner than later. I just have a regular canon powershot. Looking at all your beautiful shots and what you can do gives me a serious case of camera envy.
I have an extremely important how-to-take-sharp-pictures tip. First, wipe off the smudgy fingerprints your toddler left on the lens. ;-)
ok, confession time – I’ve never considered how “aggressively” i’m pressing the shutter button – thanks so much!!
Wow! I found your blog through Paper Heart Blog … All I can say is wow! Your blog stands out because you seem to really describe in detail how things work! I am learning Manual mode and just found this post – love love love it! I am practicing the back button AF – what an amazing thing LOL! ANd I love moving the focal point too. Thanks for sharing and you’ve got me as a follower for sure! :)
Skye
Aww, thanks and welcome!! I love BBF!! Let me know if you have any questions :O)
Yep I just ame across your bog too.. and love all the tips. I put my amera to bak button lok, still trying to get the hang of it… but as long as my shots of more in focus it is worth it.
Yay! So glad to hear you are giving back button focusing a try!! Hope you see a difference in your shots!! and Welcome!!!
New fan here!! I bought a ‘new to me’ Canon 30D just before Christmas, after my Canon PowerShot S3IS died. (I have to have a camera for product shots of the Laptop and E-Reader sleeves I make and sell online). Anyways, I’ve been quite intimidated by my new camera and resorted to using my phone for the shots I need. Yesterday I was determined to not sew another stitch until I sat down and learned how to use this camera. Thankfully (!) I found your blog and the way you explain things is genius! Today I took new products shots that I’m actually pleased with! I know I have a long way to go and a lot more to learn, but I just wanted to thank you for all of the instruction you offer here. I’ll be a regular visitor now!
Yay! I’m so glad to hear that you are getting better product shots!! Whoo hoo!! Welcome!! What is your shop web address??
Thank you Courtney. My shop address is http://www.etsy.com/shop/XSBaggageandCo. The photos that I took with my new camera, after reading your blog, are the 3 iPad Sleeves made with ‘Green Chevron’ fabric.
Thank you again!!
Those photos of the Green Chevron looks awesome!! Way to go!!! Thanks for sharing!!
P.S. do you ship to APO’s? I saw a key chain thing I want :O) It’s same shipping price as in the States you would just need to fill out a customs form. Thanks!
Thank you so much for all your advice and tips!! I am new to your website and I love it! My question is about “nailing your focus” with a 50mm f/1.8. You said you have to become very comfortable with nailing your focus if you’re going to shoot wide open. 1.) How do you learn how to do that? and 2.) What f-stop do you recommend for individual portraits, if not 1.8? Thanks, again!
I think the best way to become comfortable is practice and more practice. I know, probably not the advice you want. But honestly, that is the best way to learn how to do anything in photography. Don’t feel like you can’t shoot wide open just don’t do it all the time. For individual portraits, I like to shoot around f/2.2 all the way up to f/2.8. That is if only one person is in the image. Hope this helps!!! Oh, and WELCOME!!! :O)
Hi Courtney, I can’t thank you enough for your wonderful blog, I’ve learned so much and got tons of inspirations from it since I’ve found it! One thing I still find hard to work out (I’ve read all your posts on it) is getting a sharp focus for my 50mm 1.8 (on Canon 7D) when I take photos of more than 2 people. The other day I had a shooting for a family with a constantly moving 2.5 year old and 80 % had the wrong spot in focus or were completely blurry. For a shooting like that, which aperture would you generally use and which AF points would you use? I used 2.8 and AF point expansion, which gives an area of 4 points. The 7D also has single point, spot, Zone and 19 Point AF. THANK YOU SO MUCH!
Thank you :) I would change your camera to single focus, choose your focal point and shoot around f/4 for two people if you have a hard time getting them both in focus :) Hope that helps.
Thank you, Courtney, I’ve tried your tips and the results are much sharper, thanks so much for that! And thanks for all your time and energy you’re putting into this beautiful website, I’ve learned soooo much through it in the last couple of months!
Wonderful :) Thank you!
Good tips here. I am not a real taker of photos but I can do with some tips. I did not realise about the shutter speed and aperture number, that’s very interesting.
Glad you found some useful tips!
I am so excited by the fact that this advice is all beginning to make complete sense to me. I am in manual mode whooohoooo. Thank you enormously for all this incredibly valuable information.
That is great to hear! You are welcome :)
Thanks for the tips! There are so many things to remember when getting a great picture that I usually forget a step or two. I love reading your tips it helps burn them into my memory a little more :)
Thanks! Yes, it can be overwhelming but eventually you don’t even think about it anymore.
Thank you Courtney for sharing these marvelous tips. I finally understand how to bbf thanks to you and members of your Facebook community. Stay Blessed!
That is fantastic! Thanks!
Hello,
I am a new photographer and I’ve always had a passion for it. I am a natural (so they say) as far as what I want my images to portray and the look I want, but I want to learn new techniques and get more familiar with the aperture and speed shutter. Basically I have an 18-55mm lens for my Canon and for some reason the aperture wont go below F4.5, is it because of the type of lens I have or is it my settings? I want to be able to capture wide shots and with that blurry effect background. Thanks for youre feedback.
Hey Terri,
It isn’t you it’s the lens. An 18-55 f/3.5-5.6 means it can only go to f/3.5 at certain focal lengths and depending on the length is as wide as it can go. It can be pretty frustrating when starting out. Check out this post – http://clickitupanotch.com/2013/04/what-lens-should-i-buy-first/
The sharpest focal point will always be your center one. It’s almost better to focus using your center focal point and re-compose your shot. You just can’t do it with the aperture wide open…it’s got to be at least f4.0 or f5.6 to maintain sharpness when you recompose.
Ok, I’m confused about changing the focal points. What are you referring to exactly?
My camera has the choice of multi points or a single center one to choose where the camera focus is. Is this what you are referring to? I have a sony a55. So much of what you post or video isn’t the same as Cannon/Nikon.
Hopefully this will help – http://www.clickitupanotch.com/2010/09/changing-your-focal-point/ I’m not familiar with Sony so I won’t be able to help you but if you look in your manual it will tell you how to change your focal point.
I just want to say that your blog is the best thing that I have come across as far as photo tips go! So easy to understand! Thank you so much! Can’t wait to get home and fix my canon to do BBF!!! :)
Thank you so much!
When shooting a group where should my focus point be? If I’m wanting everything to be in focus and sharp
I put mine in the center of the group. Here’s a good post on photographing groups – http://clickitupanotch.com/2012/05/photograph-large-groups/
I bought an entry level Nikon D5100 as I am trying to learn photography. I would like to eventually have a career in photography :) Do you think this camera is a good starter dslr to learn photography with? Or should I buy a professional model?
I would say if you already own the D5100 learn that camera inside and out. I don’t recommend people upgrade for the sake of upgrading. Instead, if you want to upgrade you will know exactly what a new camera can do that your current camera can’t :)
Great article….when photographing a large group, like a wedding party where should the focus point be in that situation ?
Thanks
Hey Shanta,
Maybe this post will help you :) http://clickitupanotch.com/2012/05/photograph-large-groups/
Courtney thank you so much! My question after reading that post…it said shoot arounf F8 for larger groups, so everyone can be in focus. I’m confused, would you not want it “wide open” as low as the F-stop will go for a larger gourp? I get that so confused and just want clarification.
Your site..tips..turotirals are very helpful:)
Shanta
When you shoot wide open, (smaller aperture) less of the image is in focus. So when you have a lot of people you need more of your image in focus so you would stop down on your aperture (higher number). :)
Great Tips can’t wait to read more on your page and do the 30 day challenge. Just tried out the adjusting on my camera since I was also having such a hard time with my moving kids to be in focus and I was so excited to finally get a sharp picture :) Thanks!
Whoo hoo! Congrats :)
I recently bought a “workshop” tutorial online (im a sucker for these things) from Nichole Van. Its about skin tones/editing. I felt as though she put a lot of emphasis on buying an expensive dslr/lens to have better photos, skin tones and such. Now I feel after reading this ebook that you will get good photos with an entry level, but if you go out and get a pro camera/lens then you will have awesome photos:/ …..
I have seen people get amazing images with entry level cameras. Lenses do make a huge difference so if you are looking to upgrade I would say invest in the lens :)
I have a 50mm lens, a kit lens 18-55mm and a 55-200mm lens. I want to do portraits of my kids would the 50mm be okay or should I get a 35mm/85mm. My camera is a D5100 Nikon so it has a crop sensor. Any help would be great.
It depends if you are doing them indoors or outdoors. I LOVED my 50mm and only used that lens for almost a year. It is great for portraits but I heard the 85mm is even better at portraits but would be too tight indoors :)
I also use the shutter timer to shoot and make the minimum moves to my camera :)
How do I find back button focus? I have never heard of this. I have canon 5D. Thank you
Hey Linda,
I don’t know how to do it on a Canon. I’d check your manual or Google back button focus for your camera :)
I’m still struggling with focus. I took some pictures this weekend at a wedding reception and am so disappointed in how blurry some of them turned out. They are shots of groups of 2 or 3 people standing still, just waiting for me to take their picture (no movement involved) and they are still blurry! Any advice??
It may have been that your shutter speed was below 1/125 or your aperture was too wide.
Thank you for this! You’re the photo advice I’ve always wanted, but never found anywhere! I love how youre so accessible to your followers. I’m hoping to splurge on the photo bags you’ve shown on here so I can have my camera with me always. Congrats on reaching so many fans, you deserve it!
Thank you :) And thanks for your sweet words!
Maybe I need to adjust something else. But even if I lower my aperature all the down, 1.4, and raise my shutter up, I still get dark images! ???
And same thing that Karen said, I can get great sharp photos with one subject and maybe two, but with groups of more people, it’s not so great. I have a nikon 7100.
If you raise your shutter speed you are limiting the amount of light that comes into your image. Try raising your ISO if you need more light :)
Courtney I have a question. I have a Nikon D5200 I’m using a Nikon 50mm 1.8 and a Sigma 17-50mm 2.8 lens. My question is when I’m shooting in manual mode should I have my lens set on A-auto or M-manual? I love your tutorials you are awesome.
I prefer to shoot in auto focus but that is up to you. I shoot manual mode for my settings but auto focus. I know a lot of photographers who prefer to use manual focus but whatever you choose won’t affect your manual mode settings :)
Kudos, Courtney, on a successful and fabulous photography website.
For me, Your tutorials are like translating Greek into abc’s. You’ve made the difference between respecting my camera and using it properly, instead of fearing my camera and remaining on auto.
I wish I could sit down with you in person up fine tune my knowledge (or lack of).
If you’re ever in San Antonio, TX, let me know!
Thanks again gor all you’ve done for ALL of us!!
[email protected]
Thank you so much for your sweet words! I totally get it b/c photography was a foreign language to me when I started out. I’ll keep that in mind if I’m in San Antonio :)
Still having trouble shooting in manual mode. When Im in auto it all seem to come together, maybe Im not understanding my camera well enough yet to learn how to set…. Im trying and thanks for all the tips!!
Check out this post – http://clickitupanotch.com/2010/09/shooting-in-manual-the-basics/ :)
Really good article… Expecting more useful tips from you !
Thanks :)
Great information, thank you! I’m practicing with my dog & flowers :)
I am definitely going to try the tip of holding my breath!
How was Okinawa? Look forward to seeing your photos of your visit.
Thanks! I didn’t actually go back to Okinawa (although that would have been fun). All my girlfriends from Okinawa met up in Tennesse :)
I am so in need of photography help. I usually just go with the stock settings because I always forget which does what, but I know I could do so much better. I will start paying better attention. Be back for more tips!!
All good tips, but there is one more you left out: use image stabilization, if your lens has it. It helps reduce the effects of hand held camera shake, especially when you’re zoomed in. The Image Stabilization on top quality professional lenses, such as Canon’s f/2.8 70-200 IS LII USM lens, can give you the equivalent of 2 stops. Which means shooting at 1/60 gives the same results as shooting at 1/250.
What am I doing wrong when the people in the picture have a peach tint to their faces??? It doesn’t happen all of the time but not sure what I am doing wrong?
That sounds like a white balance issue. Check out this post – http://clickitupanotch.com/2013/05/white-balance-comparing-different-methods/
Thanks for the great article, very, very useful! I’ve got another great advice for sharper images: the full body posture. Stand, kneel, sit steady in full balance. Even while photographying children, families.
Thanks!
Hello everyone.
If there are 2 or more people in a picture, where should I put the focal point?
Thanks!
Wow wow wow. I’m a beginner photographer and have been doing some small photography jobs but I want to increase my skills but between looking after two small children, studying a Bachelor of Accounting and not being able to afford to do a photography course. I have found this site fantastic and I’m learning so much. I mainly do children (especially my own) and outdoor shots. I’m always trying to find ways to make my photos unique and stand out but find it hard when I don’t understand all the techniques involved. Thank you for sharing all this with us.
wow.. so nice guide tips…. thank you so much
Thank You Courtney !!
Hello,
First of all, THANK YOU for all this advice and knowledge! It has helped my photography tremendously.
I do have a question though: I have been using my Fujifilm X T10 camera for about a year now and I am contemplating getting another lens. When I ordered my camera it came with two lenses: a 50-230mm with f/4.5-6.7 and a 16-50mm with f/3.5-5.6. I am very interested in taking my photography to a new level and want a lens with a lower aperture of at least f/2.0 . Are there any lenses you could recommend for a student on a budget??
Thank you! this is exactly what I needed to learn! I love your writing style.
These photo editing tips are really helpful.
Back button focus was an absolute life changer for me. I’ve also rarely had a blurry photo since I got my Sony A7iii and use the eye AF. It is witchcraft.
THANK YOU! I have 3 wiggly children and love taking their pics. I am so tired of shooting on auto 🤦♀️ I am so happy you shared this info!